Remove the rear wheel and tire (A) from the rear hub (B).
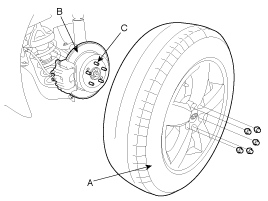
Be careful not to damage to the hub bolts (C) when removing the rear wheel and tire (A).
Loosen the wheel nuts slightly.
Raise the vehicle, and make sure it is securely supported.
Remove the rear wheel and tire (A) from the rear hub (B).

Be careful not to damage to the hub bolts (C) when removing the rear wheel and tire (A).
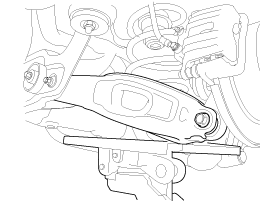
Support the rear lower arm with a jack as shown in the illustration.
Remove the rear shock absorber(A).
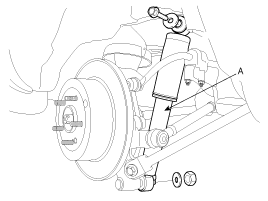
If the bush is excessive worn and damaged, replace the shock absorber assembly.
Support the rear lower arm with a jack as shown in the illustration.

Install the rear shock absorber (A).
Tightening torque Nm (kgf-m, lb-ft) :
Bolt(B) : 137.3~156.9 (14~16, 101.3~115.7)
Nut(C) : 98.1~117.7 (10.0~12.0, 72.3~86.8)
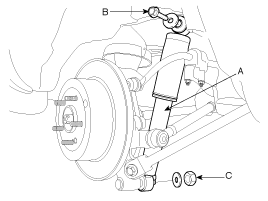
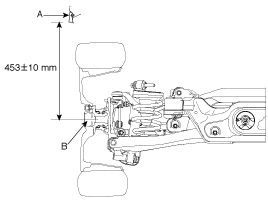
After checking the distance(453±10mm(17.83±0.39in)) between the wheel housing garnish (A) and the hub assembly (B) as shown in the illustration, tighten the mounting bolts and nuts of rear chassis part with specified torque.
Install the wheel and tire (A) to the rear hub (B).
Tightening torque Nm (kgf-m, lb-ft) :
88.3~107.9 (9~11, 65.1~79.6)

Be careful not to damage the hub bolts (C) when installing the rear wheel and tire (A).
Check the rubber parts for damage or deterioration.
Check the shock absorber for abnormal resistance or unusual sounds.
Fully extend the shock absorber rod.
Drill a hole to remove gas from the cylinder.
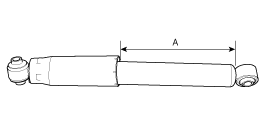
The gas coming out is harmless, but be careful of chips that may fly up when drilling. Be sure to use face shield and safety goggles.