Inspection
Cylinder Head
1.

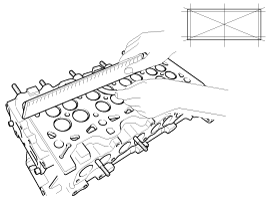
Inspect for flatness.

Using a precision straight edge and feeler gauge, measure the surface the contacting the cylinder block and the manifolds for warpage.

Flatness of cylinder head gasket surface :

Less than 0.03mm (0.0012in) for width

Less than 0.09mm (0.0035in) for length

Less than 0.012mm/50X50mm (0.0005in/1.9685X1.9685in)

Flatness of manifold mating surface :

Less than 0.025mm (0.0010in) for width

Less than 0.160mm (0.0063in) for length
2.

Inspect for cracks.

Check the combustion chamber, intake ports, exhaust ports and cylinder block surface for cracks. If cracked, replace the cylinder head.

Valve And Valve Spring
1.

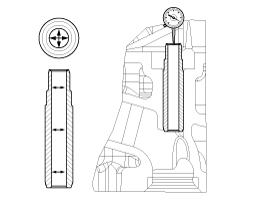
Inspect the valve stems and valve guides.

(1)

Using a caliper gauge, measure the inner diameter of valve guide.

Valve guide inner diameter :

Intake : 5.975 ~6.000mm (0.2352 ~ 0.2362in)

Exhaust : 5.975 ~6.000mm (0.2352 ~ 0.2362in)

(2)

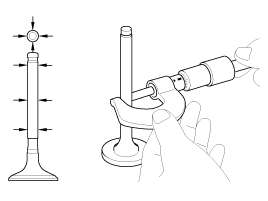
Using a micrometer, measure the outer diameter of valve stem.

Valve stem outer diameter

Intake : 5.933 ~ 5.953mm (0.2336 ~ 0.2344in)

Exhaust : 5.905 ~ 5.925mm (0.2325 ~ 0.2333in)

(3)

Subtract the valve stem outer diameter measurement from the valve guide inner diameter measurement.

Valve stem- to-guide clearance

Intake : 0.022 ~ 0.067mm (0.0009 ~ 0.0026in)

Exhaust : 0.050 ~ 0.095mm (0.0020 ~ 0.0037in)

If the clearance is greater than specification, replace the valve or the cylinder head.

2.

Inspect the valves.

(1)

Check the valve is ground to the correct valve face angle.

(2)

Check that the surface of valve for wear.

If the valve face is worn, replace the valve.

(3)

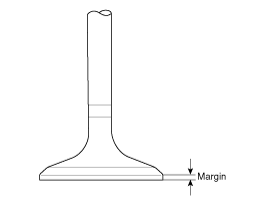
Check the valve head margin thickness. If the margin thickness is less than specification, replace the valve.

Margin

Intake : 1.25mm (0.0492in)

Exhaust : 1.25mm (0.0492in)

(4)

Check the valve length.

Length

Intake : 108.3mm (4.2638in)

Exhaust : 108.2mm (4.2598in)

(5)

Check the surface of valve stem tip for wear.

If the valve stem tip is worn, replace the valve.

3.

Inspect the valve seats.

(1)

Check the valve seat for evidence of overheating and improper contact with the valve face. If the valve seat is worn, replace the cylinder head.

(2)

Check the valve guide for wear. If the valve guide is worn, replace the cylinder head.

4.

Inspect the valve springs.

(1)

Using a steel square, measure the out-of-square of valve spring.

(2)

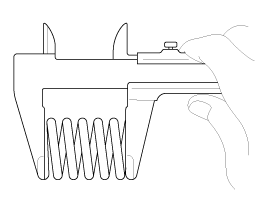
Using a vernier calipers, measure the free length of valve spring.

(3)

If the loads is not as specified, replace the valve spring.

Valve spring

Standard

Free height : 44.0mm (1.7323in)

Load : 19.9±1.0kg/36.6mm (44±21lb/1.4409in)

44.1±2.2kg/27.6mm (97±5lb/1.0866in)

Out of square : Less than 1.5° / 1.15mm (0.0453in)

Camshaft
1.

Inspect the cam lobes.

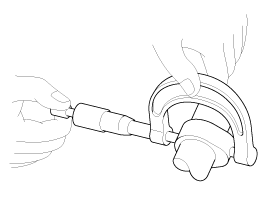
Using a micrometer, measure the cam lobe height.

Cam height

Intake : 40.094mm (1.5785in)

Exhaust : 40.425mm (1.5915in)

If the cam lobe height is less than specification, replace the camshaft.

2.

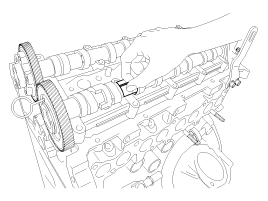
Inspect the camshaft journal clearance.

(1)

Clean the bearing caps and camshaft journals.

(2)

Place the camshafts on the cylinder head.

(3)

Lay a strip of plastigage across each of the camshaft journal.

(4)

Install the bearing caps and tighten the bolts with specified torque.

Tightening torque :

10.0 ~ 12.7N.m (1.1 ~ 1.3kgf.m, 8.0 ~ 9.4lb-ft)

caution

Do not turn the camshaft.

(5)

Remove the bearing caps.

(6)

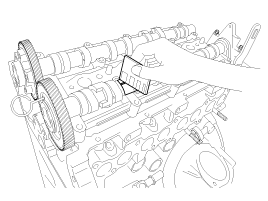
Measure the plastigage at its widest point.

Bearing oil clearance

0.040 ~ 0.074mm (0.0016 ~ 0.0029in)

If the oil clearance is greater than specificaiton, replace the camshaft. If necessary, replace the bearing caps and cylinder head as a set.

(7)

Completely remove the plastigage.

(8)

Remove the camshafts.

3.

Inspect the camshaft end play.

(1)

Install the camshafts.

(2)

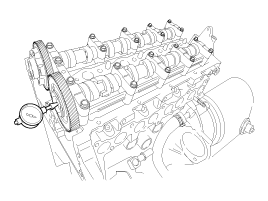
Using a dial indicator, measure the end play while moving the camshaft back and forth.

Camshaft end play

Standard : 0.05 ~ 0.15mm (0.0020 ~ 0.0059in)

If the end play is greater than specification, replace the camshaft. If necessary, replace the bearing caps and cylinder head as a set.

(3)

Remove the camshafts.

HLA (Hydraulic Lash Adjuster)

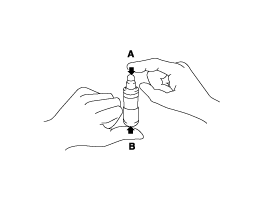
With the HLA filled with engine oil, hold A and press B by hand.

If B moves, replace the HLA.

Problem

Possible cause

Action

1. Temporary noise when starting a cold engine

Normal

This noise will disappear after the oil in the engine reaches the normal pressure.

2. Continuous noise when the engine is started after parking more than 48 hours.

Oil leakage of the high ressure chamber on the HLA, allowing air to get in.

Noise will disappear within 15 minutes when engine runs at 2000-3000 rpm.

If it doesn’t disappear, refer to step 7 below.

3. Continuous noise when the engine is first started after rebuilding cylinder head.

Insufficient oil in cylinder head oil gallery.

4. Continuous noise when the engine is started after excessively cranking the engine by the starter motor or band.

Oil leakage of the high-pressure chamber in the HLA, allowing air to get in.

Insufficient oil in the HLA.

5. Continuous noise when the engine is running after changing the HLA.

caution

Do not run engine at a speed higher than 3000 rpm, as this may damage the HLA.

6. Continuous noise during idle after high engine speed.

Engine oil level too high or too low.

Check oil level.

Drain or add oil as necessary.

Excessive amount of air in the oil at high engine speed.

Check oil supply system.

Deteriorated oil.

Check oil quality.

If deteriorated, replace with specified type.

7. Noise continues for more than 15 minutes.

Low oil pressure.

Check oil pressure and oil supply system of each part of engine.

Faulty HLA.

Remove the cylinder head cover and press HLA down by hand.

If it moves, replace the HLA.

Яндекс.Метрика