Remove the windshield wiper arm and blade after removing a nut (A).
Tighting torque :
28~32 Nm (2.8~3.2 kgf.m, 20~23.1 lbf.ft)
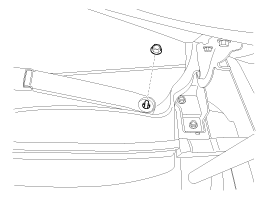
Remove the windshield wiper arm and blade after removing a nut (A).
Tighting torque :
28~32 Nm (2.8~3.2 kgf.m, 20~23.1 lbf.ft)

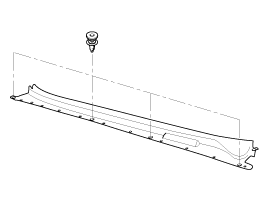
Remove the weather strip and the cowl top cover (A) after removing 4 rivets.
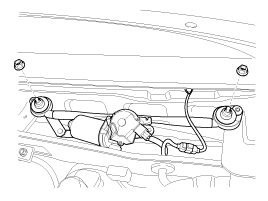
Remove the windshield wiper motor and linkage assembly after removing 2 bolts. Disconnect the wiper motor connector and windshield deicer connector from the wiper motor & linkage assembly.
Tighting torque :
7~11Nm (0.7~1.1, kgf.m, 5.0~7.9 lbf.ft)
Installation is the reverse of removal.
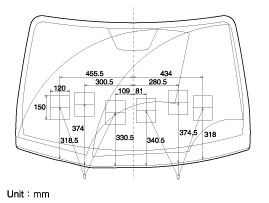
Set the cowl top cover on the specified spray position.
When you turn on the washer, confirm 50% or more of washer fluid lands within the spray area.
If the spray area is not within the standard positions, adjust the nozzle(s).
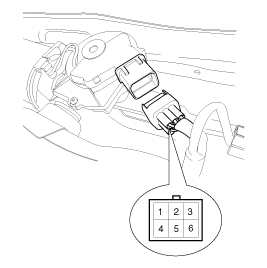
Remove the connector from the wiper motor.
Attach the positive (+) lead from the battery to terminal 6 and the negative (-) lead to terminal 5.
Check that the motor operates at low speed.
Connect the positive (+) lead from the battery to terminal 4 and the negative (-) lead to terminal 5.
Check that the motor operates at high speed.
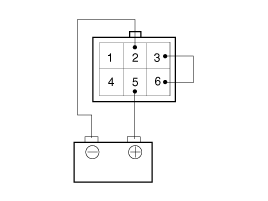
1. 1 2. B+ 3. Parking | 4. High 5. GND 6. Low |
Operate the motor at low speed using the stalk control.
Stop the motor operation anywhere except at the off position by disconnecting terminal 6.
Connect terminals 3 and 6.
Connect the positive (+) lead from the battery to terminal 2 and the negative (-) lead to terminal 5.
Check that the motor stops running at the off position.
