Remove the engine cover (A).
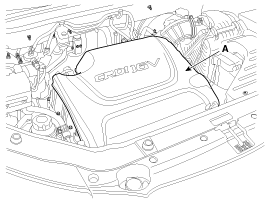
Remove the engine cover (A).

Remove the under cover (A).
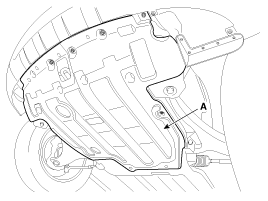
Loosen the radiator drain plug (A) and drain the engine coolant.
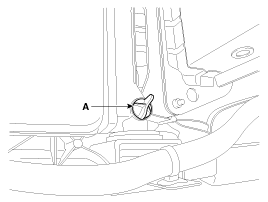
Remove the radiator cap to speed draining.
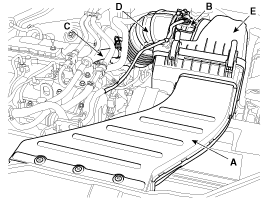
Remove the air cleaner assembly.
Remove the air duct (A).
Disconnect the air flow sensor (AFS) connector (B).
Disconnect the breather hose (C).
Remove the intake air hose (D) and air cleaner assembly (E).
Tightening torque :
Clamps: 2.9 ~ 4.9N.m (0.3 ~ 0.5kgf.m, 2.2 ~ 3.6lb-ft)
Bolts: 7.8 ~ 9.8N.m (0.8 ~ 1.0kgf.m, 5.8 ~ 7.2lb-ft)
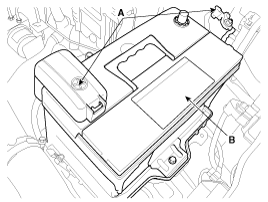
Disconnect the terminals (A) from the battery and remove the battery (B).
Tightening torque :
9.8 ~ 11.8N.m (1.0 ~ 1.2kgf.m, 7.2 ~ 8.7lb-ft)
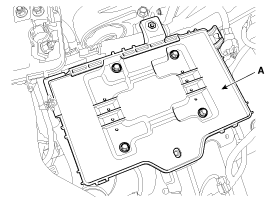
Remove the battery tray (A).
Tightening torque :
9.8 ~ 11.8N.m (1.0 ~ 1.2kgf.m, 7.2 ~ 8.7lb-ft)
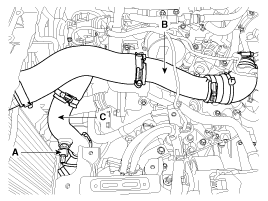
Disconnect the intake air temperature sensor connector (A) and remove the intercooler inlet pipe&hose (B) and outlet pipe&hose (C).
Tightening torque :
Clamps: 4.9 ~ 6.9N.m (0.5 ~ 0.7kgf.m, 3.6 ~ 5.1lb-ft)
Bolt: 9.8 ~ 11.8N.m (1.0 ~ 1.2kgf.m, 7.2 ~ 8.7lb-ft)
Disconnect the boost pressure sensor (BPS) connector (A) and remove the intercooler inlet pipe & hose (B) outlet pipe & hose (C).
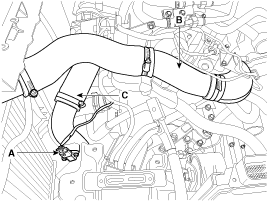
Remove the upper radiator hose (A) and lower radiator hose (B).
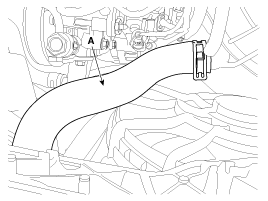
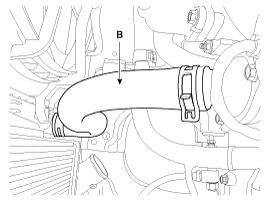
Disconnect the engine wire harness connectors.
Disconnect the difference pressure sensor connector (A). (With DPF) [Euro - 5 only]
Disconnect the exhaust gas temperature sensor connector (B). (With DPF) [Euro - 5 only]
Disconnect the lambda sensor connector (C). [Euro - 4/5 only]
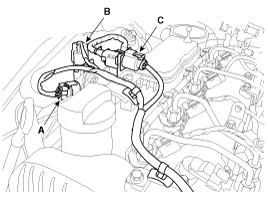
Disconnect the rail pressure regulator valve connector (A).
Disconnect the air control valve connector (B).
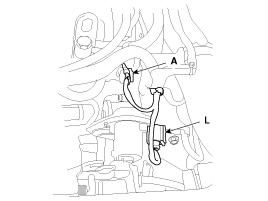
Disconnect the variable swirl control actuator connector (A). [Euro - 4/5 only]
Disconnect the engine coolant temperature sensor (ECTS) connector (B).
Disconnect the E-VGT actuator connector (C).
Disconnect the EGR actuator connector (D).
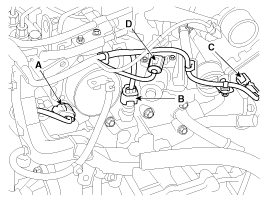
Remove the wire harness protector (A).
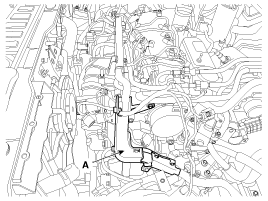
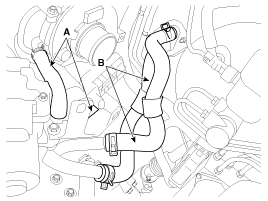
Disconnect the turbocharger water hose (A). [2.2L only]
Disconnect the heater hose (B).
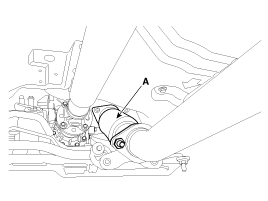
Remove the front muffler (A).
Tightening torque :
39.2 ~ 58.8N.m (4.0 ~ 6.0kgf.m, 28.9 ~ 43.4lb-ft)
Remove the DPF(or WCC) heat protector (A).
Tightening torque :
17.7 ~ 21.6N.m (1.8 ~ 2.2kgf.m, 13.0 ~ 15.9lb-ft)
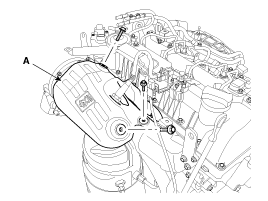
Remove the DPF (or WCC) converter assembly support bracket (A).
Tightening torque :
44.1 ~ 53.9N.m (4.5 ~ 5.5kgf.m, 32.5 ~ 39.8lb-ft)
When installing the exhaust manifold, tighten the bolts with pre-torque first, and then tighten the bolts with specified torque in the sequence shown.
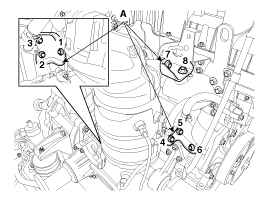
Remove the DPF(or WCC) converter assembly (A).
Tightening torque :
49.0 ~ 68.6N.m (5.0 ~ 7.0kgf.m, 36.2 ~ 50.6lb-ft)
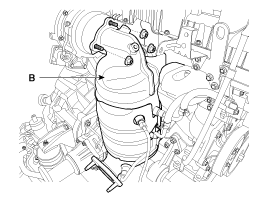
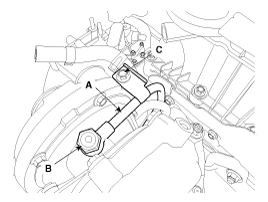
Remove the turbocharger oil drain pipe (A).
Tightening torque :
Bolts(B): 9.8 ~ 11.8N.m (1.0 ~ 1.2kgf.m, 7.2 ~ 8.7lb-ft)
Nuts(C): 19.6 ~ 26.5N.m (2.0 ~ 2.7kgf.m, 14.5 ~ 19.5lb-ft)
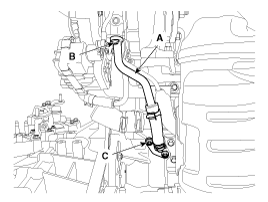
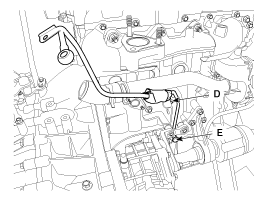
Remove the turbocharger oil feed pipe (A).
Tightening torque :
Bolt(B): 11.8 ~ 17.7N.m (1.2 ~ 1.8kgf.m, 8.7 ~ 13.0lb-ft)
Bolt(C): 9.8 ~ 11.8N.m (1.0 ~ 1.2kgf.m, 7.2 ~ 8.7lb-ft)
Bolts(D, E): 19.6 ~ 26.5N.m (2.0 ~ 2.7kgf.m, 14.5 ~ 19.5lb-ft)
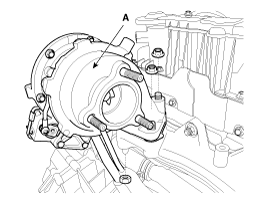
Remove the turbocharger assembly (A).
Tightening torque :
49.0 ~ 68.6N.m (5.0 ~ 7.0kgf.m, 36.2 ~ 50.6lb-ft)
Remove the exhaust manifold heat protector (A).
Tightening torque :
9.8 ~ 11.8N.m (1.0 ~ 1.2kgf.m, 7.2 ~ 8.7lb-ft)
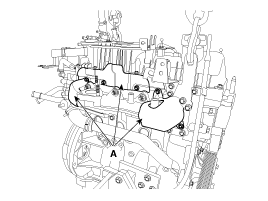
Remove the exhaust manifold (A) with the gasket.
Tightening torque :
39.2 ~ 44.1N.m (4.0 ~ 4.5kgf.m, 28.9 ~ 32.5lb-ft)
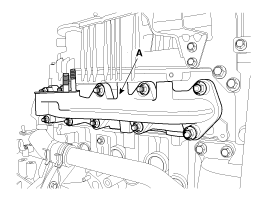
Disconnect the water inlet hose (A).
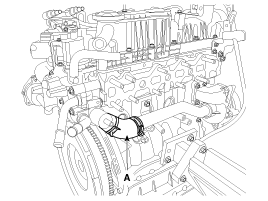
Remove the EGR vacuum pipe (A). (Refer to FL group) [Euro - 4/5 only]
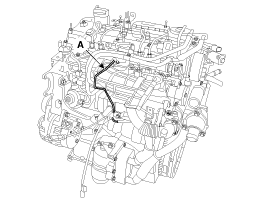
Remove the air control valve (A).
Tightening torque :
8.8 ~ 10.8N.m (0.9 ~ 1.1kgf.m, 6.5 ~ 8.0lb-ft)
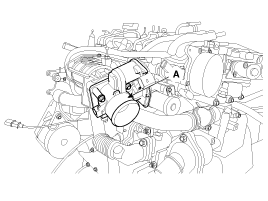
Remove the water outlet pipe (A).
Tightening torque :
7.8 ~ 11.8N.m (0.8 ~ 1.2kgf.m, 5.8 ~ 8.7lb-ft)
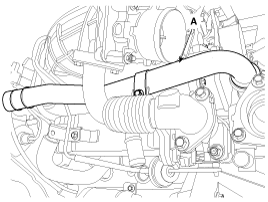
Remove the EGR pipe assembly (A). [Euro - 4/5 only]
Tightening torque :
Bolts(B): 19.6 ~ 23.5N.m (2.0 ~ 2.4kgf.m, 14.5 ~ 17.4lb-ft)
Bolts(C): 9.8 ~ 11.8N.m (1.0 ~ 1.2kgf.m, 7.2 ~ 8.7lb-ft)
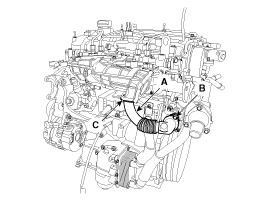
When installing the EGR pipe assembly, make sure to insert the O-ring(A) to intake manifold before installing EGR pipe(B).
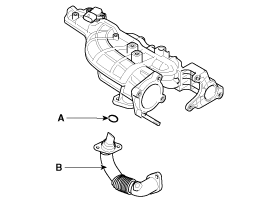
If installing an EGR pipe with O-ring inserted to the intake manifold, the O-ring may be damaged and this can cause an exhaust gas leakage.
Remove the EGR cooler hose (A) [Euro - 4/5 only] and oil cooler hoses (B).
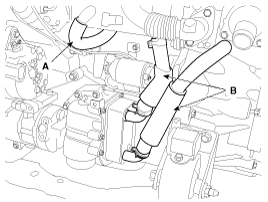
Remove the EGR cooler (A). [Euro - 4/5 only]
Tightening torque :
Bolt(B): 9.8 ~ 11.8N.m (1.0 ~ 1.2kgf.m, 7.2 ~ 8.7lb-ft)
Nut(C): 19.6 ~ 26.5N.m (2.0 ~ 2.7kgf.m, 14.5 ~ 19.5lb-ft)
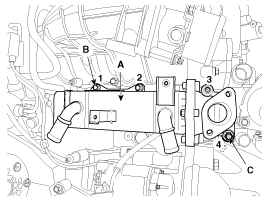
When installing the EGR cooler, tighten the bolts and nuts with pre-torque first, and then tighten the bolts and nuts with specified torque in the sequence shown.
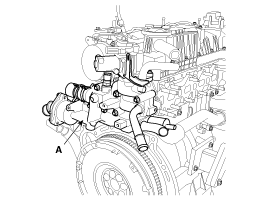
Remove the EGR & thermostat housing assembly (A).
Tightening torque :
19.6 ~ 24.5N.m (2.0 ~ 2.5kgf.m, 14.5 ~ 18.1lb-ft)
Installation is the reverse order of removal.