5.
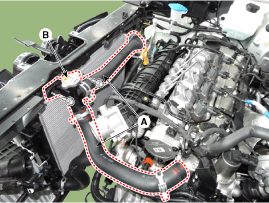
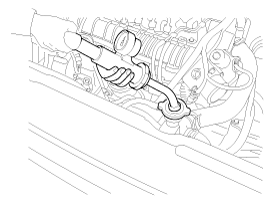
Disconnect the radiator upper hoses (A) and then remove the filler neck(B).
Remove the cooling fan.
(Refer to Cooling System - "Cooling Fan")
Remove the engine room under cover.
(Refer to Engine And Transaxle Assembly - “Engine Room Under Cover”)
Drain the coolant.
(Refer to Cooling System - "Coolant")
Remove the front bumper cover.
(Refer to Body - "Front Bumper")
Disconnect the radiator upper hoses (A) and then remove the filler neck(B).
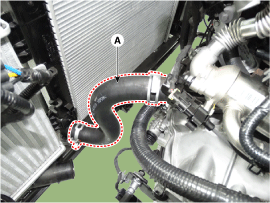
Disconnect the radiator lower hose (A).
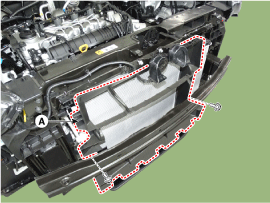
Remove the air duct(A).
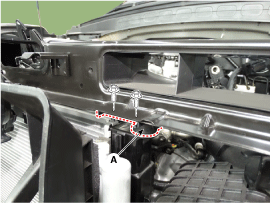
Remove the radiator upper mounting brackets(A).
Tightening torque :
7.8 ~ 11.8 N.m (0.8 ~ 1.2 kgf.m, 5.8 ~ 8.7 Ib-ft)
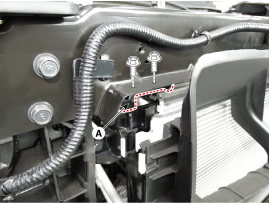
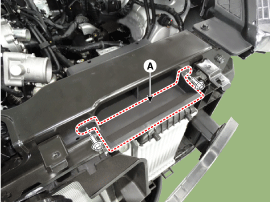
Remove the intake shield(A).
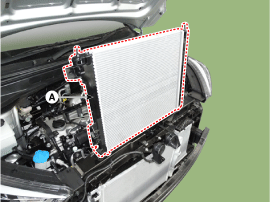
Pull the radiator (A) upward and remove it from condenser.
Install in the reverse order of removal.
Fill the radiator with coolant.
(Refer to Cooling System - "Coolant")
Start engine and check for leaks.
Remove the radiator cap, wet its seal with engine coolant, then install it on a pressure tester.
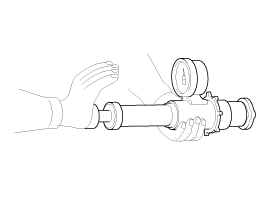
Apply a pressure of 93.16 ~ 122.58kpa (0.95 ~ 1.25kg/cm², 13.51 ~ 17.78psi).
Check for a drop in pressure.
If the pressure drops, replace the cap.
Wait until engine is cool, then carefully remove the radiator cap and fill the radiator with engine coolant, then install it on the pressure tester.
Apply a pressure tester to the radiator and apply a pressure of 93.16 ~ 122.58kpa (0.95 ~ 1.25kg/cm², 13.51 ~ 17.78psi).
Inspect for engine coolant leaks and a drop in pressure.
Remove the tester and reinstall the radiator cap.
Check for engine oil in the coolant and/or coolant in the engine oil.
