3.
Disconnect the washer nozzle hose (A).
Wear gloves to protect hands from injury.
When removing and installing the tail gate, an assistant is necessary.
Remove the tail gate trim.
(Refer to Tail Gate - "Tail Gate Trim")
Remove the tail gate latch.
(Refer to Tail Gate - "Tail Gate Latch")
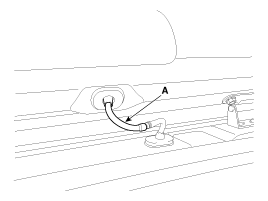
Disconnect the washer nozzle hose (A).
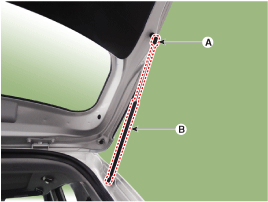
Using a screwdriver, lift the socket clips (A) up slightly on both ends of the tail gate lifter (B).
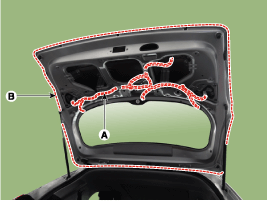
Disconnect the connectors and tail gate wiring harness (A).
After loosening the mounting bolts, then remove the tail gate assembly (B).
Tightening torque :
21.6 ~ 26.5 N.m (2.2 ~ 2.7 kgf.m, 15.9 ~ 19.5 lb-ft)
Install in the reverse order of removal.
Make sure the tail gate locks/unlocks and opens/closes properly.
Adjust the tail gate alignment.
Make sure the connectors are connected in properly.
Replace any damaged clips.
