2.
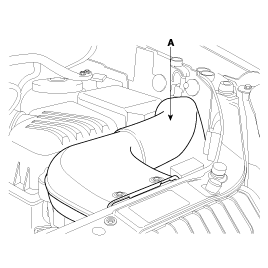
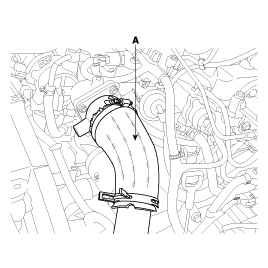
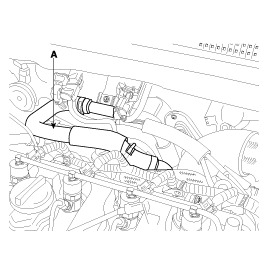
Remove the air duct(A).
Make sure jacks and safety stands are placed properly.
Make sure the vehicle will not roll off stands and fall while you are working under it.
Use fender covers to avoid damaging painted surface.
Unplug the wiring connectors carefully while holding the connector portion to avoid damage.
Mark all wiring and hoses to avoid misconnection.
Also, be sure that they do not contact other wiring or hoses or interfere with other parts.
Secure the hood as open as possible.
Remove the air duct(A).
Disconnect the battery negative terminal first, then the positive terminal. Remove the battery.
Remove the intake air duct and air cleaner housing.
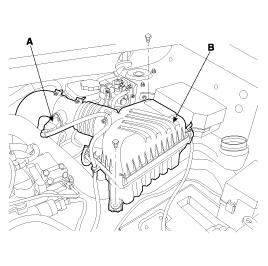
Disconnect the air-flow sensor(A).
Remove the air cleaner assembly(B).
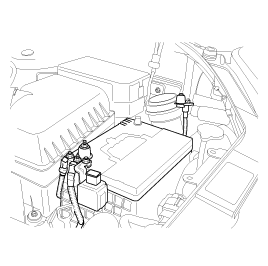
Remove the battery base(A).
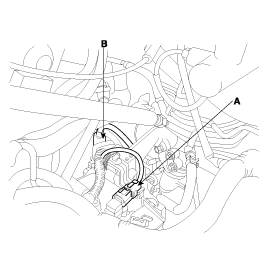
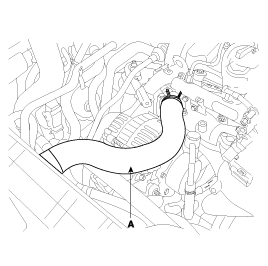
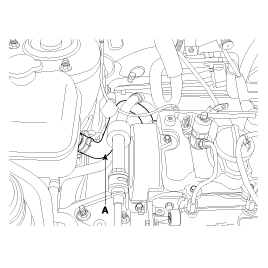
Remove the intercooler hoses(A).

Disconnect the engine wire harness connectors.
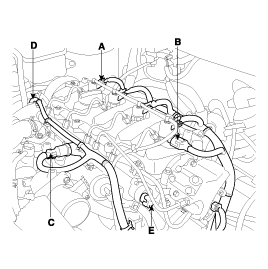
Disconnect the injector connectors(A).
Disconnect the camshaft position sensor(B).
Disconnect the rail pressure sensor(C).
Disconnect the engine coolant temperature sensor(D).
Disconnect the rail pressure regulator connector(E).
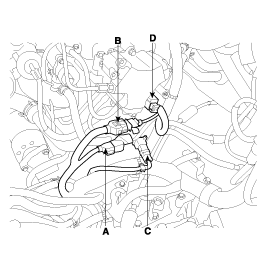
Disconnect the oil pressure sensor(A).
Disconnect the crankshaft position sensor(B).
Disconnect the fuel temperature sensor(C).
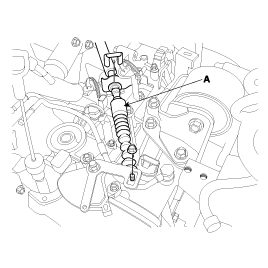
Disconnect the glow plug connector(D).
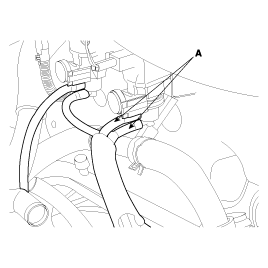
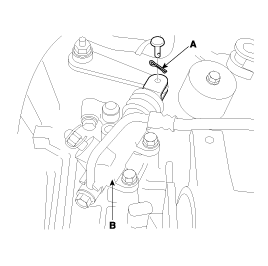
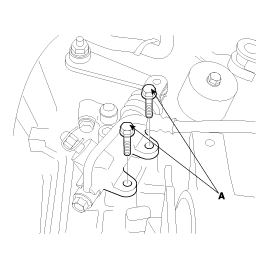
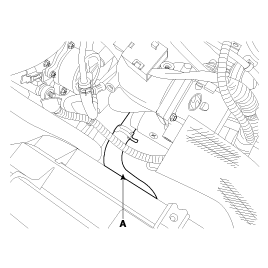
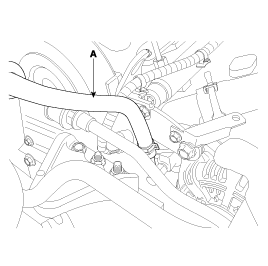
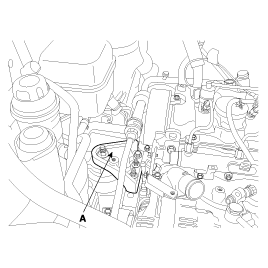
Remove the vacuum hoses(A).
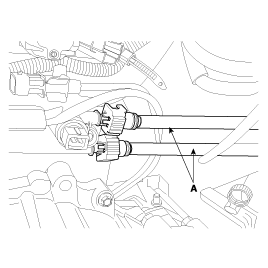
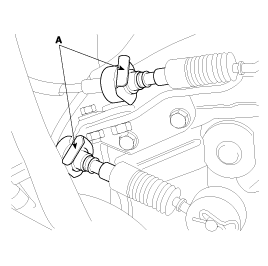
Remove the fuel lines(A).
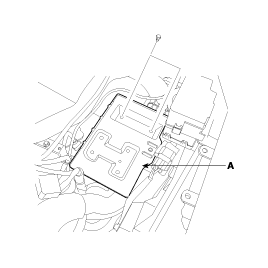
Disconnect the transaxle wire harness connectors. (A/T)
Dsiconnect the inhibitor switch connector(A).
Disconnect the trnasaxle range connector(B).
Disconnect the input shaft speed connector(C).
Disconnect the output shaft speed connector(A).
Dsiconnect the vehicle speed sensor connector(B).
Remove the control cable(A) transaxle switch. (A/T)
Remove the transaxle oil cooler hoses(A). (A/T)

Remove the clutch release cylinder(B) after removing the bolts, the pin and clip(A). (M/T)
Remove the cable assembly after removing the gear shift lever cable clip(A). (M/T)
Remove the under cover(A).

Remove the radiator cap.
Use care when removing the radiator cap to avoid scalding by not coolant steam.
Drain the engine coolant. Loosen the drain plug(A) in the radiator.
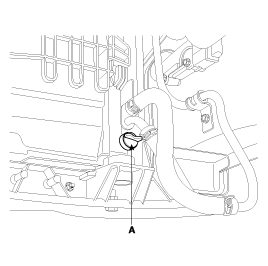
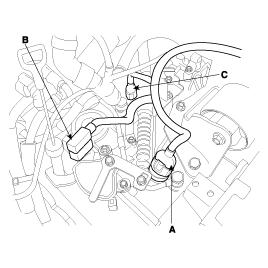
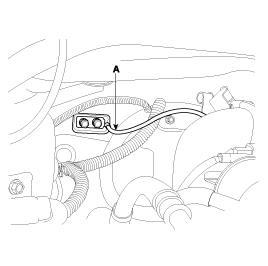
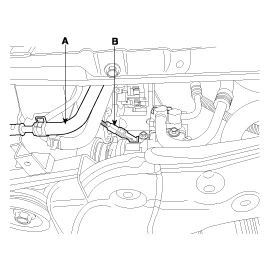
Remove the brake booster hose(A), and heater hose(B).
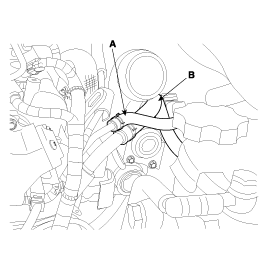
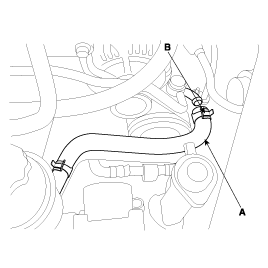
Remove the EGR cooler hose(A).
Remove the upper and lower radiator hoses(A).
Disconnect the hose from the engine coolant reservoir tank to the thermostat.
Disconnect the from the engine coolant reservior tank to the EGR cooler.
Remove the front tires/wheels and splash shield.
Remove the engine ground cable.
Drain the power steering oil.
Disconnect the power steering oil hoses(A) by loosening the clamps(B).
Remove front exhaust pipe(A).
Disconnect the wheel speed sensors(A) from both front knuckles. (See DS group - front axle)
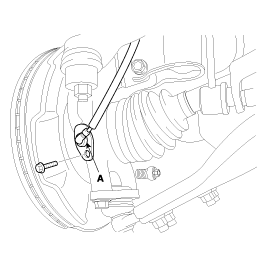
Remove the front strut lower mounting bolts and nuts. (See SS group - front strut)
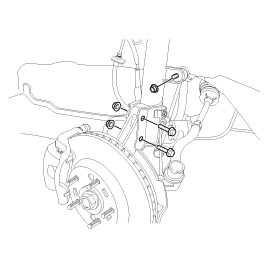
Remove the caliper and hang the caliper assembly(A).
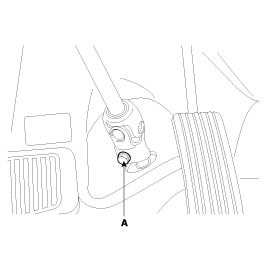
Remove the steering u-joint mounting bolt(A).
Install the jack for supporting engine and transaxle assembly.
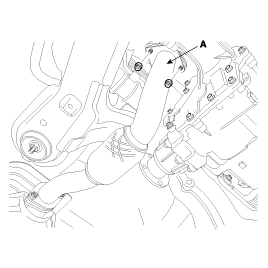
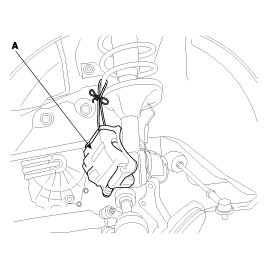
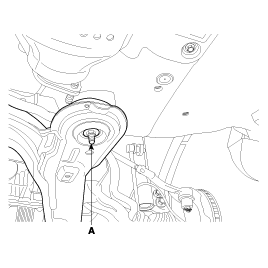
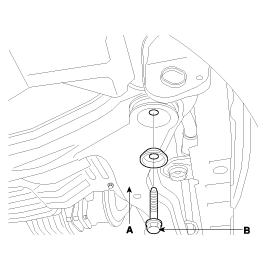
Remove the bolts and nuts of the engine mounting bracket(A).
Remove the transaxle mounting bracket(A).

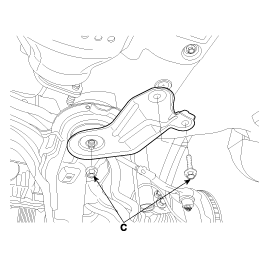
Remove the sub frame(A) mounting bolts and nut.
Tightening torque
Bolt, nut(C)
70 ~ 90Nm (700 ~ 900kgf.cm, 51.6 ~ 66.4lbf.ft)
Bolt(A, B)
160 ~ 180Nm (1600 ~ 1800kgf.cm, 118 ~ 132lbf.ft)
Install the engine in the reverse order of removal.
Reinstall the mount bolts/nuts in the following sequence.
Failure to follow these procedures may cause excessive noise and vibration, and reduce bushing life.
Install the sub frame installation bolt.
Tighten the engine and transmission mounting bolts.
Connect the power steering oil hoses.
Install the front exhaust pipe(A).
Tightening torque
40 ~ 60Nm (400 ~ 600kgf.cm, 30 ~ 43lbf.ft)
Install the front tires/wheels and splash shield.
Connect the air condition hoses.
Install the transmission links.
Connect the fuel hoses.
Connect the engine wire harness connectors.
Connect the radiator upper and lower hoses.
Connect the heater hoses.
Connect the hose to the reservoir tank.
Connect the intercooler hoses.
Install the air cleaner and the battery.
Perform the following :
Clean the areas where the driveshafts contact the transmission thoroughly with solovent or carburetor cleaner, and dry with compressed air.
Check that the snap rings on the ends of the driveshaft click into place.
Use new snap rings.
Adjust the shift cable.
Refill the radiator with engine coolant.
Bleed air from the cooling system with the heater valve open.
Clean the battery posts and cable terminals with sandpaper, assemble them, then apply grease to prevent corrosion.
Inspect for fuel leakage.
After assembly the fuel line, turn on the ignition switch (do not operate the starter) so that the fuel pump runs for approximately two seconds and the fuel line pressurizes. Repeat this operation two or three times, then check for fuel leakage at any point in the fuel line.
