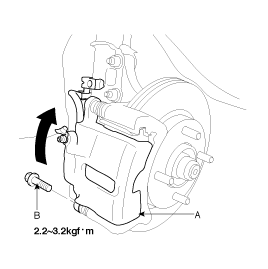
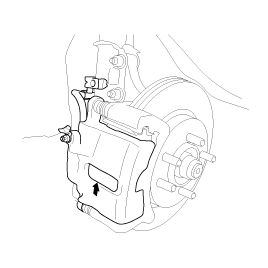
Check the brake pad thickness throgh the caliper body inspection hole
Pad thickness
Standard value : 11.0 mm ( 0.43 in.)
Service limit : 2.0 mm (0.0787 in.)
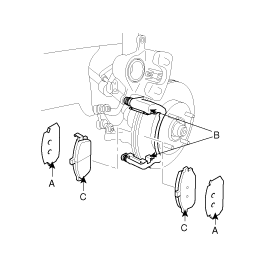
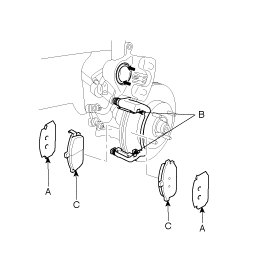
If the pad lining thickness is out of specilfication, left and right pads must be replaced as a complete set.
When the thickness difference between the left pad right pad is large, check the sliding condition of the pistion and the guide rod.
Raise the rear of the vehicle and make sure it is securely supported. Remove the rear wheel.
Release the parking brake.
Remove the two guide rod bolt (B) and support the caliper assembly with a piece of wire so that it does not hang from the brake hose.
Remove the pad shims (A), pad retainers(B), and pads (C).
Install the pad retainers (A) on the caliper bracket(B).
Check the foreign material at the pad shims (A) and the back of the pads (B).
Contaminated brake discs or pads reduce stopping ability. Keep grease off the discs and pads.
Install the brake pads (B) and pad shims (A) correctly. Install the pad with the wear indicator (C) on the inside.
If you are reusing the pads, always reinstall the brake pads in their original positions to prevent a momentary loss of braking efficiency.
Push in the piston (A) so that the caliper will fit over the pads. Make sure that the piston boot is in position to prevent damaging it when pivoting the caliper down.
Pivot the caliper down into position. Being careful not to damage the pin boot, install the guide rod bolt (B) and torque it to proper specification.
Insert the piston in the cylinder using the special tool (09581-11000).
Depress the brake pedal several times to make sure the brakes work, then test-drive.
Engagement of the brake may require a greater pedal stroke immediately after the brake pads have been replaced as a set. Several applications of the brake will restore the normal pedal stroke.
After installation, check for leaks at hose and line joints or connections, and retighten if necessary.