1.
Disconnect the negative (-) terminal(A) from the battery.
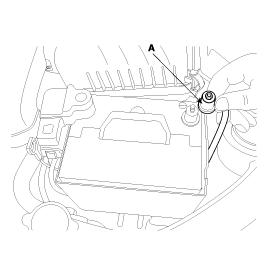
Disconnect the negative (-) terminal(A) from the battery.
Take away the bolts (A) in the illustration, and then remove the driver's airbag module(B).

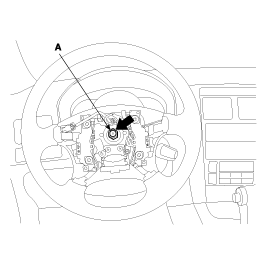
Remove the steering wheel lock nut(A).
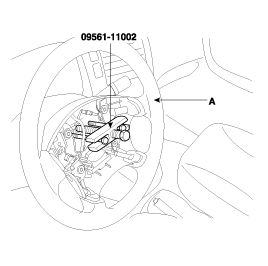
After aligning the marks on the steering shaft and wheel(A), remove the steering wheel using the special tool (09561-11002).
Do not hammer on the steering wheel to remove it: it may damage the steering column.
Remove the steering column upper(A) and lower shrouds(B).

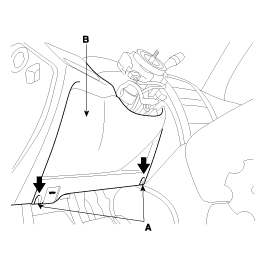
Disconnect two tightening bolt(A) and remove the lower crash pad(B).
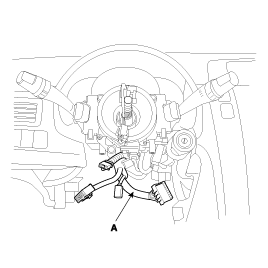
Remove the connectors of the multifunction switch(A).
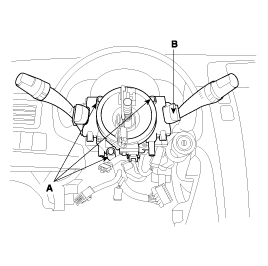
After removing three bolts(A) in the illustration, remove the multifunction switch assembly(B).
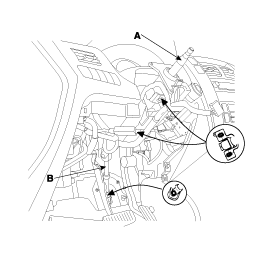
Remove the bolts connecting the steering column shaft(A) and the universal joint(B) as shown in the illustration.
Keep the neutral-range to prevent the damage of the clock spring inner cable when you handlethe steering wheel.
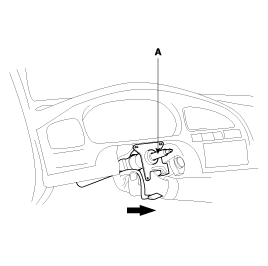
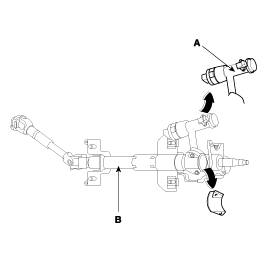
After removing the mounting bolts and nuts on the steering column and shaft assembly, remove the steering column and shaft assembly(A).
Assembly is the reverse of removal.
When installing the clock spring, refer the RT group to prevent the damage of clock spring inner cable.
If it is necessary to remove the key lock assembly(A), use a punch to make a groove on the head of the special bolt(B), and then use a screwdriverto remove the key lock assembly mounting bracket(C).
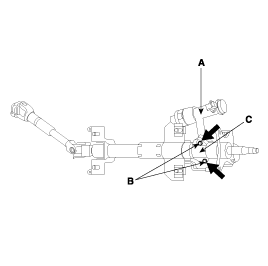
Disassemble the key lock assembly(A) from the steering column and shaft assembly(B).
Reassembly is the reverse of disassembly.
Remove the bolt(A) connecting the universal joint assembly(B) and the steering column and shaft assembly(C).
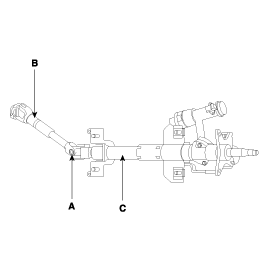
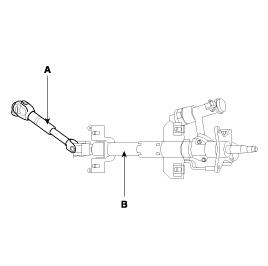
Remove the universal joint assembly(A) from the steering column and shaft assembly(B).
Reassembly is the reverse of disassembly.
Check the steering column shaft for damage and deformation.
Check connections for play, damage and smooth operation.
Check the ball joint bearing for wear and damage.
