1.
Remove the center bolt (A) while holding the pressure plate with a commercially available pressure plate bolt remover; Special tool number 09977-29000.
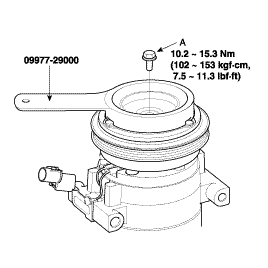
Remove the center bolt (A) while holding the pressure plate with a commercially available pressure plate bolt remover; Special tool number 09977-29000.
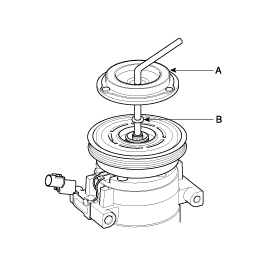
Remove the pressure plate (A) and shim (B), taking care not to lose the shims. If the clutch needs adjustment, increase or decrease the number and thickness of shims as necessary, then reinstall the pressure plate, and recheck its clearance (see page HA-33).
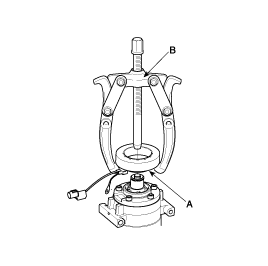
If you replacing the field coil, remove snap ring (A) with snap ring pliers.
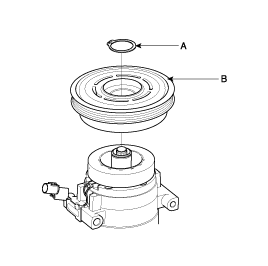
Be careful not to damage the pulley (B) and compressor during remove/installation.
Once snap ring (A) is removed, replace it with a new one.
Remove the screw from the field coil ground terminal.
Remove the field coil (A) from the shaft with a puller (B). Be careful not to damage the coil and compressor.
Reassemble the compressor clutch in the reverse order of disassembly, and note these items :
Clean the pulley and compressor sliding surfaces with non-petroleum solvent.
Install new snap rings, and make sure they are fully seated in the groove.
Make sure that the pulley turns smoothly after it's reassembled.
