1.
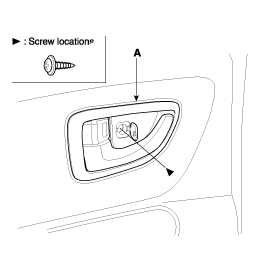
Remove the inside handle cover (A).
Take care not to scratch the door trim and other parts.
Put on gloves to protect your hands.
Remove the inside handle cover (A).
Loosen the door trim (A) mounting screws. Release the clips that hold the door trim, then remove the door trim by pulling it upward. Disconnect the power window switch connector (B).
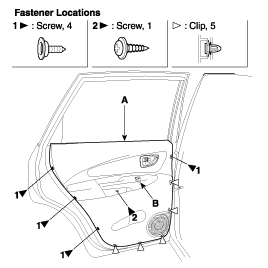
Remove the door trim seal.
Installation is the reverse of removal, make sure the connectors and courtesy light bulb socket are plugged in properly.
Put in gloves to protect your hands.
Remove the door trim (See page BD- 37).
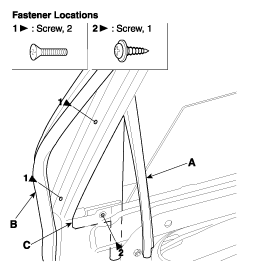
After disconnecting the glass run (A) and weatherstrip (B), then remove the delta molding (C).
Carefully move the glass (A) until you can see the bolts, then loosen them.Carefully pull the glass out through the window slot (B).
Take care not to drop the glass and scratch the glass surface.
Installation is the reverse of removal.
Roll the glass up and down to see if it moves freely without binding.
Make sure that there is no clearance between the glass and glass run channel when the glass is closed.
Adjust the position of the glass as necessary (See page BD- 43).
Remove the rear door trim (See page BD- 37).
Remove the glass (See page BD- 38).
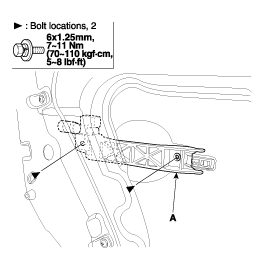
After removing the rear channel mounting bolt and nut, remove the rear channel (A).
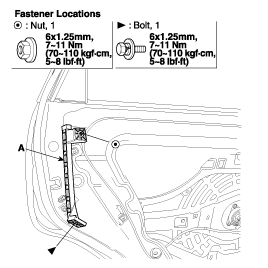
Installation is the reverse of removal.
Remove the rear door trim (See page BD- 37).
Disconnect the power window motor connector (A).
After loosening the mounting nut, remove the power window motor (B).
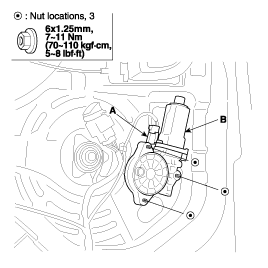
Installation is the reverse of removal.
Make sure that there is no clearance between the glass and glass run channel when the glass is closed.
Adjust the position of the glass as necessary (See page BD- 43).
Remove the door trim (See page BD- 37).
Remove the glass (See page BD- 38).
Remove the rear channel (See page BD- 39).
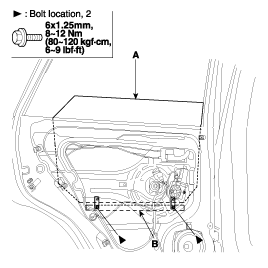
Disconnect the power window motor connector (A), speaker connector (B) and actulator connector (C). Detach the harness clip.
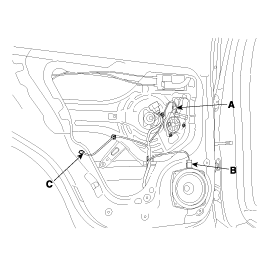
Remove the door module assembly (A).
Installation is the reverse of removal.
Make sure the door locks and opens properly.
Put on gloves to protect your hands.
Remove the door trim (See page BD- 37).
Remove the glass (see page BD- 38).
Remove the rear door module (see page BD- 40).
Remove the outside handle base (A).
Remove the outside hand lever (A) and cover (B).
Installation is the reverse of removal.
Make sure the door locks and opens properly.
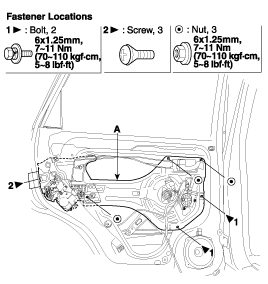
Remove the rear door module (See page BD- 40).
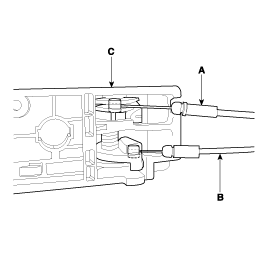
Remove the latch cover, then disconnect the lock cable (A) and inside handle cable (B).
Remove the rear door latch (C).
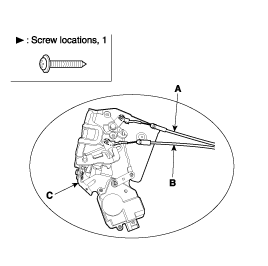
Installation is the reverse or removal.
Remove the rear door trim (See page BD- 37).
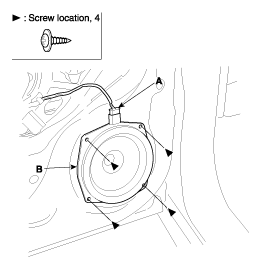
After disconnecting the speaker connector (A), remove the speaker (B).
Installation is the reverse of removal.
Remove the front door trim (See page BD- 37).
Loosen the inside handle (A) mounting screw.
Push the inside handle forward to disconnect from the door module.
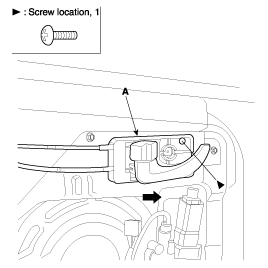
Disconnect the lock cable (A) and inside handle cannect cable (B).
Installation is the reverse of removal.
Make sure the door locks and opens properly.
Remove the front door trim (See page BD- 37).
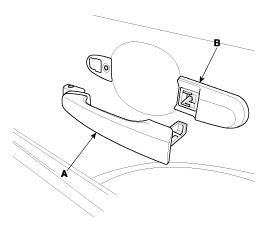
Release the hooks (A), and then remove the door belt weatherstrip (B).
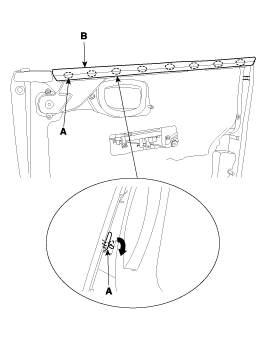
Installation is the reverse of removal.
Check the weatherstrips and glass run channel for damage or deterioration, and replace them if necessary.
Remove the door trim (See page BD- 37).
Carefully move the glass (A) until you can see the glass mounting bolts (B), then loosen them.
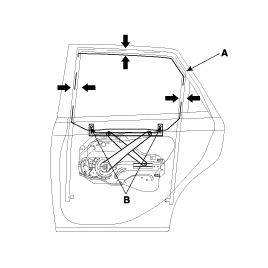
Push the glass against the center channel, then tighten the glass mounting bolts.
Check that the glass moves smoothly.
Raise the glass fully, and check for gaps. Check that the glass contacts the glass run channel evenly.
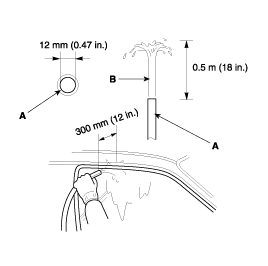
Check for water. Run water over the roof and on the sealing area as shown, and note these items:
Use a 12mm (1/2in.) diameter hose (A).
Adjust the rate of water flow as shown (B).
Do not use a nozzle.
Hold the hose about 300mm(12in.) away from the door (C).
Adjust the door position and striker (See page BD- 34).
