After loosening the mounting nuts, then remove the trunk lid garnish (A).
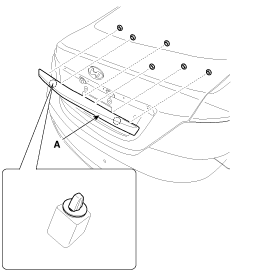
When prying with a flat-tip screwdriver, wrap it with protective tape, and apply protective tape around the related parts, to prevent damaged.
Put on gloves to protect your hands.
Take care not to scratch the body surface.
Remove the trunk lid trim.
(Refer to the BD group - "Trunk Lid")
After loosening the mounting nuts, then remove the trunk lid garnish (A).

Installation is the reverse of removal.
When prying with a flat-tip screwdriver, wrap it with protective tape, and apply protective tape around the related parts, to prevent damaged.
Put on gloves to protect your hands.
Take care not to scratch the body surface.
Disconnect the rear spoiler connector (A) and washer nozzle (B).
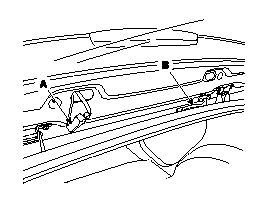
After loosening the mounting nuts, then remove the rear spoiler (A).
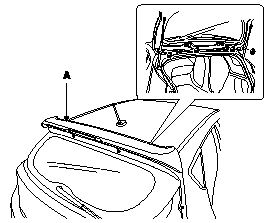
Installation is the reverse of removal.
Replace any damage clips.
When prying with a flat-tip screwdriver, wrap it with protective tape, and apply protective tape around the related parts, to prevent damaged.
Put on gloves to protect your hands.
Take care not to scratch the body surface.
Using a screwdriver or remover, remove the roof molding (A).
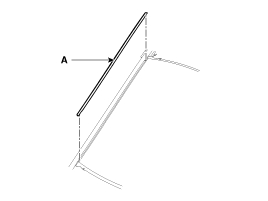
Installation is the reverse of removal.
Put on gloves to protect your hands.
Replace any damage clips.
When prying with a flat-tip screwdriver, wrap it with protective tape, and apply protective tape around the related parts, to prevent damaged.
Put on gloves to protect your hands.
Take care not to scratch the body surface.
Using a screwdriver or remover, remove the delta garnish (A).
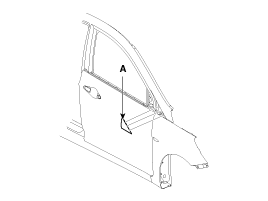
Installation is the reverse of removal.
Replace any damage clips.
When prying with a flat-tip screwdriver, wrap it with protective tape, and apply protective tape around the related parts, to prevent damaged.
Put on gloves to protect your hands.
Take care not to scratch the body surface.
Using a screwdriver or remover, remove the quarter garnish (A).
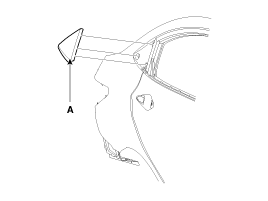
Installation is the reverse of removal.
Replace any damage clips.
When prying with a flat-tip screwdriver, wrap it with protective tape, and apply protective tape around the related parts, to prevent damaged.
Put on gloves to protect your hands.
Take care not to scratch the body surface.
Remove the front tire
After loosening the mounting screws and nuts, then remove the front wheel guard (A).
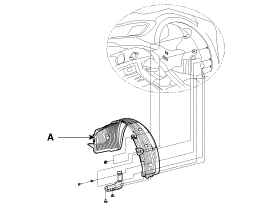
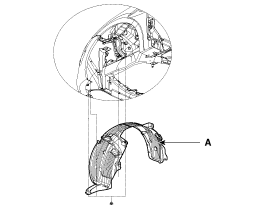
Installation is the reverse of removal.
Replace any damage clips.
When prying with a flat-tip screwdriver, wrap it with protective tape, and apply protective tape around the related parts, to prevent damaged.
Put on gloves to protect your hands.
Take care not to scratch the body surface.
Remove the rear tire
After loosening the mounting screws and nuts, then remove the rear wheel guard (A) and mud guard (B).
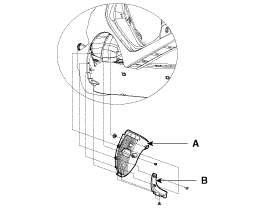
Installation is the reverse of removal.
Replace any damage clips.
When prying with a flat-tip screwdriver, wrap it with protective tape, and apply protective tape around the related parts, to prevent damaged.
Put on gloves to protect your hands.
Take care not to scratch the body surface.
Remove the rear tire.
After loosening the mounting screws, then remove the deflecotor guard (A).
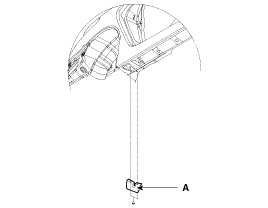
Installation is the reverse of removal.
Replace any damage clips.