2.
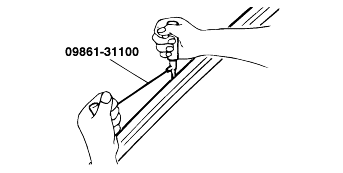
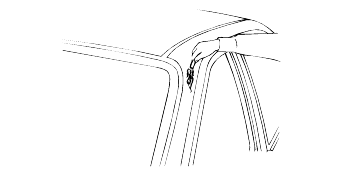
Use the special tool (09861-31100) to cut through the sealant.
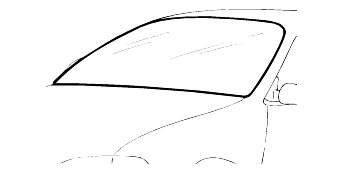
To remove the windshield, first remove the following parts :
Front pillar trim
Inside rear view mirror
Wiper arms
Cowl top cover
Windshield glass molding
Use the special tool (09861-31100) to cut through the sealant.
Make mating marks on the glass and body if the glass is to be reinstalled.
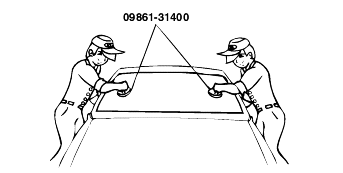
Take out the windshield glass with the special tool(09861-31400).
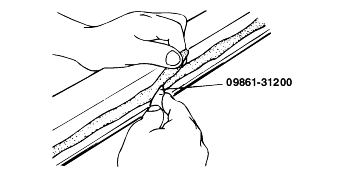
Using a knife or the special tool(09861-31200), cut the old sealant smoothly to a thickness of about 2 mm (0.08 in.) on the bonding surfacearound the entire windshield flange.
Be careful not to remove more adhesive than necessary, and also not to damage the paintwork on the body surface with the knife. If the paintwork is damaged, repair the damaged area with touch-uppaint.
Clean the body bonding surface with a sponge dampened in alcohol, or wax and grease remover.
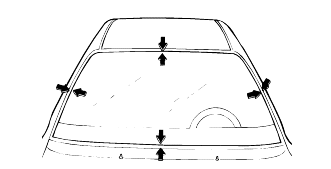
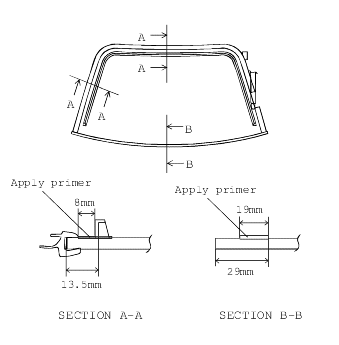
Center the new windshield glass in the opening. Mark the location by marking lines across the glass and body with a grease pencil at the fourpoints as shown.
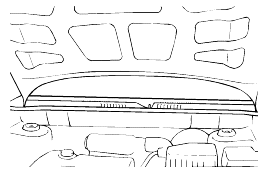
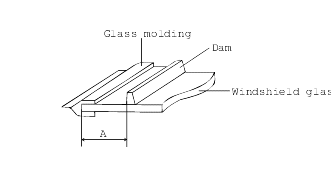
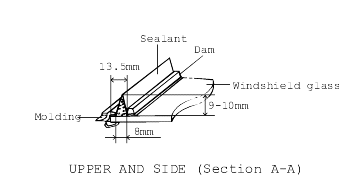
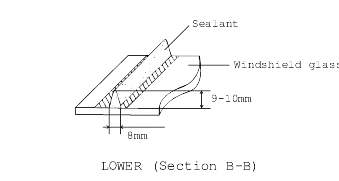
Glue the rubber dam to the inside surface of the windshield glass around the entire edge as shown, to contain the sealant during installation.
Part | "A" | Remarks |
Upper | 13.5mm constant | Glass molding sub |
Side |
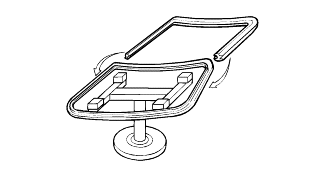
Install the windshield glass molding. Do not allow any gaps.
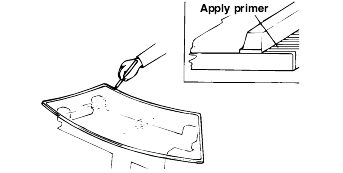
Clean the surface applying primer with alcohol.
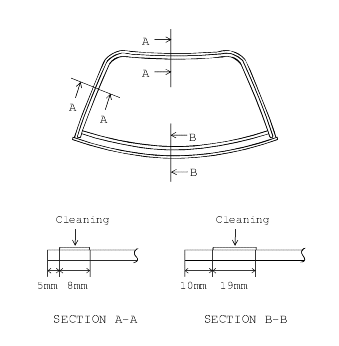
Apply a light coat of glass primer to the outside of the dam.
Never touch the surface with your hand after you have applied primer.
If you do, the adhesive may not bond to the glass properly, causing a leak after the windshield glass is installed.
Do not apply body primer to the glass.
Keep water, dust, and abrasive materials away from the primer.
Apply sealant around the edge of the glass.
Apply the adhesive within 5 minutes after applying the primer.
Apply a light coat of body primer to the original sealant remaining around the window opening flange. The glass should be installed within 10minutes after you apply the primer.
Using suction cups or the special tool (09861-31400), lower the glass over the opening, align it with the marks made in step 3 and setit down on the sealant.
Remove excess adhesive with a putty knife or gauze. Fill any cavities around the windshield glass.
After one hour, perform a water-leak test for the windshield. Use a cold water spray, being careful not to direct a powerful stream of water on the new adhesive material. Allow water to spill over the edges of the glass.
If there are leaks, dry the affected area, then apply sealant.
Install the removed parts.
Keep the windshield dry for the first hour after installation.
Let the car stand for at least four hours after windshield installation. If the car has to be used winthin the first 8 hours, it must be driven slowly.
Take care not to slam the doors with all the windows rolled up.
Take care not to stress the body (such as when going in and out of driveways at an angle or driving over rough, uneven roads).
