REMOVAL
1.

To remove the transaxle assembly, first remove the air cleaner joint, then the mounting bracket, and wiring etc.

2.

Remove the clutch release lever.

A.

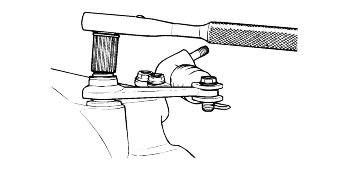
Loosen the release lever nut and washer.

B.

Remove the clevis pin and snap ring from the release cylinder.

C.

Remove the release lever.

note

It is impossible to remove the transaxle assembly without performing this step because the clutch cover assembly, release bearing and release forkare held together.

3.

Loosen the bolts attached to the release cylinder and remove the release cylinder.

4.

Remove the transaxle assembly, after removing each bolt which connects the transaxle assembly and engine.

5.

If the clutch cover is attached to the flywheel, remove the release bearing using snap-ring pliers.

(1)

Rotate the release bearing in an easy direction in order to examine the snap ring.

(2)

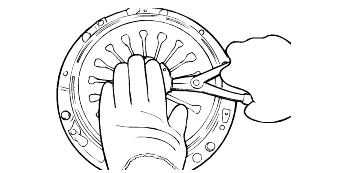
Insert the pliers under the wave washer as shown in the illustration and place it in the center of the snap ring.

(3)

Spread the snap ring by pushing down on the bearing as shown in the illustration.
(4)

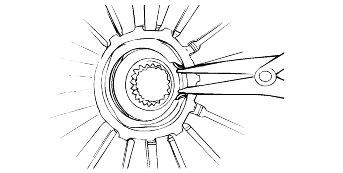
The snap ring expanded state is shown in the figure.
(5)

With In the snap ring expanded, pull out the release bearing and remove it.
6.

Insert the special tool (09411-11000) in the clutch disc to prevent the disc from shifting.

7.

Loosen the bolts which attach the clutch cover to the flywheel in a star pattern. Loosen the bolts in succession, one or two turns at a time,to avoid bending the cover.

note

Do not clean the clutch disc or the release bearing with cleaning solvent.

8.

Remove the release fork shaft and bushing.

Яндекс.Метрика