Inspect the crankshaft journal for taper and out-of-round.
Standard value |
Crankshaft journal O.D : |
56.982 - 57.000 mm (2.2434 - 2.2441 in.) |
Crankshaft pin O.D : |
44.980 - 45.000 mm (1.7709 - 1.7717 in.) |
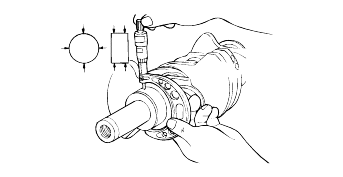
Check the crankshaft journals and pins for damage, uneven wear and cracks. Also check the oil holes for restrictions. Repair or replace any defectivepart.
Inspect the crankshaft journal for taper and out-of-round.
Standard value |
Crankshaft journal O.D : |
56.982 - 57.000 mm (2.2434 - 2.2441 in.) |
Crankshaft pin O.D : |
44.980 - 45.000 mm (1.7709 - 1.7717 in.) |

Standard value |
Oil clearance |
Crankshaft main bearing |
No.1,2,4,5 : 0.018 - 0.036 mm (0.0007 - 0.0014 in.) |
No.3 : 0.024 - 0.042 mm (0.0009 - 0.0017 in.) |
Connecting rod bearing : |
0.015 - 0.048 mm (0.0006 - 0.0019 in.) |
Limit : 0.1 mm (0.0039 in.) |
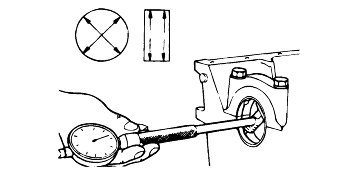
Remove oil, grease and any other dirt from the bearings and journals.
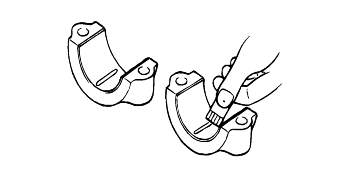
Cut the plasticgauge to the same length as the width of the bearing and place it in parallel with the journal, avoiding the oil holes.
Install the crankshaft, bearings and caps and tighten them to the specified torques. During this operation, do not turn the crankshaft. Remove the caps. Measure the width of the plasticgauge at the widest part by using the scale printed on the gauge package. If the clearance exceeds the service limit, the bearing should be replaced or an undersize bearing should be used. When installing a new crankshaft, be sure to use standard size bearings. If the standard clearance can not be obtained even after replacing the bearing, the journal and pin should be ground to thr undersize and a bearing of the correspondingsize should be installed.
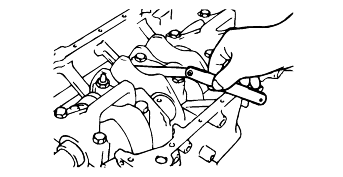
Standard value : 0.05 - 0.25 mm (0.0020 - 0.0098 in.) |
Check the clutch disc contacting surface of the flywheel for damage and wear. Replace the flywheel if excessively damaged or worn.
Check the clutch disc contacting surface of the flywheel for run-out.
Limit |
Flywheel run - out : 0.13 mm(0.0051 in.) |
Check the ring gear for damage, cracks and wear. Replace if necessary.