Remove the split pin and castle nut.
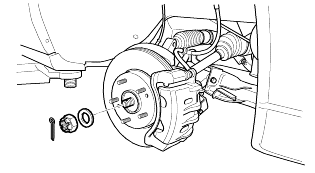
Remove the aluminum wheel cover using a flat-blade screwdriver.
Raise the vehicle and remove the wheel.
Remove the split pin and castle nut.

Drain the transaxle oil.
Detach the wheel speed sensor cable from the bracket (for vehicles equipped with ABS).
Detach the brake hose cable from the bracket.
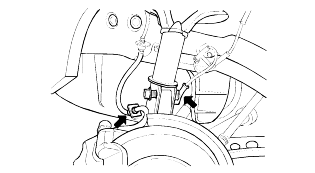
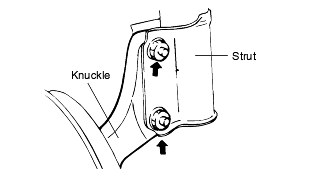
Remove two flange bolts and detach the knuckle from the strut.
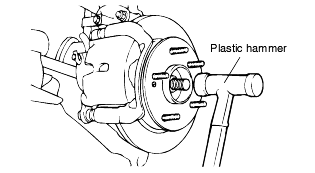
Separate the driveshaft from the axle hub by tapping it lightly with a plastic hammer.
Drive off the driveshaft from the transaxle or transfer inner shaft using a hammer and brass bar.
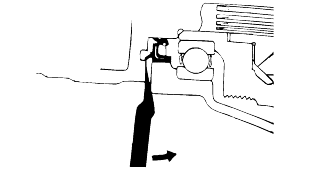
Use a pry bar not to damage the joint.
If you pull the driveshaft by excessive force, the components inside the joint kit can be displaced which might cause the boot to be torn and thebearing to be damaged.
Plug the transaxle case opening with an oil seal cap in order to avoid contamination.
Support the driveshaft properly.
Replace the retainer ring each time the driveshaft is removed from the transaxle case.
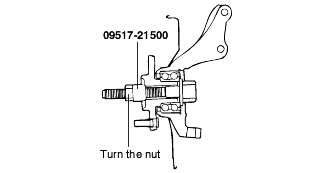
While loosening the driveshaft nut, do not allow vehicle weight to be concentrated on the wheel bearing. If the vehicle moves, hold the wheel bearingusing the special tool (09517-21500).
Coat gear oil on the driveshaft splines and transaxle case-sliding surface.
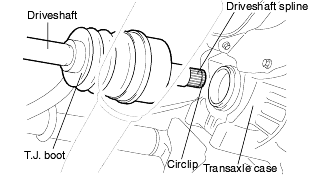
Before installing the driveshaft, set the opening side of the circlip facing downward.
Assemble the dust cover, the hub, the brake disc and the wheel bearing to the knuckle.
Install the B.J. into the knuckle.
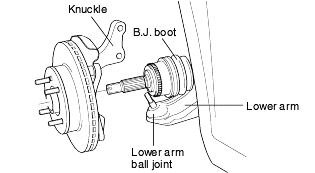
In practice, the knuckle should be installed in the lower arm the moment the B.J. is installed in the knuckle. Be careful not to damage theboot.
Install the knuckle in the strut assembly with the tightening torque, 100~120 Nm (1000~1200 kg·cm, 74~89 lb·ft).
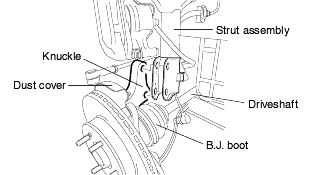
Install the lower arm in the knuckle with the tightening torque 100~120 Nm (1000~1200 kg·cm, 74~89 lb·ft).
After the installation, check on the driveshaft for stability by hand.
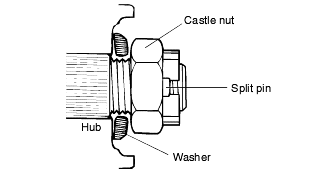
After installing the washer with convex surface outward, install the castle nut and the split pin.
Install the wheel and tire.
Check the driveshaft boots for damage and deterioration.
Check the splines for wear and damage.
Check the ball joints for wear and operating condition.
Check the dynamic damper for damage and deterioration
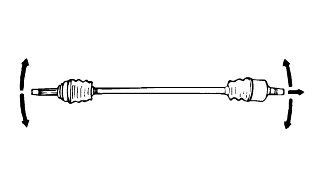
Do not disassemble the B.J. assembly.
Special grease is used on the driveshaft joint. Do not substitute with another type of grease.
The boot band should always be replaced with a new one.
Remove the T.J. boot bands and pull the T.J. boot from the T.J. case.
Be careful not to damage the boot.
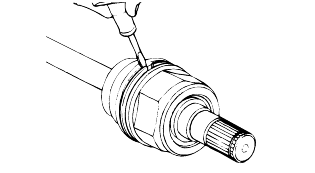
Remove the snap ring and spider assembly from the driveshaft.
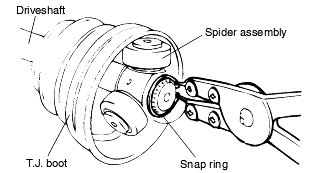
Clean the spider assembly.
Remove the B.J. boot bands and pull out the T.J. boot and B.J. boot.
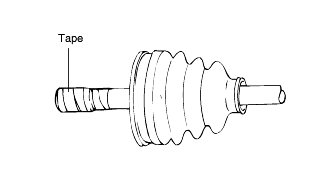
If the boot is to be reused, wrap tape around the drive shaft splines to protect the boot.
