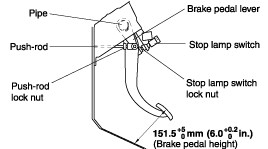
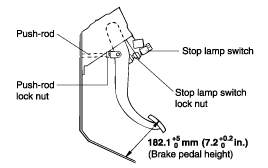
Remove the carpet and measure the brake pedal height. If the height is over the standard value, adjust it as the following procedures.
: 182.1(+5, 0) mm [7.2 (+0.2, 0) in.]
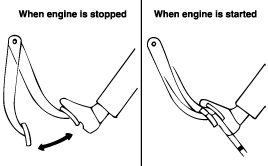
Disconnect the stop lamp switch connector, loosen the stop lamp switch lock nut, and back off the stop switch until it doesn't reach the brake pedal arm.

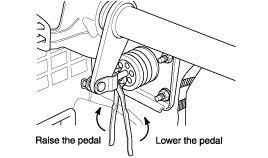
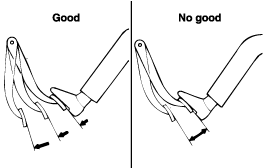
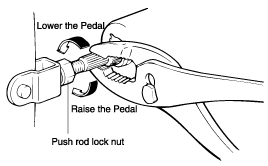
Loosen the push rod lock nut, and screw the push rod in or out with pliers until the standard pedal height from the floor is reached.
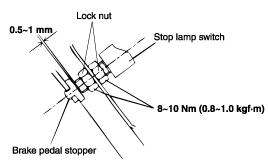
Turn the stop lamp switch until clearance between the stop lamp switch outer case and stopper becomes 0.5~1.0mm.
Tighten the lock nut firmly.
Brake pedal stroke should be 130mm (5.12 in.) or more. If the brake pedal stroke is not 130mm or more, readust the brake pedal height and stop lamp switch clearance.
Connect the stop lamp switch connector.
Make sure that the stop lamps go off when the brake pedal is released.
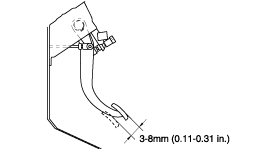
With the engine off, depress the pedal 2~3 time to get rid of pressure, and then inspect the play on the pedal by pushing it by hand.
: 3 ~ 8 mm (0.11 ~ 0.31 in.)
If the play is below the standard value, check on the fact that the clearance between the stop lamp switch outer case and the brake pedal is within the standard value.
If the play is over the standard value, clearance between the clevis pin and the brake pedal arm is over the standard value. Inspect the defective parts and replace them if required.