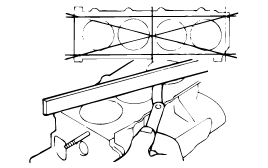
Using a straight edge and feeler gauge, check the top surface of the block for warpage. Make sure that the surface is free from gasket chips or other foreign material.
Standard : 0.03 mm (0.0012 in.) or less
Limit : 0.15 mm (0.0059 in.) or less

Check the engine block for scores, rust and corrosion. Also check for cracks or any other defects. Replace the block if defective.
Using a straight edge and feeler gauge, check the top surface of the block for warpage. Make sure that the surface is free from gasket chips or other foreign material.
Standard : 0.03 mm (0.0012 in.) or less
Limit : 0.15 mm (0.0059 in.) or less

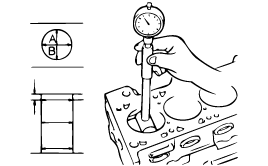
Measure the cylinder bore with a cylinder gauge at three levels in the direction of A and B. If the cylinder bores show more than the specified out-of-round or taper or if the cylinder walls are badly scuffed or scored, the cylinder block should be rebored and honed. Oversize pistons and rings must be fitted.
Cylinder I.D
1.6 L : 76.5 ~ 76.53 mm (3.0118 ~ 3.0130 in.)
1.5 L : 75.5 ~ 75.53 mm (2.9724 ~ 2.9736 in.)
Cylinder I.D taper : 0.01 mm (0.0004 in.) or less

If a cylinder ridge exists, cut away with a ridge reamer.
Oversize pistons are available in four sizes.
Pistom service size and mark mm (in.)
0.25 (0.010) O.S. : 0.25
0.50 (0.020) O.S. : 0.50
0.75 (0.030) O.S. : 0.75
1.00 (0.039) O.S. : 1.00
When boring the cylinder to the oversize, maintain the specified clearance between the oversize piston and the bore, and make sure that all pistons used are the same oversize.
The standard measurment of the piston's outside diameter is taken 47 mm (1.85 in.) from the top land of the piston.
Piston - to - cylinder clearance :
1.6 L : 0.025 ~ 0.045 mm (0.0010 ~ 0.0018 in.)
1.5 L : 0.02 ~ 0.04 mm (0.00078 ~ 0.0016 in.)