2.
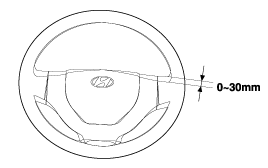
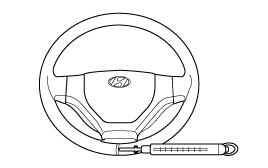
Measure the play at the circumference of the steering wheel.
Standard value
Steering wheel free play : 0~30 mm (0~1.1 in.)
Start the engine with the steering wheel in the straight ahead position.
Measure the play at the circumference of the steering wheel.
Standard value
Steering wheel free play : 0~30 mm (0~1.1 in.)
If the play exceeds the standard value, inspect the connection between the steering shaft and steering linkage.
Place the front wheel on a turning radius gauge and measure the steering angle.
Standard value
Wheel angle (Unladen state)
Inner wheel : 37°42´ ± 1°30´
Outer wheel : 33°03´
If the measured value is not within the standard value, adjust the toe and inspect again.
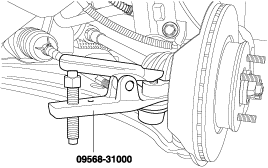
Disconnect the tie rod and knuckle by using the special tool.
Move the ball joint stud in a circular motion several times to check for looseness.
Mount the nuts on the ball joint, and then measure the ball joint starting torque.
Standard value
0.5~2.5 Nm (5~25 kg·cm, 0.36~1.78 lb·ft)
If the starting torque exceeds the upper limit of the standard value, replace the tie rod end.
Even if the starting torque is below the lower limit of the standard value, check the play of the ball joint and replace if necessary.
Position the vehicle on a level surface and place the steering wheel in the straight ahead position.
Increase the engine speed to 1000 ± 100 rpm.
After checking, reset the engine speed to the standard value (idling speed).
Measure the turning force with a spring scale by turning the steering wheel clockwise and counterclockwise one and a half turns.
Standard value
Stationary steering effort : 29N (3.0 kg, 6.5 lbs)
Check that there is no sudden change of force while turning the steering wheel.
If the stationary steering effort is excessive, check and adjust the following points.
Damage or cracks on the dust cover and tie rod end ball joint.
Pinion preload of the steering gear box and starting torque of the tie rod end ball joint.
Starting torque of the ball joint.
The force required to turn the steering wheel and the wheel return should be the same for both left and right in case of moderate or sharp turns.
When the steering wheel is turned 90° and held for a couple of seconds while the vehicle is being driven at 35kph, the steering wheel should return at least 70° from the neutral position when it is released.
If the steering wheel is turned very quickly, steering may be momentarily difficult. This is not a malfunction because the oil pump output will be somewhat decreased.
Press the V belt, applying a pressure of 98N (10kg, 22lb) at the specified point and measure the deflection to confirm that it is within the standard value.
Standard value
V belt deflection : 6~9 mm
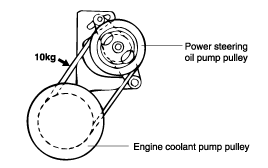
If the belt deflection is beyond the standard value, adjust the belt tension as follows.
Loosen the bolt adjusting the power steering "V" belt tension.
Put a bar or equivalent between the bracket and the oil pump and adjust the tension so that the belt deflection is within the standard value.
Tighten the bolt adjusting the power steering "V" belt tension.
Check the belt deflection and adjust it again if necessary.
After turning the V belt in the normal rotation direction more than once, recheck the belt deflection.
Position the vehicle on a level surface.
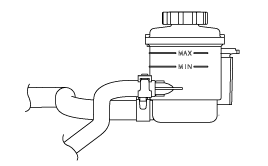
Start the engine. With the vehicle kept stationary, turn the steering wheel several times continuously to raise the fluid temperature to 50~60°C (122 to 140°F).
With the engine at idle, turn the steering wheel fully clockwise and counterclockwise several times.
Make sure there is no foaming or cloudiness in the reservoir fluid.
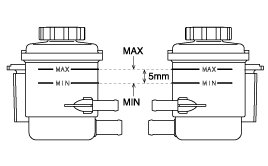
Stop the engine to check for any difference in fluid level between a stationary and a running engine.
If the fluid level varies 5 mm (0.2 in.) or more, bleed the system again.
If the fluid level suddenly rises after stopping the engine, further bleeding is required.
Incomplete bleeding will produce a chattering sound in the pump and noise in the flow control valve, and lead to decreased durability of the pump
Jack up the front wheels and support them with rigid racks.
Disconnect the return hose from the oil reservoir and plug the oil reservoir.
Connect a vinyl hose to the disconnected return hose, and drain the oil into a container.
Disconnect the high-tension cable at the ignition coil side.
While operating the starter motor intermittently, turn the steering wheel all the way to the left and then to the right several times to drain the fluid.
Connect the return hose and fix it with a clip securely.
Fill the power steering fluid reservoir with the specified fluid.
PSF-3 : 0.75~0.8 lit.
Start the engine.
Check for fluid leaks from the hose, then stop the engine.
Pour the fluid into the bottom of the oil filter in the power steering fluid reservoir.
Bleed the air.
Disconnect the ignition coil high tension cable, and then, while operating the starter motor intermittently (for 15 to 20 seconds), turn the steering wheel all the way to the left and then to the right five or six times.
During air bleeding, replenish with the fluid so that the level does not fall below the lower position of the filter.
If air bleeding is done while the vehicle is idling, the air will be broken up and absorbed into the fluid. Be sure to do the bleeding only while cranking.
Connect the high tension cable, and then start the engine (idling).
Turn the steering wheel to the left and then to the right, until there are no air bubbles in the oil reservoir.
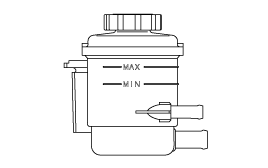
Confirm that the fluid is not milky and that the level is between "MAX" and "MIN" marks on the reservoir.
Check that there is a little change in the fluid level when the steering wheel is turned left and right.
If the fluid level varies 5mm (0.2 in.) or more, bleed the system again.
If the fluid level suddenly rises after stopping the engine, further bleeding is required.
Incomplete bleeding will produce a chattering sound in the pump and noise in the flow control valve, and lead to decreased durability of the pump.
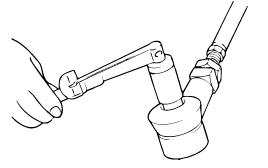
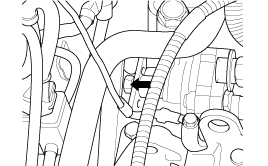
Disconnect the pressure hose from the pump. Connect the special tool between the pump and the pressure hose as illustrated.
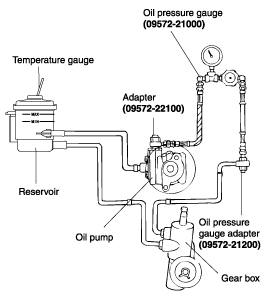
Bleed the air, and then start the engine and turn the steering wheel several times so that the fluid temperature can rise to approximately 50-60°C (122-132°F) operating temperature.
Increase the engine speed to 1,000 ± 100 rpm.
Close the shut-off valve of the special tool and measure the fluid pressure to confirm that it is within the standard value range.
Standard value
Relief pressure :
8.3~8.8 MPa (85~90 kg·cm², 1209~1280 psi)
Do not keep the shut-off valve on the pressure gauge closed for more than ten seconds.
If the fluid pressure is not within the standard value range, overhaul the oil pump.
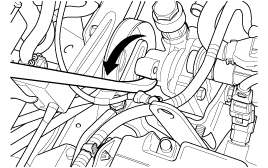
Remove the special tools, and tighten the pressure hose to the specified torque.
Tightening torque
55~65 Nm (550~650 kg·cm, 40.6~47.9 lb·ft)
Bleed the system.
