Remove the cover of fuse box.
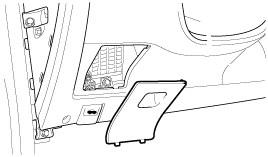
When removing the ECM, it is necessary to remove the crash pad lower panel before, so be careful not to scratch the crasd pad.
If the MIL(Malfunction Indicator Lamp) is turned ON and any DTC is stored in ECM memory, verify the code with HI-SCAN and record it.
Disconnect the negative terminal of battery.
Be careful not to scratch the crash pad.
Raise up the steering column.
Remove the door scarf trim and cowl side trim. (Refer to "Interor Trim")
Remove the cover of fuse box.

Loosen two mounting bolts and two screws.
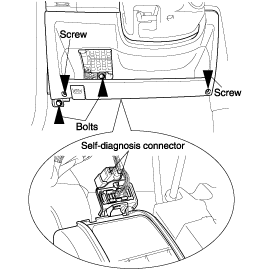
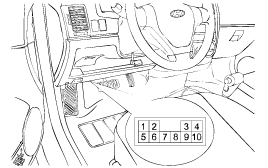
Disconnect the connector of DLC and the relief cable of hood and remove the crash pad lower panel.
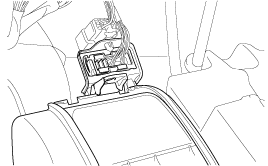
Remove the ECM.
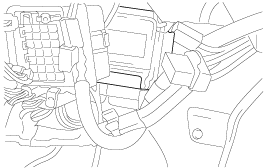
Installation is the reverse of removal procedure.
Reduce the internal pressure of the fuel lines and hoses by completing the following operations.
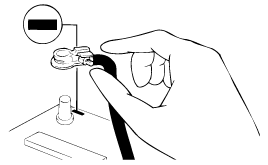
After removing the rear seat cushion, disconnect the fuel pump harness.
Start the engine. Allow it to stop by itself, then turn the ignition switch OFF.
Disconnect the battery negative (-) terminal.
Connect the fuel pump harness connector.
Remove the eye bolts while holding the fuel filter nuts securely.
Cover the fuel filter with a shop towel to avoid residual gasoline from splashing.
Remove the fuel filter mounting bolts, then remove the fuel filter from the fuel filter clamp.
After replacing the fuel filter, check for fuel leaks.
Disconnect the vapor hoses, and then remove the overfill limiter.
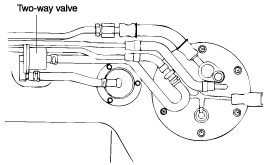
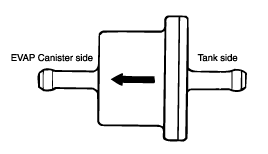
Connect the overfill limiter in the correct direction.
Remove the fuel tank cap to lower the fuel tank's internal pressure.
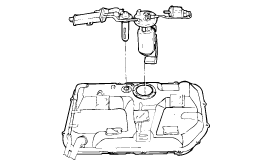
Remove the fuel sender installation screws, then remove the fuel sender from the fuel tank.
Before adjusting, check that the spark plugs, injectors, idle speed control actuator (ISC actuator), compression etc. are normal.
Engine coolant temperature is 80 to 95°C (176 to 205°F).
Lights, electric cooling fan and all accessories are off.
Transaxle is in neutral ("P" or "N" range for A/T vehicles).
Steering wheel is in a straight forward position (Vehicles with power steering).
Install a tachometer to the primary coil side or connect the scan tool to the data link connector.
Start and run the engine at curb idle speed.
Run the engine for more than 5 seconds at an engine speed of 2,000 to 3,000 rpm. Then, run the engine at idle for 2 minutes.
Read the idling rpm.
Idle speed : 700 ± 100 rpm
Turn the ignition switch OFF.
Apply battery voltage to the fuel pump drive connector to check that the pump operates.
The fuel pump is an in-tank type and its operation is hard to hear without removing the fuel tank cap.
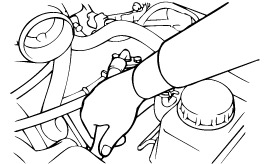
Pinch the hose to check that fuel pressure is felt.
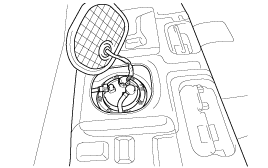
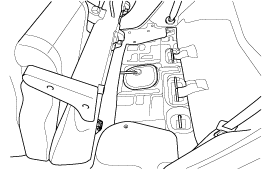
Fold the back of rear seat forward and then push up the folded rear set forward.
Then open the inspection panel of the fuel pump with screw driver.
To reduce the internal pressure of the fuel lines and hoses, first start the engine with the fuel pump disconnected and wait until it stops by itself.
Be sure to reduce the fuel pressure before disconnecting the fuel main pipe and hose, otherwise fuel will spill out.

Disconnect the battery negative (-) terminal and then connect the fuel pump harness connector.
Using the fuel pressure gauge adapter (09353-24000, 09353-24100, 09353-38000), install the fuel-pressure gauge to the fuel filter. Tighten the bolt to the specified torque.
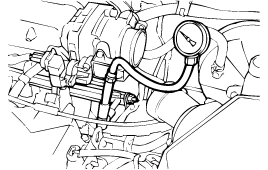
Tightening Torque
Fuel pressure gauge to fuel filter :
25 ~ 35 Nm (250 ~ 350 kg·cm, 18 ~ 26 lb·ft)
Connect the battery's negative (-) terminal.
Apply battery voltage to the terminal for the pump drive and activate the fuel pump. Then, with fuel pressure applied, check that there is no fuel leak from the pressure gauge or connections.
Start the engine and let it idle.
Measure the fuel pressure.
350 kPa (3.5 kg/cm², 49.8 psi)
If the result of the measurements made in steps (7) and (8) are not within the standard value, use the table below to determine the probable cause, and make the necessary repairs.
Condition | Probable cause | Remedy |
Fuel pressure too low | Clogged fuel filter. Fuel leak on the return side, caused by poor seating of the fuel-pressure regulator. | Replace fuel filter. Replace fuel pump. |
Fuel pressure too high | Sticking fuel-pressure regulator. Clogged or bent fuel return hose or pipe. | Replace fuel pump. Repair or replace hose or pipe. |
Stop the engine and check for a change in the fuel pressure gauge reading, which should hold for approximately 5 minutes. If the gauge indication drops, observe the rate of drop. Determine and remove the causes according to the following table.
Condition | Probable cause | Remedy |
Fuel pressure drops slowly after engine is stopped | Injector leak. | Replace injector. |
Fuel pressure drops immediately after engine is stopped | The check valve within the fuel pump is open. | Replace fuel pump. |
Reduce the pressure in the fuel line.
Disconnect the hose and the gauge.
Cover the hose connection with a shop towel to prevent splashing of fuel caused by residual fuel pressure in the fuel line.
Replace the O-ring at the end of the hose.
Connect the fuel hose to the delivery pipe and tighten with the specified torque.
Check for fuel leaks.