2.
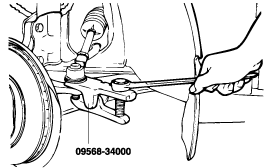
Using the special tool (09568-34000), disconnect the tie rod end ball joint.
Remove the front wheel and tire.
Using the special tool (09568-34000), disconnect the tie rod end ball joint.
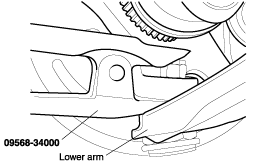
Using the Special Tool (09568 - 34000), disconnect the lower arm ball joint from the lower arm.
Remove the strut lower mounting bolts(2).

Remove the lower arm bushing (A) and bushing (G) mounting bolts(2).
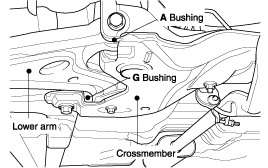
Remove the lower arm assembly.
Tighten the components below to the specified torque as follows.
Items | Torque Nm (kgfcm, lbft) |
Wheel nut | 90~110 (900~1100, 67~82) |
Lower arm ball joint nut | 60~72 (600~720, 43~52) |
Lower arm bushing (A) | 95~120 (950~1200, 70~88) |
Lower arm bushing (G) | 130~150 (1300~1500, 96~111) |
Stabilizer link nut | 35~45 (350~450, 26~33) |
Using a flat-tipped screwdriver, remove the dust cover from the lower arm ball joint.
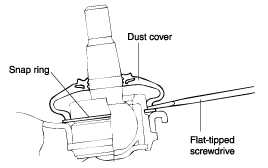
Remove the snap ring.
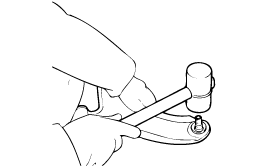
Using a plastic hammer, tap the ball joint out of the lower arm.
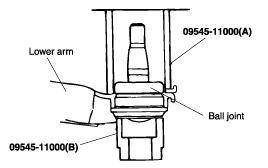
Using the Special Tools (09545-11000 A/B), press-fit the ball joint into the lower arm assembly.
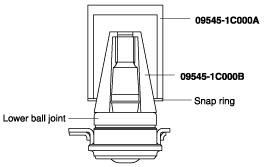
Using the special tools (09545-1C000 A/B) install the snap ring.
Using the Special Tool (09545-11000 A/B), install the dust cover.

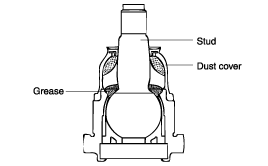
Apply Recommended grease to the dust cover inner side and stud.
Recommended grease :
Variant R-2 grease or poly lub gly 801K
Check the bushing for wear and deterioration.
Check the lower arm for bending or breakage.
Check the ball joint dust cover for cracks and damage.
Check all bolts for damage and deformation.
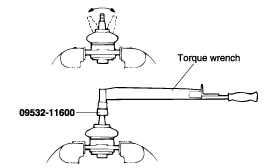
Check the lower arm ball joint for rotating torque.
If there is a crack in the dust cover, replace the ball joint assembly.
Shake the ball joint stud several times.
Measure the balll joint rotating torque.
Standard value
3.5~10 Nm (35~100 kgf·cm, 2.6~7.4 lb·in)
If the rotating torque is above the upper limit of the standard value, replace the ball joint assembly.
Even if the rotating torque is below the lower limit of the standard value, the ball joint may be reused unless it has drag and excessive play.
