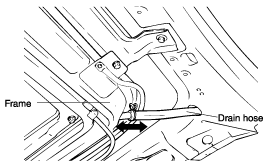
Disconnect the drain hose.
Prior to the removal of the sunroof assembly, remove the following items.
Front seat
Rear seat
Overhead console
Front pillar trim
Front door scuff trim
Rear door scuff trim
Front seat belt
Center pillar lower, upper trim
Rear seat belt lower anchor
Transverse trim
Rear center seat belt anchor
Luggage side trim
Rear pillar trim
Sunvisor and Grab handle
Headlining
Disconnect the drain hose.

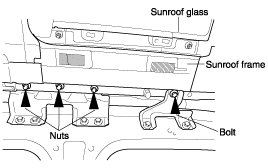
After loosening the sunroof assembly mounting nuts(3EA) and one bolt, remove the sunroof assembly.
TORQUE : 4 ~ 6 Nm (40 ~ 60 kg·cm,3 ~ 4 lb·ft)
Installation is the reverse of removal.
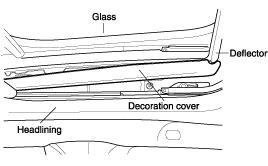
Open the sunshade, then remove the decoration cover using a screwdriver.
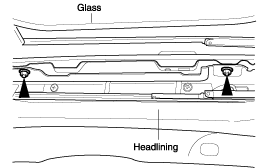
After loosening the glass mounting nuts(right side:2EA, left side:2EA), remove the glass.
TORQUE : 4 ~ 6 Nm (40 ~ 60 kg·cm,3 ~ 4 lb·ft)
Installation is the reverse of removal.
Loosen the motor mounting screws(3EA), disconnect the controller connector, and remove the motor.
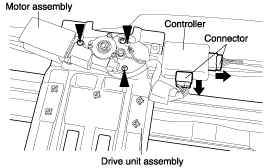
Remove the controller.
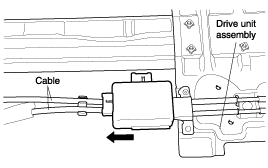
After loosening the drive unit assembly mounting screws(12EA), remove the drive unit assembly.
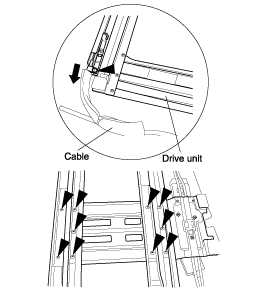
After removing the stopper in the end of the rail, remove the sunshade.
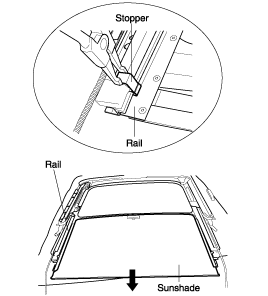
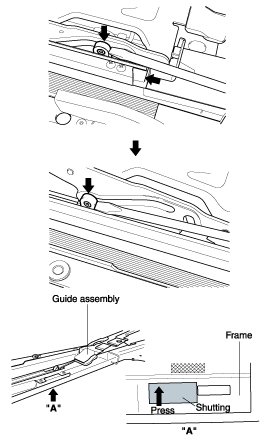
Tilt the guide assembly by pushing the slighter with a screwdriver, push up the shutting by hand through the hole in the reverse side of rail, and then remove the guide assembly. Keep hand pushing up the shutting until hand doesn't reach.
Remove the deflector mounting screws.(right side:2EA, left side:2EA) Remove the deflector.
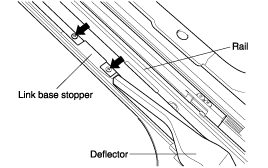
Install the deflector.(After engaging the clip, connect the link base stopper)

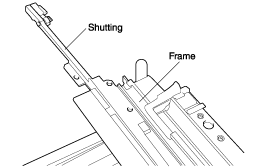
Insert the shutting into the rail.
Do not confuse the left and right sides.
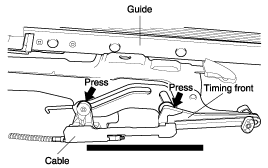
Install the slide to the cable. Move the timing front edge to be aligned with the slide of the guide assembly.
Face the protrusion of "Shoe A" upward, the cushion of "Shoe B" downward.
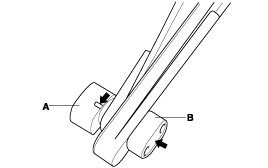
Insert the protrusion of the slide to the grove of the shutting.
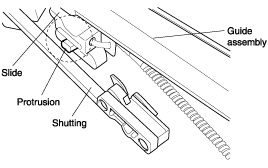
If the steps 3,4,5 are O.K, insert the guide assembly to the rail and the inside pin to the lowest rail.
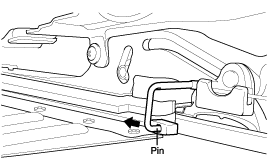
Fully insert the guide assembly into the rail. Completely push the slide until it touches the timing front using a screwdriver.
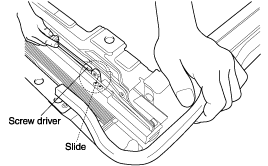
Install the sunshade and insert the stopper.
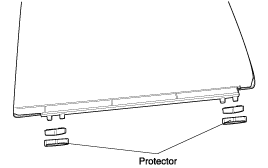
When installing the sunshade, the protector should be inserted securely.
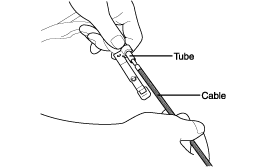
Insert the motor cable into the drive unit assembly tube.
Install the drive unit to the frame.
Install the motor and controller and engage the connector.
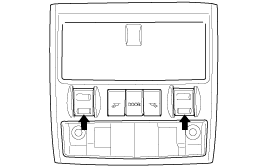
Always initiates the sunroof in the following condition.
● After manual operation ● After parts replacement including motor, controller, harness ● Malfunction of sunroof wiring ● Abnormal operation after battery and fuse replacement |
Follow the general operation produce for inital sefting after reassembliny.
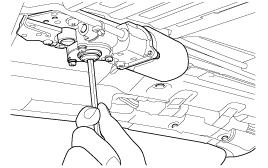
Operation
● With the sunroof closed, inserta hexagonal wench into the motor and rotote it clockwise slowly. |
Operation cases
● When opening or closing the sunroof at the motor and controller malfunction state. for example : rainy day, driving on a highway, etc. |