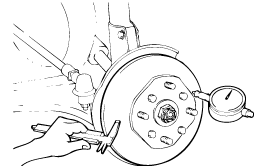
Inspect the disc by using a caliper and a dial gauge.
Thickness of disc mm (in.)
Standard value : 19 (0.75)
Service limit : 17 (0.67)
: 0.04 (0.002)
: 0.01 (0.0004)

Using a micrometer, measure the disc thickness at eight positions approximately 10mm from the outer edge of the disc and at 45° intervals.
If you substract the minimum of measurements from the maximum, you get the difference of the disc thickness.
When measuring the disc runout, fix a dial gauge approximately 5mm from the outer edge of the disc, and rotate the disc 360°.
At this time, if you subtract the minimum of measurements from the maximum, you get the disc runout.
