1.
After disengaging the 3 trim mounting clips, remove the front door scuff trim.
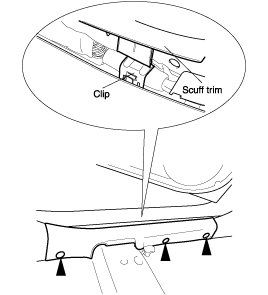
Prior to removing the trims, remove the outside weatherstrip.
After disengaging the 3 trim mounting clips, remove the front door scuff trim.
Installation is the reverse of removal.
3 - DOOR
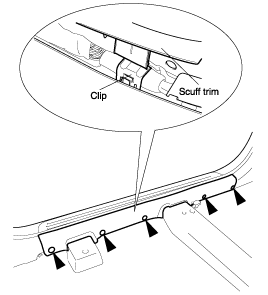
After disengaging the 3 trim mounting clips, remove the front scuff trim.
Installation is the reverse of removal.
Remove the front door scuff trim.
After disengaging the cowl side trim mounting clip, remove the cowl side trim.
Installation is the reverse of removal.
After removing the rear scuff trim mounting screws(3EA) and the clip, remove the door scuff trim.
Installation is the reverse of removal.
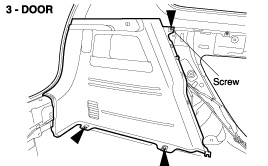
3 - DOOR
After removing the rear scuff trim mounting screws(3EA), remove the rear scuff trim.

Installation is the reverse of removal.
Remove the front door scuff trim. ("See Page BD-50")
Remove the rear door scuff trim. ("See Page BD-50")
After removing the front seat belt lower anchor bolt and clip, remove the center pillar lower trim.
Installation is the reverse of removal.
Remove the front door scuff trim. ("See Page BD-52")
Remove the rear door scuff trim. ("See Page BD-53")
Remove the center pillar lower trim. .("See Page BD-53")
Remove the front seat belt upper anchor cover, loosen the anchor mounting bolt, and remove the center pillar upper trim.
Installation is the reverse of removal.
Remove the front scuff trim. ("See Page BD-52")
Remove the rear scuff trim. ("See Page BD-53")
Loosen the sliding bar mounting bolt cover.
Loosen the rear seat lower anchor mounting bolt and screw, then remove the quarter inner trim.
Detach the mounting wire, remove the covering self trim by pulling it upward.
Installation is the reverse of removal.
Remove the covering self trim.
Remove the luggage cover mat.
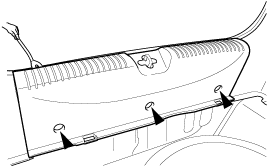
After loosening the transverse trim mounting screws(3EA), remove the transverse trim.
Installation is the reverse of removal.
Remove the rear door scuff trim. ("See Page BD-53")
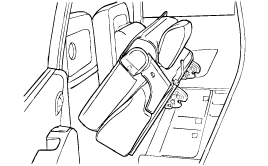
Raise the rear seat.
Remove the luggage cover mat.
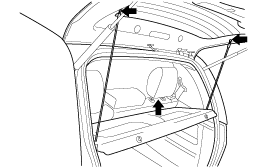
Remove the rear transverse trim.
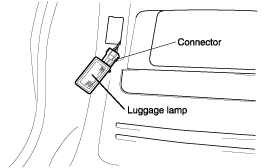
Remove the trunk lamp.
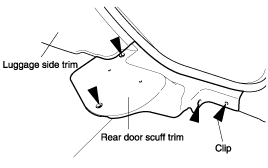
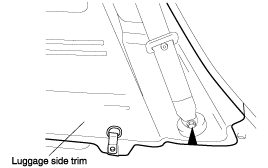
Remove the trunk floor mounting bolts, loosen the rear seat belt lower anchor bolt, and remove the luggage side trim using a trim remover.
Installation is the reverse of removal.
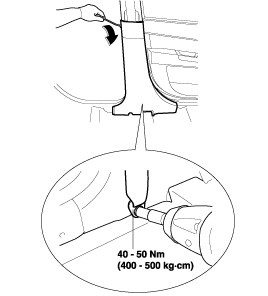
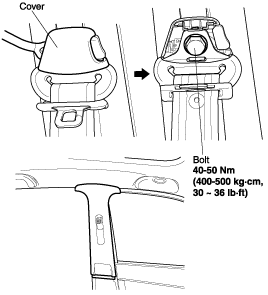
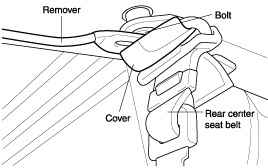
Remove the rear seat belt lower anchor.
Remove the rear center seat belt anchor.
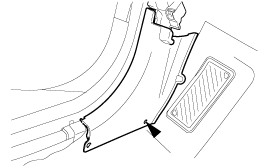
Remove the rear pillar trim using a trim remover.
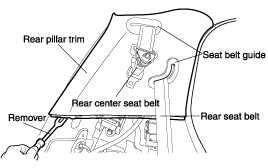
Installation is the reverse of removal.
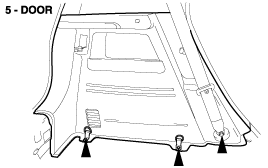
3 - DOOR
Remove the rear scuff trim. ("See Page BD-53")
Remove the quarter inner trim. ("See Page BD-52")
Remove the rear transverse trim. ("See Page BD-55")
Remove the luggage side trim. ("See Page BD-55")
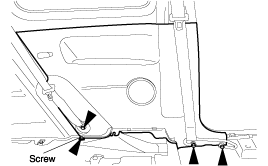
Loosen the 2 screws, loosen the rear center seat belt anchor mounting bolt, and then remove the rear pillar trim.
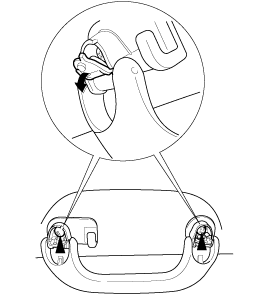
Loosen the sunvisor mounting screws(2EA) and holder mounting screw, then remove the sunvisor and holder.
Installation is the reverse of removal.
After loosening the grab handle mounting screws(2EA), remove the grab handle.
Installation is the reverse of removal.
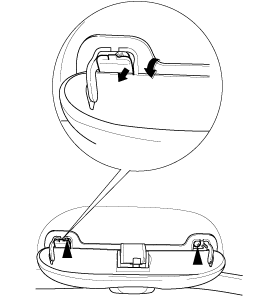
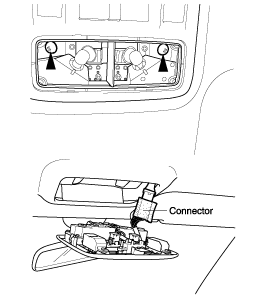
Remove the ceiling light cover.
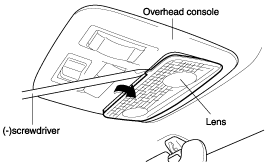
Loosen the 2 mounting screws, disconnect the connector, and then remove the overhead console.
Installation is the reverse of removal.
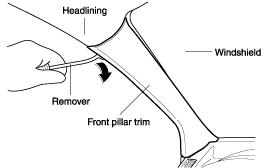
Prior to removing the headlining, remove the following items.
Front seat
Rear seat
Overhead console
Front pillar trim
Front door scuff trim
Rear door scuff trim
Front seat belt
Center pillar lower, upper trim
Rear seat belt lower anchor
Transverse trim
Rear center seat belt anchor
Luggage side trim
Rear pillar trim
Sunvisor and Grab handles
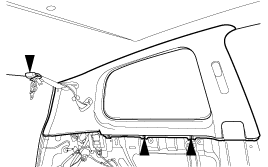
After detaching the headlining mounting clips(2EA), remove the headlining.
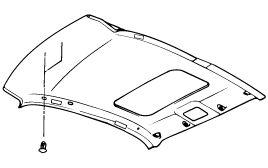
Installation is the reverse of removal.
