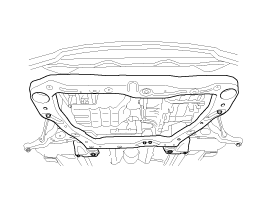
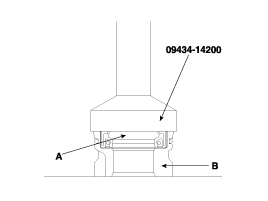
2.
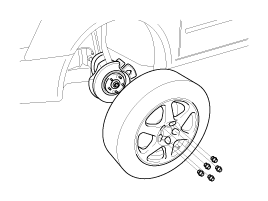
Remove the front wheel and tire(A) from front hub(B).
caution
Be careful not to damage the hub bolts(C) then remove the front wheel and tire(A).
Loosen the wheel nuts slightly.
Raise the front of the vehicle, and make sure it is securely supported.
Remove the front wheel and tire(A) from front hub(B).
Be careful not to damage the hub bolts(C) then remove the front wheel and tire(A).
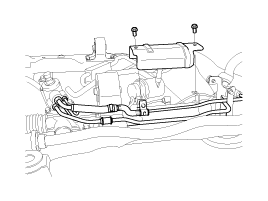
Drain the power steering fluid.
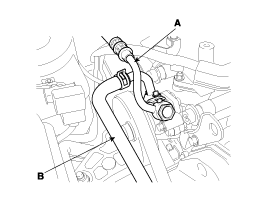
Disconnect the pressure hose and the retrun tube.
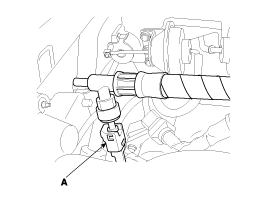
Remove the pressure sensor connector(A) from the pressure hose.
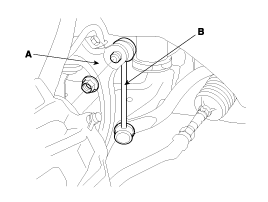
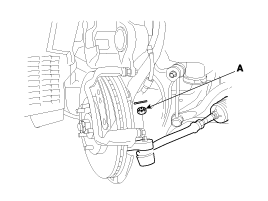
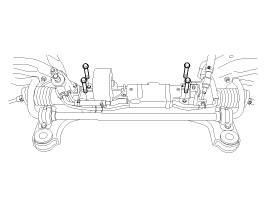
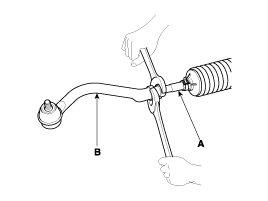
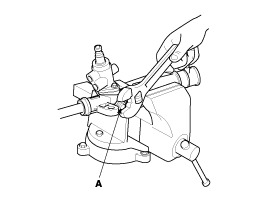
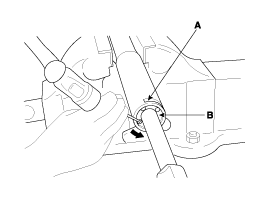
Remove the nut(B) from the stabilizer bar link(A).
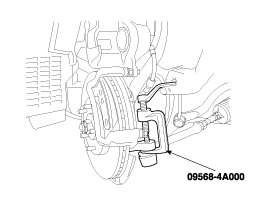
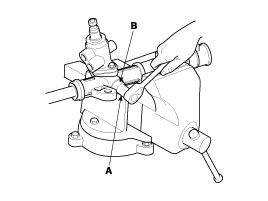
Using the specil tool(09568-4A000) disconnect the tie rod end from the knuckle arm.
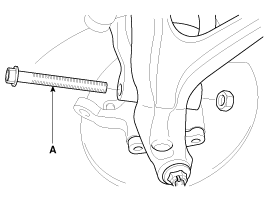
Remove the lower arm mounting bolts(A).

Remove the front fork and the knuckle ball joint from the front lower arm.
Be careful not to damage to the aluminium lower arm.
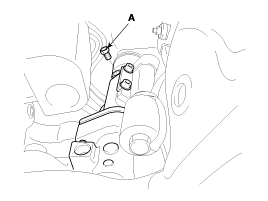
Remove the joint assembly connecting bolt.
Keep the neutral-range to prevent the damage of the clock spring inner cable when you handlethe steering wheel.
Remove the connecting bolts of front and rear roll stopper.

Remove the mounting bolts(10EA) of cross member complete assembly.
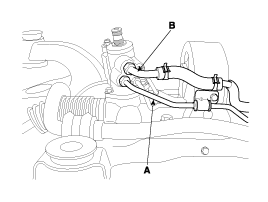
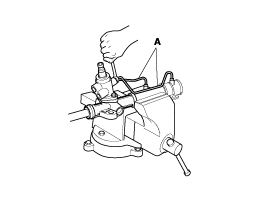
Remove the heat protecting cover(A) mounting bolts(B).
Remove the steering gear box mounting bolts and remove the steering gear box assembly and the mounting rubber.
When removing the gear box, pull it out carefully and slowly to avoid damaging the boots.
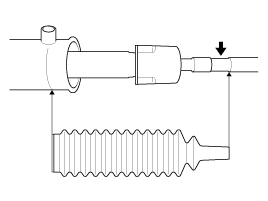
Disconnect the pressure hose and the retrun tube.
Be sure to connect between a tube and a hose asshown in the illustration.
Installation is reverse of removal.
Tightening Torque Nm(kgf·m, lb-ft)
Pressure hose to gear box :
12~18(1.2~1.8, 8.6~13)
Return tube to gear box :
12~18(1.2~1.8, 8.6~13)
Tie rod end lock nut :
50~55(5~5.5, 36.1~39.7)
Pinion and valve assembly to self locking nut :
20~30(2~3, 14.4~21.6)
lock nut :
50~70(5~7, 36.1~50.6)
Tie rod end self locking nut :
24~34(2.4~3.4, 17.3~24.5)
Mounting bracket to crossmember :
60~80(6~8, 43.3~57.8)
After installation, bleed the air in the power steering system(See page ST-11).
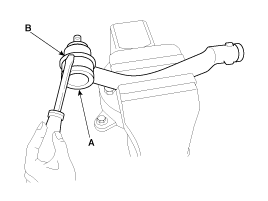
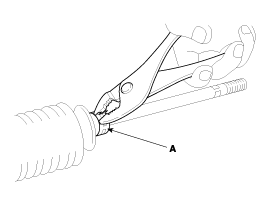
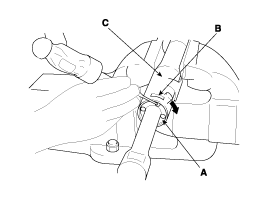
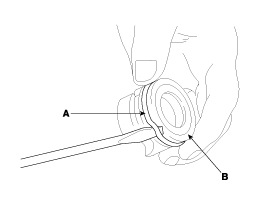
Remove the tie rod end(B) from the tie rod(A).
Remove the dust cover(B) from the ball joint(A).
Remove the bellows band(A).
Remove the bellows clip(A).
Pull the bellows out toward the tie rod.
Check for rust on the rack when the bellows are replaced.
Remove the feed tube(A) from the rack housing.
While moving the rack slowly, drain the fluid from the rack housing.
Unstake the tab washer(A) which fixes the tie rod(B) and rack(C) with a chisel.
Remove the tie rod(B) from the rack(A).
Remove the tie rod(B) from the rack(A), takingcare not to twist the rack.
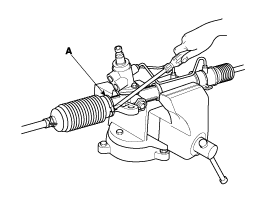
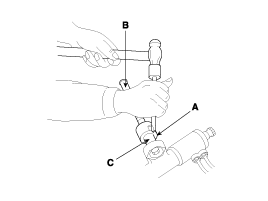
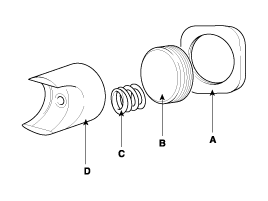
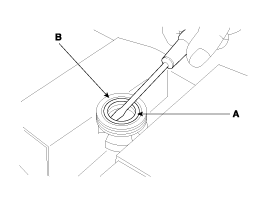
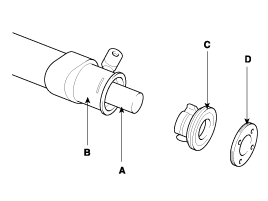
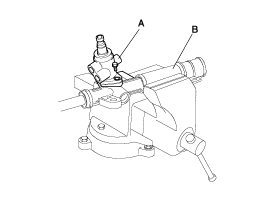
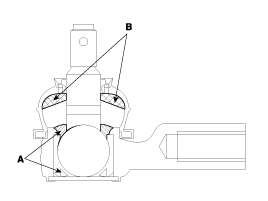
Remove the yoke plug locking nut(A).
Remove the yoke plug(B) with a 14mm socket(A).
Remove the lock nut(D), yoke plug(C), rack support spring(B) and rack support yoke(A) from the gear box.
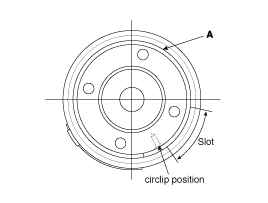
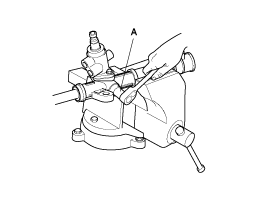
When the end of the circlip comes out of the notchedhole of the housing rack cylinder, turn the rack stopper counterclockwise and remove the circlip.
Be careful not to damage the rack.
When the end of the circlip comes out of the notched hole of the housing rack cylinder, turn the rack stopper counterclockwise and remove the circlip.
Be careful not to damage the rack.
Remove the rack bushing and rack from the rack housing.
Remove the O-ring(A) from the rack bushing(B).
Remove the oil seal(B) from the rack bushing(A).
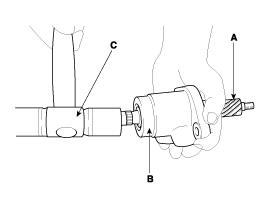
Remove the valve body from the valve body housing with a soft hammer.
Using the special tool, remove the oil seal and ballbearing from the valve body housing.
Remove the oil seal and O-ring from the rack housing.
Be careful not to damage the pinion valve cylinderinside of the rack housing.
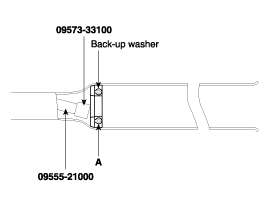
Using the special tool(09573-33100, 09555-21000),remove the oil seal(A) from the rack housing.
Be careful not to damage the rack cylinder insideof the rack housing.
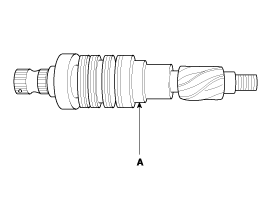
Rack
Check for rack tooth face damage or wear.
Check for oil seal contact surface damage.
Check for rack bending or twisting.
Check for oil seal ring damage or wear.
Check for oil seal damage or wear.
Pinion valve
Check for pinion gear tooth face damage or wear.
Check for oil seal contact surface damage.
Check for seal ring damage or wear.
Check for oil seal damage or wear.
Bearing
Check for seizure or abnormal noise during abearing rotation.
Check for excessive play.
Check for missing needle bearing rollers.
Others
Check for damage of the rack housing cylinder bore.
Check for boot damage, cracking or aging.
Apply the specified fluid to the entire surface of the rack oil seal.
Recommended fluid : PSF-3
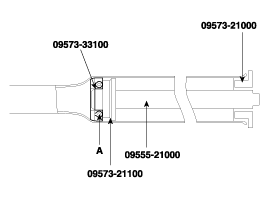
Install the backup washer and oil seal(A) to the specified position in the rack housing.
Apply the specified fluid to the entire surface of the rack bushing oil seal.
Recommended fluid : PSF-3
Install the oil seal(A) in the rack bushing(B).
Apply the specified fluid to the entire surface of the O-ring and install it in the rack bushing.
Apply the specified grease to the rack teeth.
Recommended grease
Multipurpose grease SAE J310a NLGI No.2
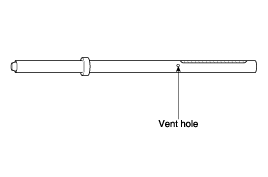
Do not plug the vent hole(A) in the rack with grease.
Insert the rack(A) into the rack housing(B) and install the rack bushing(C).
Push in the rack stopper until the circlip groove of the rack stopper is aligned with the notched hole of the rack housing. Then, install the circlip while turning the rack stopper.
The circlip should not be visible through the notched hole of the rack housing.
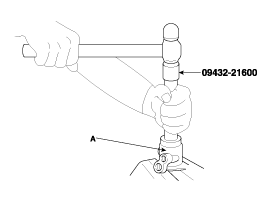
Using special Tool(09432–21600), install the oil seal and the ball bearing in the valve body(A).
After applying the specified fluid and grease to the pinion valve assembly(A), install it in the rack housing assembly.
After applying the specified fluid to the oil seal, install it inthe rack housing and fix the valve body assembly(A) and O-ring in the gear box(B).
Install the rack support yoke(A), rack supportspring(B), yoke plug(C) and lock nut(D) in the ordershown in the illustration. Apply semi-drying sealantto the threaded section of the yoke plug before installation.
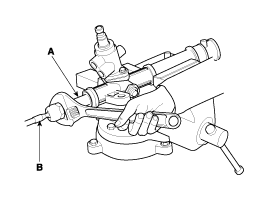
With the rack placed in the center position, attach the yoke plug to the rack housing. Tighten the yokeplug to 12 Nm (120 kg·cm, 8.9 lb·ft), with a 14mm socket(A). Loosen the yoke plug approximately from 30° to 60° and tighten the yoke nut to the specified torque.
Tightening Torque Nm(kgf·m, lb-ft) :
50 ~ 70(5 ~ 7, 37 ~ 52)
Tighten the feed tube(A) to the specified torque and install the mounting rubber using adhesive.
Apply the specified grease to the bellows mounting position (fitting groove) of the tie rod.
Recommended grease : Silicone grease
Install the new attaching band to the bellows.
When the bellows are installed, a new band must beused.
Install the bellows in position, taking care not to twist it.
Fill the dust cover inner side and lip with the specified grease, and fix the dust cover in position with the clipring attached in the groove of the tie rod end.
Recommended grease
A : POLY LUB GLY 801K or equivalent
B : SHOWA SUNLIGHT MB2 or equivalent
Dust cover inner side and lip : THREE BOND
Install the tie rod(A) to the tie rod end(B)..
Check for total pinion preload.

