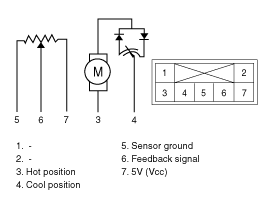
Verify the temperature control actuator operates to the hot position when connecting 12V to the terminal 3 and grounding terminal 4.
Verify that the temperture control actuator operates to the cool position when connecting in the reverse.

Verify the temperature control actuator operates to the hot position when connecting 12V to the terminal 3 and grounding terminal 4.
Verify that the temperture control actuator operates to the cool position when connecting in the reverse.

Check the voltage between terminals 5 and 6.
Door position | Voltage (5-6) | Error detecting |
Max. cooling | 0.3 ± 0.15V | Low voltage : 0.1V or less |
Max. heating | 4.7 ± 0.15V | High voltage : 4.9V or more |
It will feedback current position of actuator to controls.
Verify the temperature control actuator operates to the hot position when connecting 12V to the terminal 3 and grounding terminal 4.
Verify that the temperture control actuator operates to the cool position when connecting in the reverse.

Check the voltage between terminals 5 and 6.
Door position | Voltage (5-6) | Error detecting |
Max. cooling | 0.3 ± 0.15V | Low voltage : 0.1V or less |
Max. heating | 4.7 ± 0.15V | High voltage : 4.9V or more |
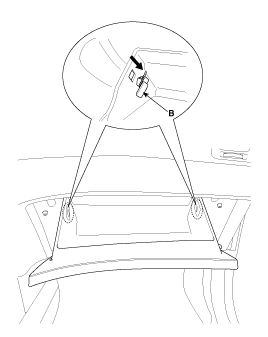
Remove the glove box (Refer to BD group).

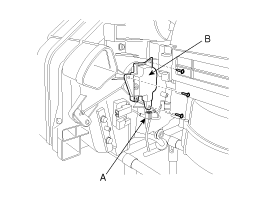
Disconnect the temperature control actuator connector (A) after removing the air duct.
Loosen the mounting screw and then remove the temperature control actuator (B).

Installation is the reverse order of removal.
Disconnect the negative (-) battery terminal.
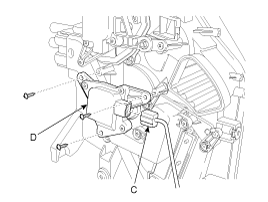
Disconnect the connector (C) of temperature control actuator.
Loosen the mounting screw and then remove the temperature control actuator(D).

Installation is the reverse order of removal.