1.
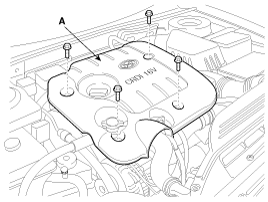
Remove the engine cover(A).
Make sure jacks and safety stands are placed properly.
Make sure the vehicle will not roll off stands and fall while you are working under it.
Use fender covers to avoid damaging painted surface.
Unplug the wiring connectors carefully while holding the connector portion to avoid damage.
Mark all wiring and hoses to avoid misconnection.
Also, be sure that they do not contact other wiring or hoses or interfere with other parts.
Remove the engine cover(A).
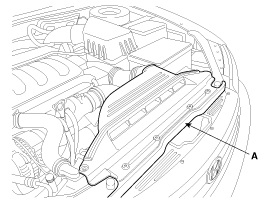
Remove the air duct(A).
Drain engine coolant and remove the radiator cap to speed draining.
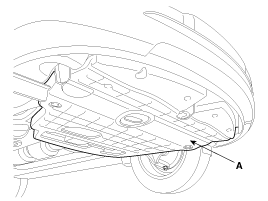
Remove the under cover(A).
Remove the coolant plug(A).
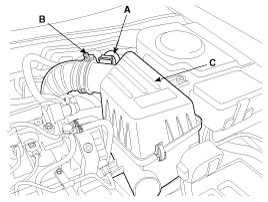
Remove the air cleaner assembly.
Remove the Air Flow Sensor(AFS) connector(A).
After removing the air intake hose clamp(B), loosen the air cleaner assembly mounting bolts.
Remove the air cleaner assembly(C).
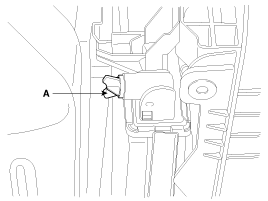
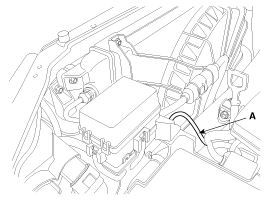
Remove the battery tray(A).
Remove the fuse box cover.
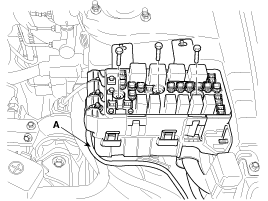
After remove the LH shock absorber cover, Disconnect the terminals(A) from the fuse box.
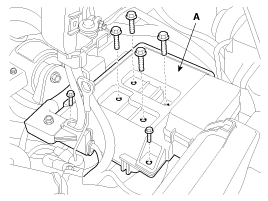
Remove the fuse box(A).

Remove the engine wiring(A) and the connector wiring(B).

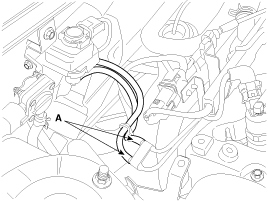
Disconnet the Engine Control Unit(ECU) connector(A,B).
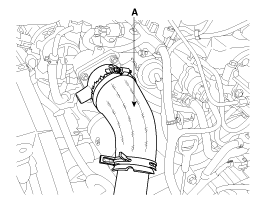
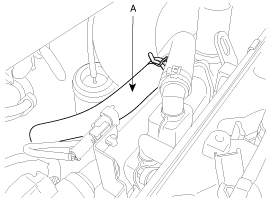
Remove the intercooler intake manifold hose(A).
Remove the solenoid valve vacuum hose(A).
Remove the fuel hose(A).
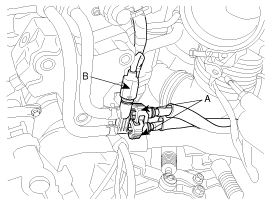
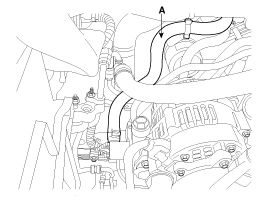
Remove the break booster vacuum hose(A) and the heater hose(B).
Remove the heater hose (A) form the EGR cooler.
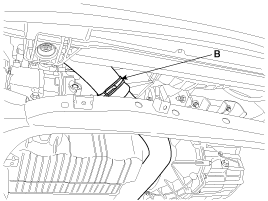
Remove the radiator upper hose(A) and coolant bleed hode(B).
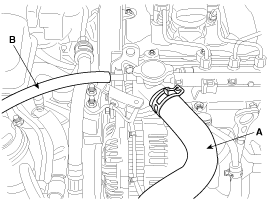
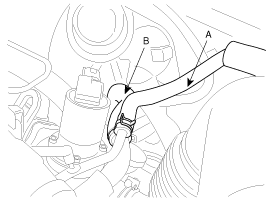
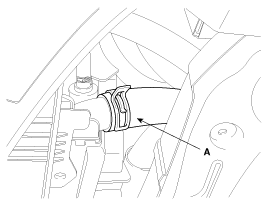
Remove the radiator lower hose(A) and intercooler lower pipe(B).
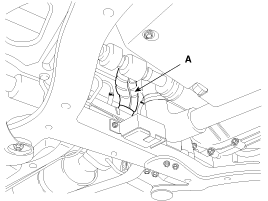
Remove the front connector(A).
Disconnect the transaxle wire harness connectors and control cable.(See TR group)
Drain the power steering oil.
Disconnet the power steering oil hose(A).(See ST group)
Recovering refrigerant and remove the high & low pressure pipe.
(See HA group - air conditioner compressor)
Remove the steering column universal joint mounting bolt.
Remove the front wheels and tires.
Remove the stabilizer bar link nut.(See SS group- front strut)
Remove the front muffler(A).
Install the jack for supporting engine and transaxle assembly
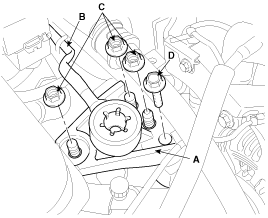
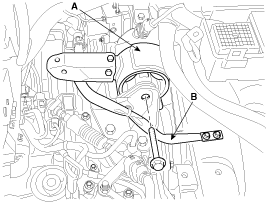
Remove the engine mounting bracket(A) and the ground cable(B).
Tightening torque :
(C,D) : 63.7 ~ 83.4N.m (6.5 ~ 8.5kgf.m, 47.0~ 61.5lb-ft)
(B): 7.8~11.8N.m(0.8~1.2kgf.m, 5.8~8.7lb-ft)
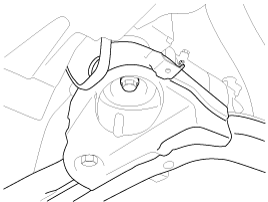
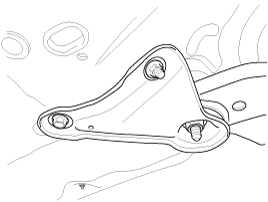
Remove the transaxle mounting bracket (A) and the ground cable(B).
Tightening torque :
63.7 ~ 83.4N.m (6.5 ~ 8.5kgf.m, 47.0~ 61.5lb-ft)
Remove the sub frame mounting bolts and nut.
Tightening torque :
63.7 ~ 83.4N.m (6.5 ~ 8.5kgf.m, 47.0~ 61.5lb-ft)
Install the engine in the reverse order of removal.
Reinstall the mount bolts/nuts in the following sequence.
Failure to follow these procedures may cause excessive noise and vibration, and reduce bushing life.
Install the sub frame installation bolt.
Tighten the engine and transmission mounting bolts.
Connect the power steering oil hoses.
Ionnect the power steering oil hoses.
Install the front tires/wheels and splash shield.
Connect the air condition hoses.
Install the transmission links.
Connect the fuel hoses.
Connect the engine wire harness connectors.
Connect the radiator upper and lower hoses.
Connect the heater hoses.
Connect the hose to the reservoir tank.
Connect the intercooler hoses.
Install the air cleaner and the battery.
Perform the following :
Clean the areas where the driveshaft contact the transmission thoroughly with solvent or carburetor cleaner, and dry with compressed air.
Check that the snap rings on the ends of the driveshaft click into place.
