1.
Remove the wheel and tire.

Remove the wheel and tire.
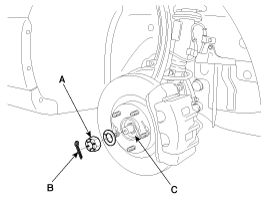
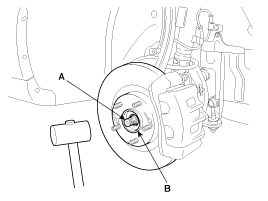
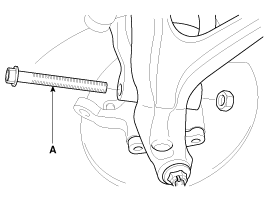
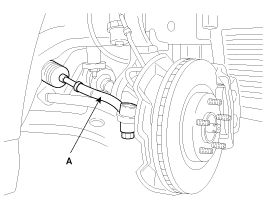
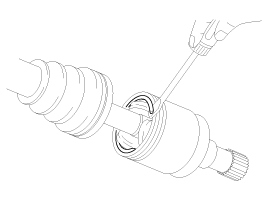
Remove the spilt pin(B) and driveshaft castle nut(A) and washer from the front hub(C).
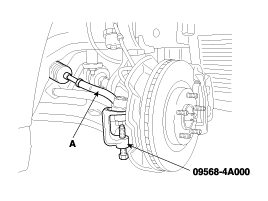
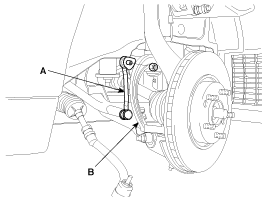
Using the special tool (09568-4A000), disconnect the tie rod end(A) from the knuckle.
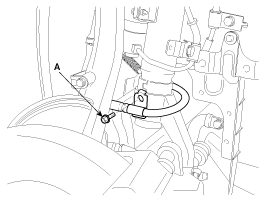
Remove the 2 bolts(A) and disconnect the ball joint from the knuckle.

Disconnect the brake hose(A) from the knuckle.
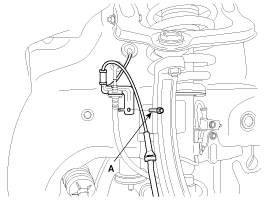
Disconnect the wheel speed sensor(A) from theknuckle.
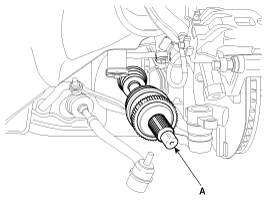
Using a plastic hammer, disconnect the driveshaft(A) from the axle hub(B).
Removing the driveshaft(A) from the transaxle by using a pry bar(C) as shown below.
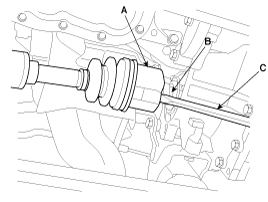
Use a pry bar so you do not damage the joint.
If you pull the driveshaft by excessive force,components inside the joint can be displaced causing the boot to be torn and the bearing tobe damaged.
Plug the transaxle case opening with an oil seal cap in order to avoid contamination.
Support the driveshaft properly.
Replace the retainer ring each time the driveshaft is removed from the transaxle case.
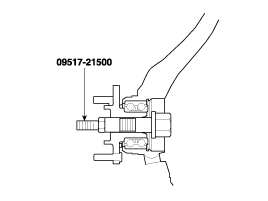
While loosening the driveshaft nut, do not allow vehicle weight to be concentrated on the wheel bearing. If the vehicle moves, hold thewheel bearing using the special tool.
[RH]
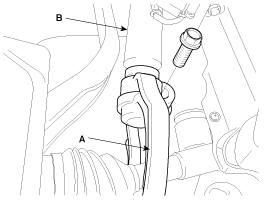
Remove the stabilzer link(A) from the fork(B).
Remove the fork(A) from the front lower arm.
Be careful not to damage to the aluminium lower arm.
Remove the fork(A) from the front strut assembly(B).
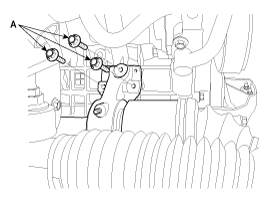
Remove the inner shaft cover(A) from the innershaft bracket(B).

Remove the inner shaft bracket mounting bolt(A).
Remove the front driveshaft assembly(A) with the inner shaft from the transaxle.
Do not try to disconnect the inner shaft from the driveshaft. Because they can not be disconnected once assembled.
Do not reuse the driveshaft which is disassembled from the innershaft.
Using the special tool (09432-11000), remove the tone wheel.
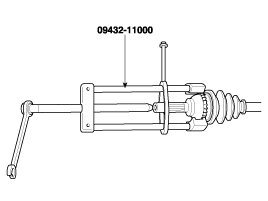
Replace the circlip with new ones after removal.
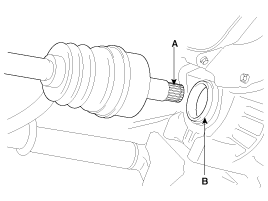
Apply gear oil on the drive shaft spliness(A) and the contacting surface of differential case oil seal(B).
After installation, check if the drive shaft cannot be removed.
[RH]
Install the inner shaft bracket mounting bolt(A).
Tightening Torque Nm(kgf·m, lb-ft) :
50 ~ 65(5 ~ 6.5, 36 ~ 47)
Install the inner shaft cover(A) by installing the cover mounting bolts(B).
Tightening Torque Nm(kgf·m, lb-ft) :
9 ~ 14(0.9 ~ 1.4, 6.5 ~ 10)
Install the front strut assembly(B) to the fork(A).
Tightening Torque Nm(kgf·m, lb-ft) :
60 ~ 80(6 ~ 8, 44 ~ 59)
Install the connecting bolt(A) between the fork and the lower arm.
Tightening Torque Nm(kgf·m, lb-ft) :
140 ~ 160(14 ~ 16, 101 ~ 118)
Install the stabilizer link(A) to the frok(B).
Tightening Torque Nm(kgf·m, lb-ft) :
100 ~ 120(10 ~ 12, 74 ~ 88)
Install the drive shaft into the knuckle.
Be careful not to damage the boot.
Install the knuckle in the lower arm assembly.
Tightening Torque Nm(kgf·m, lb-ft) :
100 ~ 120(10 ~ 12, 74 ~ 88)
Install the tie rod end(A) in the knuckle.
Tightening Torque Nm(kgf·m, lb-ft) :
24 ~ 34(2.4 ~ 3.4, 18 ~ 25)
Install the wheel speed sensor in the knuckle.
Install the brake hose bracket mounting bolt(A) to the front knuckle.
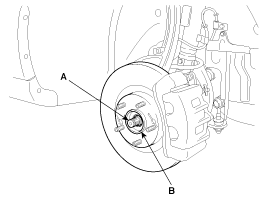
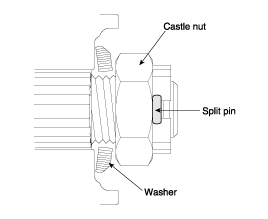
After installing the washer(B) with convex surface outward, install the lock nut(A) and the spilt pin(C).
Tightening Torque Nm(kgf·m, lb-ft) :
200~280 (20~28, 148~207)

Install the wheel and tire.
Tighten the components with the tightening torque.
Tightening Torque Nm(kgf·m, lb-ft)
Drivershaft castle nut
200 ~ 280(20 ~ 80, 148 ~ 207)
Lower arm and ball joint
100 ~ 120(10 ~ 12, 74 ~ 88)
Shock absorber lower mounting bolts
140 ~ 160(14 ~ 16, 101 ~ 118)
Tie rod end and knuckle
24 ~ 34(2.4 ~ 3.4, 18 ~ 25)
Replace the retainer ring every time the driveshaft is removed from the transaxle case.
Install the washer on driveshaft and tighten the nut as illustrated.
Install the split pin.
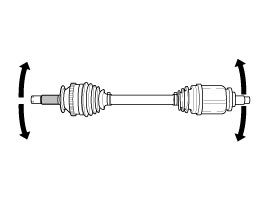
Check the driveshaft boots for damage and deterioration.
Check the splines for wear and damage.
Check the ball joints for wear and operating condition.
Check the boots for damage and deterioration.
Do not disassemble the BJ assembly.
The Driveshaft joint uses special grease. Do not subtitute with another type of grease.
The Boot band should be replaced with a new one.
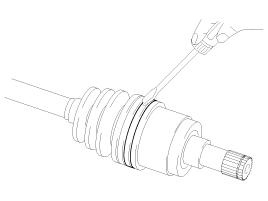
Remove the SFJ boot band and pull the boot from SFJ outer race.
Be careful not to damage it.
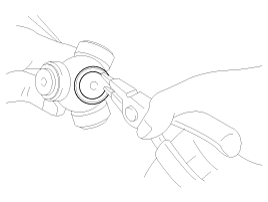
Remove the circlip using a screwdriver.
(ASAN) KOREA
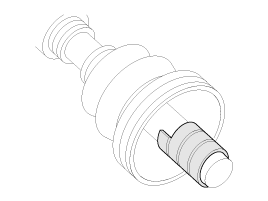
Remove the driveshaft from SFJ outer race.
Remove the snap ring and disassemble the spider assembly from the shaft.
Clean the spider assembly.
Remove the BJ boot band and removal of the SFJ boot and the BJ boot.
If the boot is reused, wrap a tape around the driveshaft splines to protect the boot.
Remove both side of bands(B, C) of the dunamic damper(A).
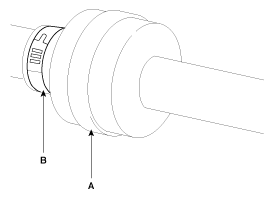
Fix the drive shaft(A) with a vice(B) as illustrated.
Apply soapy water to the shaft to prevent being damaged between the shaftspline and the dynamic damper when the dynamic damper is removed.
Separate dynamic damper(A) from the shaft(B) carefully.