2.
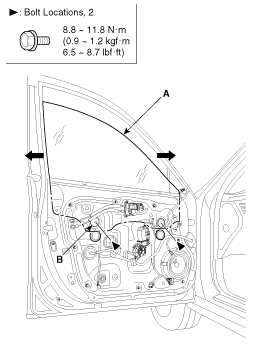
Carefully move the glass (A) until you can see the glass mounting bolts (B), then loosen them.
Check the glass run channel for damage or deterioration, and replace them necessary.
Remove the following parts.
Quadrant cover.
Door trim.
Carefully move the glass (A) until you can see the glass mounting bolts (B), then loosen them.
Check that the glass moves smoothly.
Raise the glass fully, and check for gaps.
Check that the glass contacts the glass run channel Evenly.
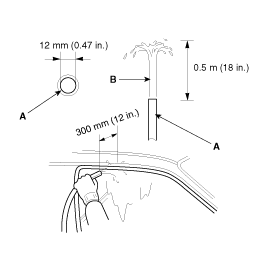
Check for water leaks. Run water over the roof and on the sealing area as shown, and note these items:
Use a 12mm (1/2Iin.) diameter hose (A).
Adjust the rate of water flow as shown (B).
Do not use a nozzle.
Hold the hose about 300mm(12in.) away from The door (C).
After installing the door, check for a flush fit with the body, then check for equal gaps between the front, rear, and bottom, door edges and the body. Check that the door and body edges are parallel. Before adjusting, replace the mounting bolts.
Place the vehicle on a firm, level surface when adjusting the doors.
Adjust at the hinges (A):
Loosen the door mounting bolts (B) slightly, and move the door IN or OUT until it aligns flush with the body.
Loosen the hinge mounting bolts (C) slightly, and move the door BACKWARD or FORWARD, UP or DOWN as necessary to equalize the gaps.
Place a shop towel (D) on the jack (E) to prevent damage to the door when adjusting the door.
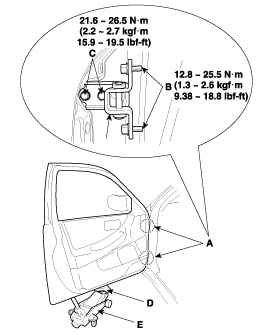
Check that the door and body edges are parallel.
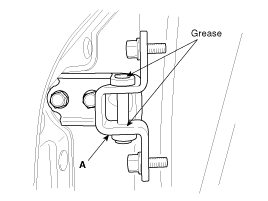
Grease the pivot portions of the hinges indicated by the arrows.
Check for water leaks.
