3.
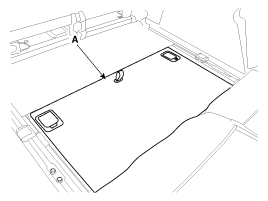
Remove the luggage cover board (A).
Turn ignition switch OFF and disconnect the negative (-) battery cable.
Fold the rear seat cushion (Refer to "SEAT" in BD group).
Remove the luggage cover board (A).
Remove the luggage front tray (B).

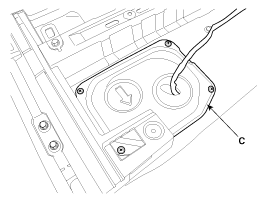
Remove the service cover (C) after loosening 4 screws.
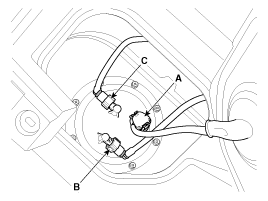
Disconnect the fuel sender connector (A).
Disconnect the fuel feed tube quick-connector (B) and the fuel return tube quick-connector (C).
Lift the vehicle and remove the mufflers passing under the fuel tank. (Refer to "Intake and exhaust system" in EM group)
Support the fuel tank with a jack.
Remove the center muffler assembly.
(Refer to "Intake and Exhaust System" in EM group)
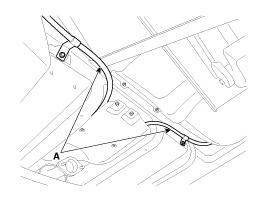
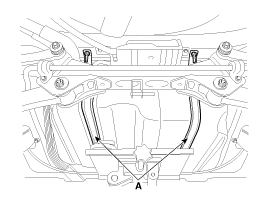
Remove the parking brake line (A).
Disconnect the fuel filler hose (A), the leveling hose (B) and the ventilation hose (C).

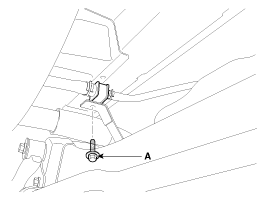
Remove the ventilation hose bracket bolt (A).
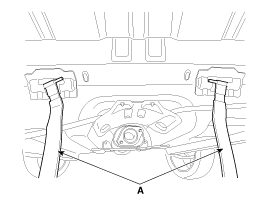
Unscrew the fuel tank band installation nuts (A), and then remove the fuel tank (B) from the vehicle.
Remove the fuel tank band as below.
Installation is reverse of removal.
Fuel tank band installation nuts:
39.2 ~ 54.0 N.m (4.0 ~ 5.5 kgf.m, 28.9 ~ 39.8 lb-ft)
After removing or replacing the part below, bleed air in low pressure fuel circuit (Refer to "BLEEDING AIR IN LOW PRESSURE FUEL CIRCUIT" in this group).
Fuel Tank
Fuel Sender
Fuel Filter
High Pressure Fuel Pump
Low Pressure Fuel Lines
