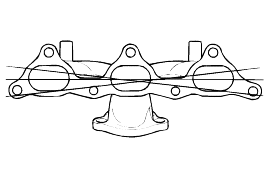
Check for damage or cracks.
Using a straight edge and feeler gauge, check for distortion on the cylinder head matching surface.
Standard value : 0.15 mm (0.006 in.) or less |
Service limit : 0.3 mm (0.012 in.) or less |

Check the exhaust manifold for damage and cracks.