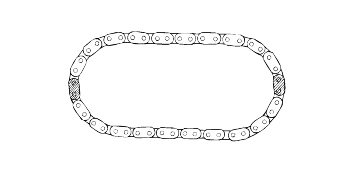
Align the camshaft timing chain with the intake timing chain sprocket and exhaust timing chain sprocket as shown in the illustration.
Install the HLA.
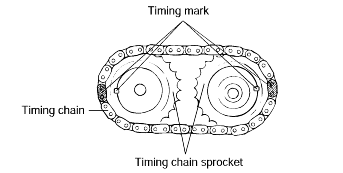
Align the camshaft timing chain with the intake timing chain sprocket and exhaust timing chain sprocket as shown in the illustration.

Install the camshafts after lubricating the journals of the camshaft with engine oil.
To check the press fit, the camshaft (IN) and timing chain sprocket should be separable by a force greater than 1000kg (MIN.)at room temperature.
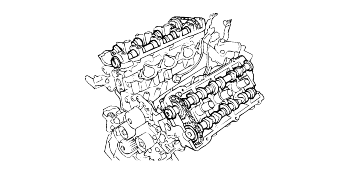
Install the bearing caps. Check the markings on the caps for intake/exhaust identification symbol.
I: Intake camshaft
E: Exhaust camshaft
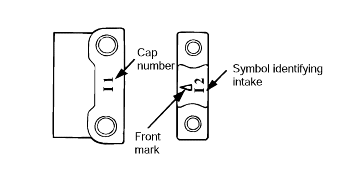
Tighten the bearing caps to the specified torque in two or three increments as shown.
Tightening torque Bearing cap bolt 50 mm : 15 - 17 Nm (150 - 170 kg.cm, 11 - 12.5 lb.ft) 38 mm : 11 - 13 Nm (110 - 130 kg.cm, 8 - 9.6 lb.ft) |
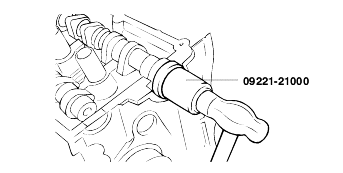
Using the special tool, the camshaft oil seal installer (09221 - 21000), install the camshaft oil seal. Be sure to apply engine oil to theexternal surface of the oil seal.
Insert the oil seal along the camshaft front end and install it with a hammer until it is seated.
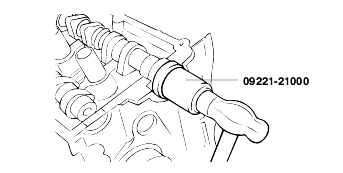
Install the camshaft sprocket to the specified torque.
Tightening torque |
Camshaft sprocket bolt : |
90 - 110 Nm (900 - 1100 kg.cm, 65 - 80 lb.ft) |
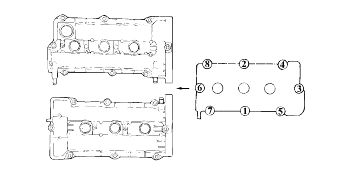
Install the cylinder head cover.
Tightening torque |
Cylinder head cover bolts : |
5 - 6 Nm (50 - 60 kg.cm, 3.6 - 4.4 lb.ft) |
<Tightening procedure> |
1) Tighten all bolts temporarily to half of the specified torque in the sequence 1.2.3.4.5.6.7.8 |
2) Retighten all bolts to the specified torque. |
Install the spark plug cables and, center cover.
Install the timing belt and then tighten the auto tensioner pulley.
Install the timing belt cover.
Install the power steering pulley, air conditioner pulley, crankshaft pulley and tensioner pulley.
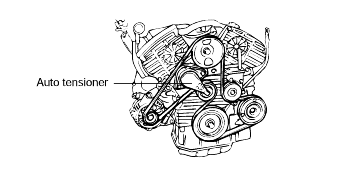
Connect the breather hose and engine harness.
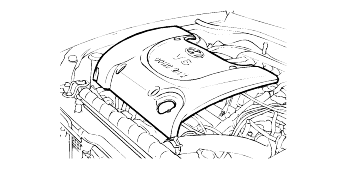
Install the intake manifold and engine cover.
Remove the engine cover and intake manifold.
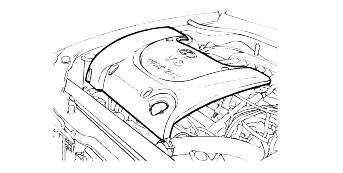
Disconnect the breather hose and the engine harness.
Remove the power steering pulley, air conditioner pulley, crankshaft pulley, idler pulley and tensioner pulley.
Remove the timing belt cover.
Loosen the auto tensioner.
Remove the timing belt from the camshaft sprocket.
Remove the spark plug cables.
Loosen the cylinder head cover bolts and then remove it.
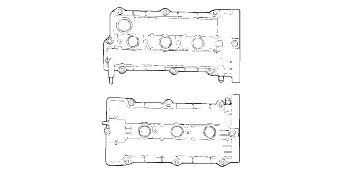
Remove the camshaft sprockets.
Remove the camshaft bearing caps.

Remove the camshafts.
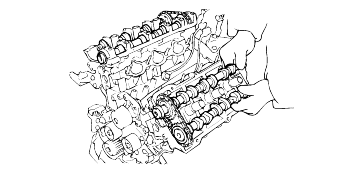
Check the camshaft journals for wear. If the journals are badly worn out, replace the camshaft.
Check the cam lobes for damage. If the lobe is damaged or excessively worn out, replace the camshaft.
Cam height [Standard] 2.5 : 43.95 - 44.15 mm (1.7303 - 1.7382 in.) 2.0 : 43.47 - 43.67 mm (1.711 - 1.719 in.) [Limit] 2.5 : 43.45 mm (1.7106 in.) 2.0 : 42.97 mm (1.692 in.) |
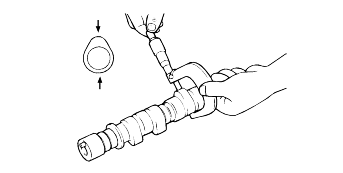
Check the cam surface for abnormal wear or damage, and replace if necessary.
Check each bearing for damage. If the bearing surface is excessively damaged, replace the cylinder head assembly or camshaft bearing cap, as necessary.
Camshaft end play : 0.1-0.15mm (0.0039-0.0059 in.) |
Check the lips for wear. If lip threads are worn out, replace the oil seal with new one.
Check a contact surface of oil seal lip on camshaft. If there stratified wear, replace the camshaft.
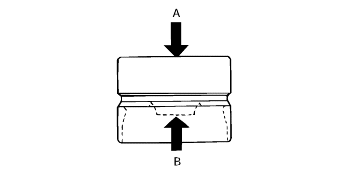
Problem | Possible cause | Action | |
1. | Temporary noise when starting a cold engine | Normal | This noise will disappear after the oil in the engine reaches the normal pressure. |
2. | Continuous noise when the engine is started after parking more than 48 hours. | Oil leakage of the high pressure chamber on the HLA,allowing air to get in. | Noise will disappear within 15 minutes when engine runs at 2000-3000 rpm. If it doesn't disappear,refer to step 7 below. |
3. | Continuous noise when the engine is first started after rebuilding cylinder head. | Insufficient oil in cylinder head oil gallery. | |
4. | Continuous noise when the engine is started after excessivly craking the engine by the starter motor or band. | Oil leakage of the high-pressure chamber in the HLA, allowing air to get in. Insufficient oil in the HLA. | |
5. | Continuous noise when the engine is running after changing the HLA. | caution Do not run engine at a speed higher than 3000 rpm, as this may damage the HLA. | |
6. | Continuous noise during idle after high engine speed. | Engine oil level too high or too low. | Check oil level. Drain or add oil as necessary. |
Excessive amount of air in the oil at high engine speed. | Check oil supply system. | ||
Deteriorated oil. | Check oil quality. If deteriorated, replace with specitied type. | ||
7. | Noise cotinues for more than 15 minutes. | Low oil pressure. | Check oil pressure and oil supply system of each part of engine. |
Faulty HLA. | Remove the cylinder head cover and press HLA down by hand. If it moves, replace the HLA. warning Be careful with the hot HLAS. | ||
