CHECKING THE TIE ROD END BALL JOINT STARTING TORQUE
1.

Disconnect tie rod and knuckle with the special tool (09568-31000).

2.

Shake the ball joint stud several times.

3.

Mount two jam nuts on the ball joint, and then measure the ball joint starting torque.

Standard value

0.5-2.5 Nm (5-25 kg·cm, 0.36-1.78 lb·ft)

4.

If the starting torque exceeds the upper limit of the standard value, replace the tie rod end.

5.

Even if the starting torque is below the lower limit of the standard value, creck the play of the ball joint and installation.

CHECKING POWER STEERING FLUID LEVEL
1.

Position the vehicle on a level surface.

2.

Start the engine. With the vehicle kept stationary, turn the steering wheel several times continuously to raise the fluid temperature to 50-60°C(122-140°F).

3.

With the engine at idle, turn the steering wheel fully clockwise and counter-clockwise several times.

4.

Make sure that there is no foaming or cloudiness in the reservoir fluid.

5.

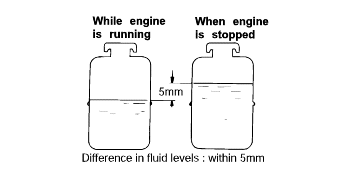
Stop the engine and check for any difference in fluid level between a stationary and a running engine.

note
1.

If the fluid level varies 5 mm (0.2 in.) or more, bleed the system again.

2.

If the fluid level suddenly rises after stopping the engine, further bleeding is required.

3.

Incomplete bleeding will produce a chattering sound in the pump and noise in the flow control valve, and lead to decreased durability of the pump.
OIL PUMP PRESSURE TEST (OIL PUMP RELIEF PRESSURE)
1.

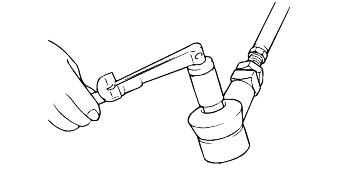
Disconnect the pressure hose from the oil pump. Connect the special tool between the oil pump and pressure hose as illustrated.

2.

Bleed the air, and then start the engine and turn the steering wheel several times so that the fluid temperature rises to approximately 50°C(122°F).

3.

Set the engine speed to 1,000 rpm.

4.

Colse the shut-off valve of the special tool and measure the fluid pressure to confirm the it is within the standard vaule range.

Standard value

Oil pump pressure

Gauge hose valve closed :

81-88kg/cm² (953-1,035psi) or less

caution

Don't keep the shut-off valve on the pressure gauge closed for longer than seconds.

5.

Remove the special tools, and tighten the pressure hose to the specified torque.

55-69 Nm (550-690 kg.cm)

6.

Bleed the system.

AIR BLEEDING
1.

Disconnect the high tension cable, and while operating the starting motor intermittently (for 15-20 seconds), turn the steering wheel all theway to the left and then to the right five or six times.

note
1.

During air bleeding, replenish the fluid supply so that the level never falls below the lower position of the filter.

2.

If air bleeding is done while the vehicle is idling, the air will be broken up and absorbed into the fluid. Be sure to do the bleeding only whilecranking.

2.

Connect the high tension cable, and start the engine (idling).

3.

Turn the steering wheel to the left and the right until there are no air bubbles in the oil reservoir.

caution

Do not hold the steering wheel turned all the way to either side for more than ten seconds.

4.

Confirm that the fluid is not milky, and that the level is up to the position specified on the level gauge.

5.

Confirm that there is little change in the surface o the fluid when the steering wheel is turned left and right.

caution
1.

If the surface of the fluid changes considerably, air bleeding should be done again.

2.

If the fluid level rises suddenly when the engine is stopped, it indicates that there is still air in the system.

3.

If there is air in the system, a jingling noise may be heard from the pump and the control valve may also produce unusual noises. Air in the systemwill shorten the life of the pump and other parts.

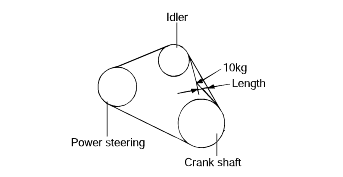
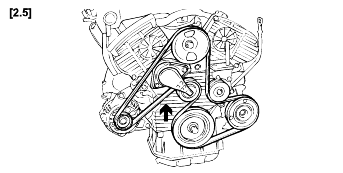
CHECKING POWER STEERING BELT TENSION
1.

Press the belt applying a pressure of 98 N (10 kg, 22 lb) at the specified point, and measure the deflection to confirm that it is within the standardvalue range.

Standard value

Drive belt deflection

Regular inspection : 11.7-15.3mm(0.46-0.60 in.)

New one : 8.8-11.0mm (0.35-0.43in.)

2.

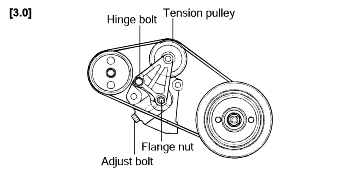
To adjust the belt tension, auto tensioner does automatically adjust to obtain the standard value (V-6 ENG).

3.

Temporarily install hinge bolt and flange nut not to tensioner pulley run out → Adjust belt tension → Tighten adjust bolt and flange nutto the specified torque.

SERVICE ADJUSTMENT PROCEDURE
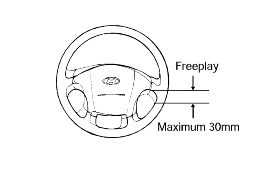
CHECKING STEERING WHEEL FREE PLAY
1.

Start the engine and with the steering wheel in the straight ahead position.

2.

Measure the play while turning the steering wheel to the left and right.

Standard value

Steering wheel free play : 30 mm (1.1 in.)

3.

If the play exceeds the standard value, inspect the connection between the steering shaft and tie rod ends.

CHECKING STEERING ANGLE
1.

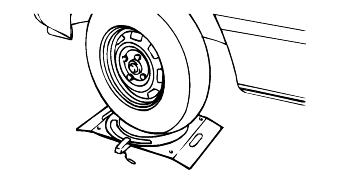
Place the front wheel on a turning radius gauge and measure the steering angle.

Standard value

Wheel angle

Inside wheel

Tire size

20565 : 38.92° ± 2°

20560 : 37.32° ± 2°

Outside wheel

Tire size

20565 : 31.49°

20560 : 30.61°

2.

If the measured value is not within the standard value, adjust the toe and inspect again.

CHECKING STEERING WHEEL RETURN
1.

The force required to turn the steering wheel and the wheel return should be the same for both moderate and sharp turns.

2.

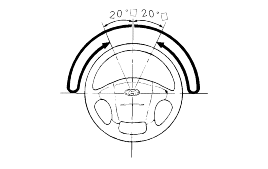
When the steering wheel is turned 90° and held for a couple of seconds while the vehicle is being driven at 20-30 kph (12-19 mph), the steering wheel should return at least 20° from its central position whenit is released.

note

If the steering wheel is turned very quickly, steering may be momentarily difficult. This is not a malfunction because theoil pump output will be somewhat decreased.

Яндекс.Метрика