1.
Install the transaxle lower mounting bolts (B-2ea, C-2ea) after fitting the transaxle assembly into the engine assembly.
Tightening torque :
[B] : 35-50Nm (3.5-5.0kgf.m, 25.3-36.2lb-ft)
[C] : 43-55Nm (4.3-5.5kgf.m, 31.1-39.8lb-ft)
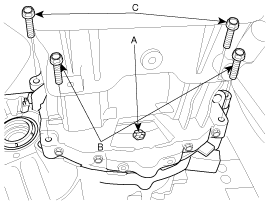
Install the transaxle lower mounting bolts (B-2ea, C-2ea) after fitting the transaxle assembly into the engine assembly.
Tightening torque :
[B] : 35-50Nm (3.5-5.0kgf.m, 25.3-36.2lb-ft)
[C] : 43-55Nm (4.3-5.5kgf.m, 31.1-39.8lb-ft)
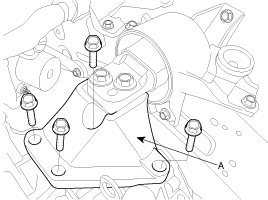
Install the torque converter assembly mounting bolts (A-6ea).
Tightening torque :
46-53Nm (4.6-5.3kgf.m, 33.3-38.3lb-ft)
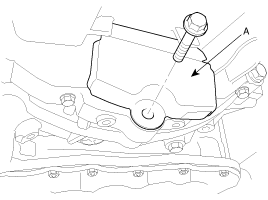
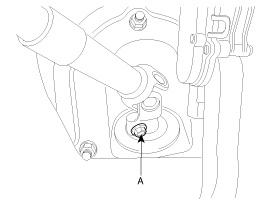
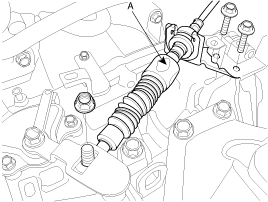
Install the transaxle housing guide (A).
Tightening torque :
30-42Nm (3.0-4.2kgf.m, 21.7-30.4lb-ft)
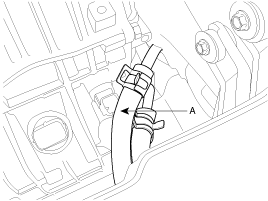
Install the intercooler hose (A).
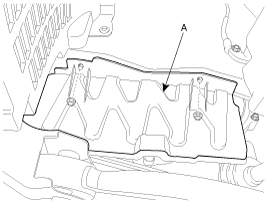
Install the oil pan protecting cover (A).
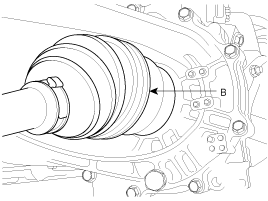
Connect the drive shafts (A, B) to the transaxle.

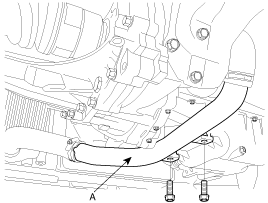
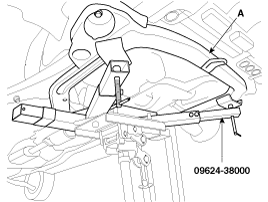
Supporting the sub frame (A) with a jack and the Special tool(09624-38000), install the mounting bolts. (refer to Stabilizer's installation in SS group).
Tightening torque :
140-160Nm (14-16kgf.m, 101-118lb-ft)
Install the muffler hanger rubber (A).
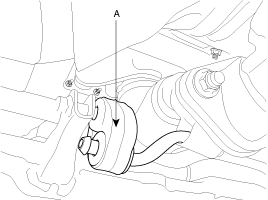
Install the roll stopper mounting bolts (A, B).
Tightening torque :
50-65Nm (5-6.5kgf.m, 36.2-47.0lb-ft)
Install the lower arm ball joint mounting nut, the stabilizer link mounting nut, and the tie rod end mounting nut to the front knuckles. (refer to Front suspension system in SS group)
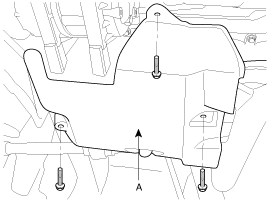
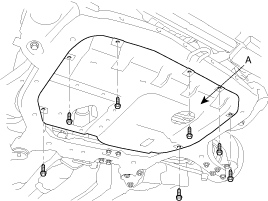
Install the under shield cover (A).
Install the side mud cover (A).
Install the front wheels and tires. (refer to installation in SS group)
Install the steering joint assembly bolt (A). (refer to Steering column/shaft in ST group)
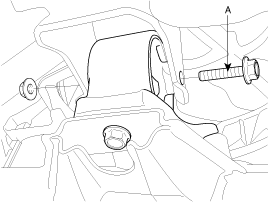
Install the transaxle insulator mounting bracket bolts (A).
Tightening torque :
60-80Nm (6.0-8.0kgf.m, 43.4-57.9lb-ft)
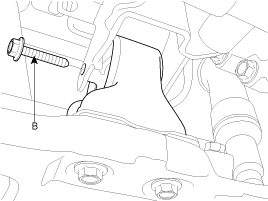
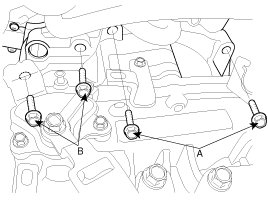
Install the transaxle upper mounting bolts (A-2ea) the starter motor mounting bolts (B-2ea).
Tightening torque :
[A] 60-80Nm (6.0-8.0kgf.m, 43.4-57.9lb-ft)
[B] 39-60Nm (3.9-6.0kgf.m, 28.2-43.4lb-ft)
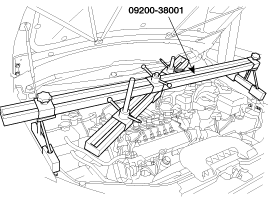
Remove the special tool (09200-38001).
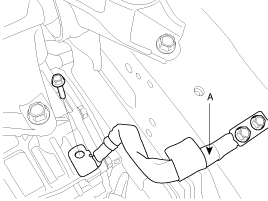
Connect the transaxle oil cooler hoses (A) to the tubes by fastening the clamps.
Install the control cable assembly (A).
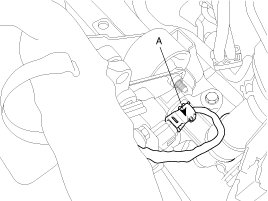
Install the output speed sensor connector (A).
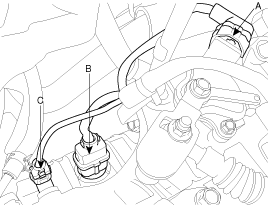
Connect the inhibiter switch connector (A), solenoid valve connector (B) and the input speed sensor connector (C).
Install the ground cable (A) to transaxle.
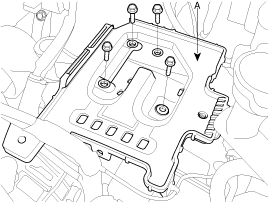
Install the battery tray (A).
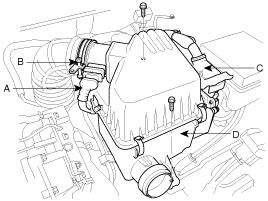
Install the air cleaner assembly (D) by connecting the AFS(Air Flow Sensor) connector (A), the clamp (B) and the ECM connector (C).
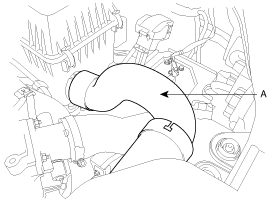
Install the air duct (A).
Install the engine cover.
(refer to Engine and Transaxle Assembly in EM group)
After completing the installation perform the following procedure;
Adjust the shift cable.
Refill the transaxle fluid.
Clean the battery posts and cable terminals with sandpaper and grease them to prevent corrosion before installing.
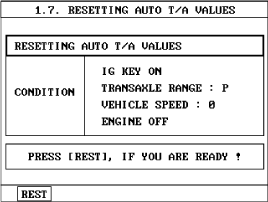
When replacing the automatic transaxle, reset the automatic transaxle’s values by using the High- Scan Pro.
Connect the Hi-Scan Pro connector to the data link connector under the crash pad and power cable to the cigar jack under the center facia.
Turn the ignition switch on and power on the Hi-Scan Pro.
Select the vehicle's name.
Select 'AUTOMATIC TRANSAXLE'.
Select 'RESETTING AUTO T/A VALUES' and perform the procedure
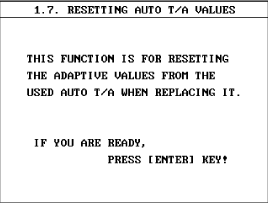
Perform the procedure by pressing F1 (REST).