2.
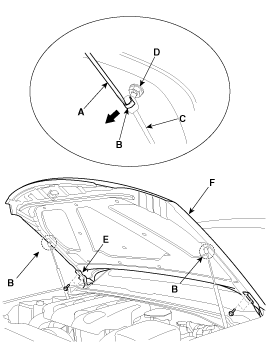
After loosening the hood hinge (E) mounting bolts, remove the hood panel (F).
When removing and installing the hood, an assistant is necessary.
Be careful not to damage the hood and body.
Use a clip remover when removing clips..
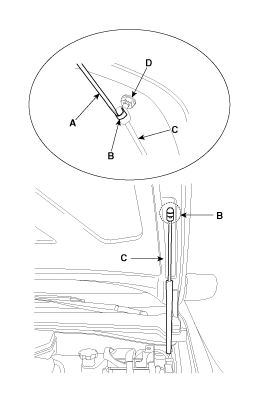
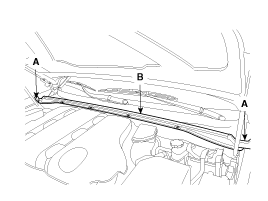
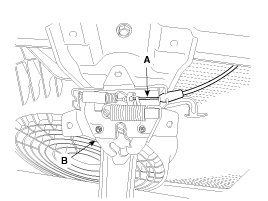
Using a screwdriver (A), lift the socket clips (B) up slightly on both ends of the lifter (D), and then remove the lifter from the bracket (C).
After loosening the hood hinge (E) mounting bolts, remove the hood panel (F).
Installation is the reverse of removal.
Make sure the hood opens properly and locks securely.
Adjust the hood alignment.
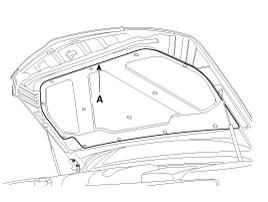
Using a clip remover, detach the clips, and remove the hood insulator (A).
Take care not to scratch the hood panel.
Installation is the reverse of removal.
Replace any damaged clips.
Using a screwdriver (A), lift the socket clips (B) up slightly on both ends of the lifter (D), and then remove the lifter from the bracket (C).
Installation is the reverse of removal.
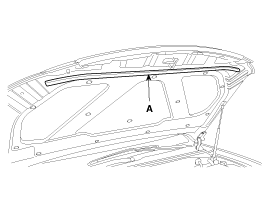
Detach the clips, then remove the hood weatherstrip (A). Be careful not to scratch the hood.
Installation is the reverse of removal.
Replace any damaged clips.
Detach the clips, then remove the hood weatherstrip (B). Be careful not to scratch the hood.
Installation is the reverse of removal.
Replace any damaged clips.
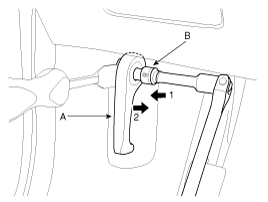
Using a socket (B), remove the hood release handle (A).
Installation is the reverse of removal.
Make sure the hood latch cable is connected properly.
Make sure the hood locks securely.
Remove the front bumper cover.
Remove the hood latch cover (A).
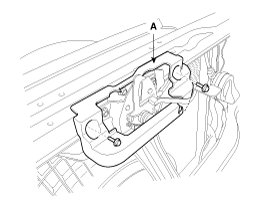
Remove the hood latch (A) mounting bolts.
Tightening torque :
6.9~10.8N.m (0.7~1.1kgf.m, 5.1~8.0 lb-ft)
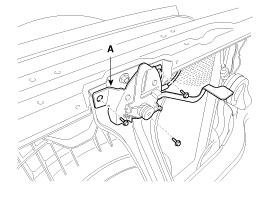
Disconnect the hood latch cable (A) and remove the latch (B).
Installation is the reverse of removal.
Make sure the hood latch cable is connected properly.
Make sure the hood locks securely.
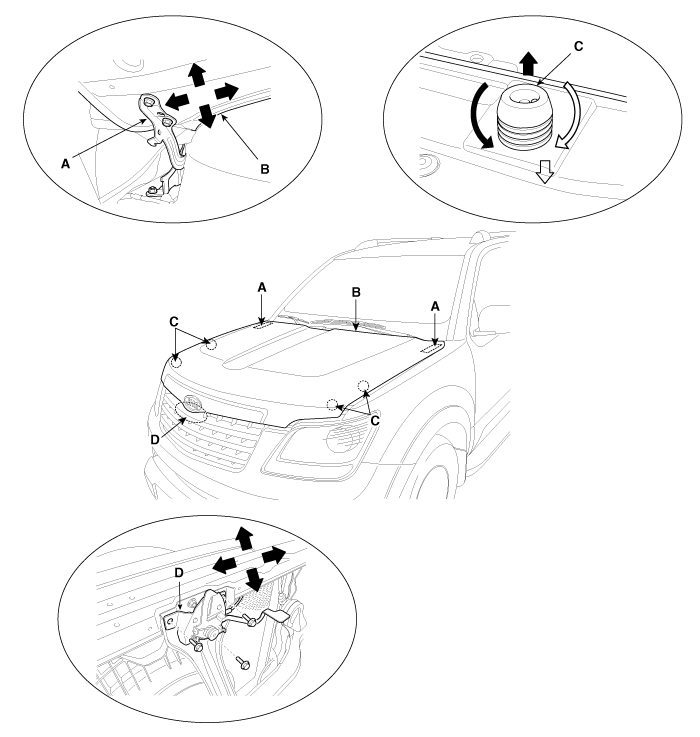
After loosening the hinge (A) mounting bolt, adjust the hood (B) by moving it up or down, or right or left.
Adjust the hood height by turning the hood overslam bumpers (C).
After loosening the hood latch (D) mounting bolts, adjust the latch by moving it up or down, or right or left.