Disconnect the battery cables (A). (Negative first)
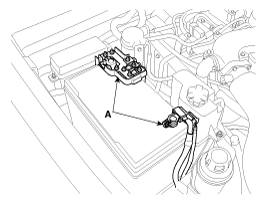
Disconnect the battery cables (A). (Negative first)

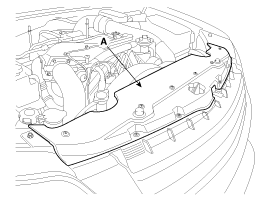
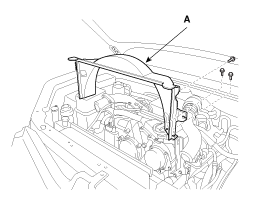
Remove the radiator grille upper guard (A).
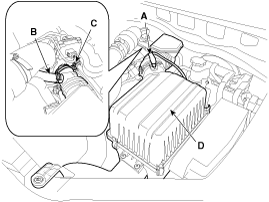
Remove the air cleaner assembly.
Disconnect the Air flow sensor connector (A).
Disconnect the breather hose (B).
Loosen the hose clamp bolt (C).
Tightening torque :
2.9 ~ 4.9N.m (0.3 ~ 0.5kgf.m, 2.2 ~ 3.6lb-ft)
Remove the air cleaner assembly (D).
Tightening torque :
7.8 ~ 9.8N.m (0.8 ~ 1.0kgf.m, 5.8 ~ 7.2lb-ft)
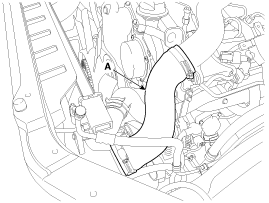
Remove the intercooler inlet hose (A).
Tightening torque :
4.9 ~ 6.9N.m (0.5 ~ 0.7kgf.m, 3.6 ~ 5.1lb-ft)
Remove the radiator upper shroud (A).
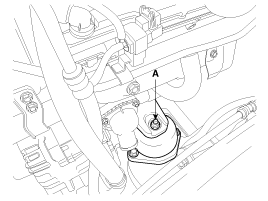
Install a jack under the edge of engine oil pan.
Remove the engine mounting nut (A).
Tightening torque :
88.3 ~ 107.9 N.m (9.0 ~ 11.0 kgf.m, 65.1 ~ 79.6 lb-ft)
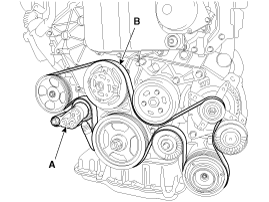
Remove the alternator.
Compressing the tensioner (A) with a wrench in a left hand by turning it clockwise, start removing the drive belt (B) from the water pump side idler.
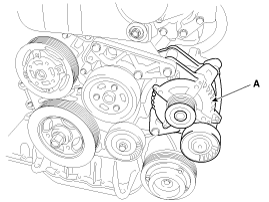
Remove the alternator (A) from the bracket after loosening bolts.
Tightening torque :
29.4 ~ 41.2 N.m (3.0 ~ 4.2 kgf.m, 21.7 ~ 30.4 lb-ft)
Disconnect the cable and connector.
Make easy to disconnect the cable and connector after removing alternator from bracket first.
Installation is in the reverse order of removal.