Disconnect the battery (-) terminal.
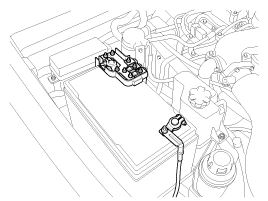
Disconnect the battery (-) terminal.

Remove the rear propeller shaft. (refer to Propellar shaft in DS group)
Support the transaxle with a jack.
Be careful not to give a shock or damage to the plastic oil pan.
Remove the muffler assembly. (refer to Muffler in EM group)
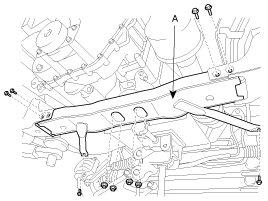
Remove the cross member (A) by removing the bolts (8ea).
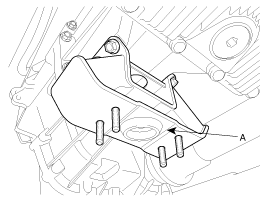
Remove the insulator support bracket (A).
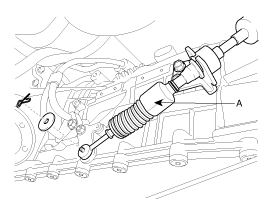
Remove the transter front propeller shaft. (refer to Propellar shaft in DS group)
Disconnect the shift cable assembly (A).
Disconnect the 4WD ECU connector (A) or EMC connector (B).
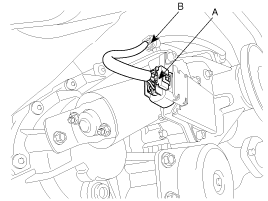
Remove the mounting bolts (8ea) and the transfer assembly.
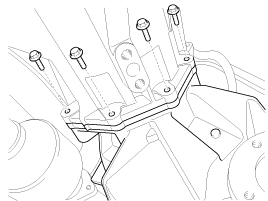
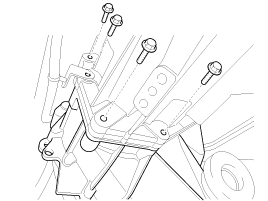
Remove the ground wire (A) by removing the bolt.
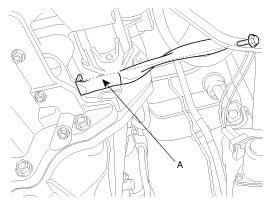
Remove the exhaust manifold stay (A).
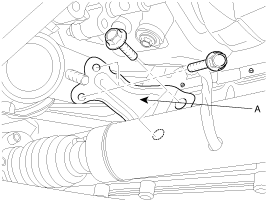
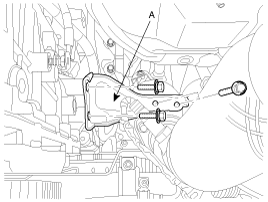
Disconnect the TCU connector (A).
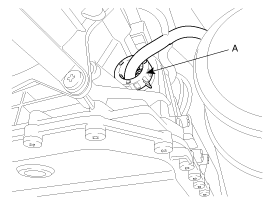
Remove the oil cooler hose mounting bolt (A) and the bracket mounting bolt (B).
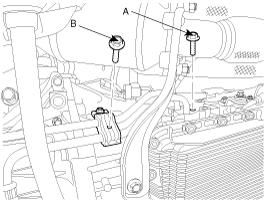
Remove the wire holding brackets on the transmission.
Remove the dust cover (A).
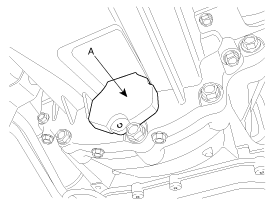
Remove the torque converter mounting bolts (A-6ea) by rotating the crank shaft.
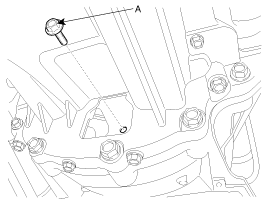
Remove the mounting bolts (A-4ea) lower in the engine side.
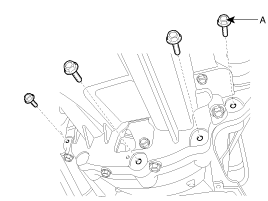
Remove the mounting bolts (A-2ea).
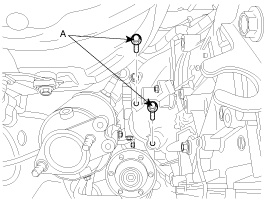
Remove the mounting bolts (A-2ea) for the starter motor.
Before removing one mounting bolt on the transmission side and the other bolt for the starter motor, remove the cross member and lower the transmission assembly.
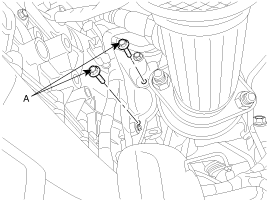
Remove the mounting bolts (A-4ea) on the transmission side.
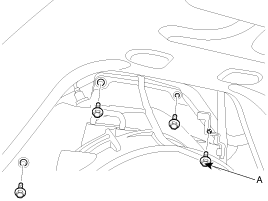
Disconnect the CKP sensor (A).
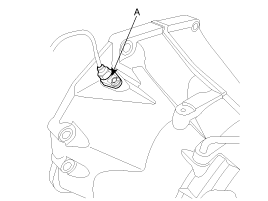
Remove the tansmission assembly by lowering the supporting jack.
Be careful not to damage tubes, hoses or wire.
Drain the ATF by removing the drain plug and retighten the drain plug.
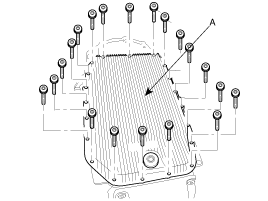
Remove the plastic oil pan (A) by removing the special bolts (20ea) with TORX wrench(T40).
Be careful not to drop or damage to the plastic oil pan.
After pulling the white clip (A) upward, remove the connector housing (B).
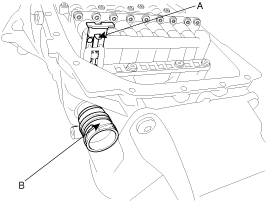
Remove the mechatronik (A) by removing the special bolts (10ea) with TORX wrench(T40).
Be careful not to drop or damage to the mechtronik.
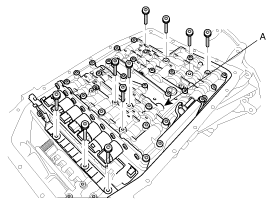
Remove the adapter (A).
Must use new ones when reassembled.
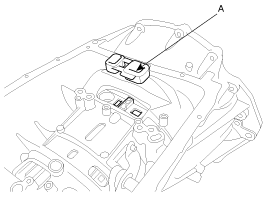
Remove the selector shaft (A), detent disk (B), and connecting rod (C) by removing the holding pin.
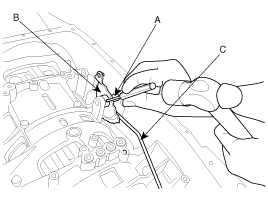
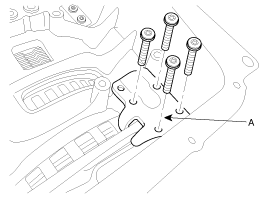
Remove the guide plate (A) by removing the special bolts (10ea) with TORX wrench(T27).
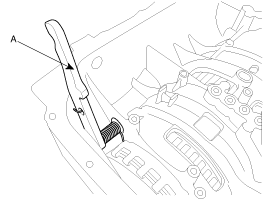
Remove the spring and rachet (A) by pushing out the guide pin.
Pull out the four oil seal (A).
Must use new ones when reassembled.
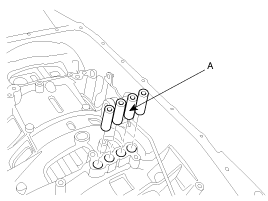
Insert the four oil seal (A).
Must use new ones when reassembled.

Install the spring and rachet (A) by inserting the guide pin.

Install the guide plate (A) by installing the special bolts (10ea) with TORX wrench(T27).

Install the selector shaft (A), detent disk (B), and connecting rod (C) by installing the holding pin.

Install the adapter (A).
Must use new ones when reassembled.

Install the mechatronic (A) by installing the special bolts (10ea) with TORX wrench(T40).
Be careful not to drop or damage to the mechtronik.

After installing the connector housing (B), push the white clip (A) downward.

Install the plastic oil pan (A) by installing the special bolts (20ea) with TORX wrench(T40).
Be careful not to drop or damage to the plastic oil pan.

Refill the ATF. (refer to Procedure Of ATF Level Adjustment)
Temporarily install the tansmission assembly by lifting the supporting jack.
Be careful not to damage tubes, hoses or wire.
Connect the CKP sensor(A).

Install the mounting bolts (A-2ea, B-2ea) on the transmission side.
Tightening torque :
(A) 80~100 Nm (8.0~10.0 kgf.m, 57.8~72.3 Ib-ft)
(B) 63.7~83.4N.m(6.5~8.5kgf.m, 47.0~61.5 Ib-ft)
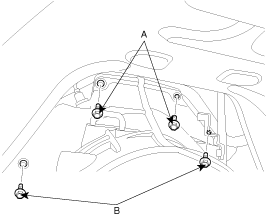
Install the mounting bolts (A-2ea) for the starter motor.
Tightening torque :
35~47 Nm (3.5~4.7 kgf.m, 25.3~33.9 Ib-ft)

Install the mounting bolts (A-2ea).
Tightening torque :
35~47 Nm (3.5~4.7 kgf.m, 25.3~33.9 Ib-ft)

Install the mounting bolts (A-4ea) lower in the engine side.
Tightening torque :
40~47 Nm (4.0~4.7 kgf.m, 28.9~33.9 Ib-ft)

Install the torque converter mounting bolts (A-6ea) by rotating the crank shaft.
Tightening torque :
46~53 Nm (4.6~5.3 kgf.m, 33.2~38.3 Ib-ft)

Install the dust cover(A).

Install the wire holding brackets on the transmission.
Install the oil cooler hose mounting bolt (A) and the bracket mounting bolt (B).

Connect the TCU connector(A).

Install the exhaust manifold stay (A).


Install the ground wire (A) by the bolt.

Install the mounting bolts(A,B-4ea) and the transfer assembly.
Tightening torque :
30~42 Nm (3.0~4.2 kgf.m, 21.6~30.3 Ib-ft)


Connect the 4WD ECU connector(A) or EMC connector(B).

Connect the shift cable assembly (A)

Install the cross member(A)

Install the insulator support bracket(A).
Tightening torque :
50~65 Nm (5.0~6.5 kgf.m, 36.1~47.0 Ib-ft)

Install the cross member (A) by installing the bolts(8ea).

Remove the exhaust manifold stay (A).


Install the muffler assembly. (refer to Muffler in EM group)
Put aside the transmission jack.
Install the rear propeller shaft. (refer to Propellar shaft in DS group)
Connect the battery (-) terminal.

Refill the automatic transaxle fluid. (refer to Inspection and Adjustment)