3.
Check if the heater resistance is within the specification.
Specification : 2.4 ~ 4.0 Ω [20℃(68℉)]
Turn the ignition switch OFF and disconnect the battery negative (-) terminal.
Disconnect the lambda sensor connector.
Check if the heater resistance is within the specification.
Specification : 2.4 ~ 4.0 Ω [20℃(68℉)]
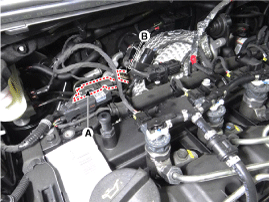
Turn the ignition switch OFF and disconnect the battery negative (-) terminal.
Disconnect the lambda sensor connector (A).
Remove the lambda sensor (B).
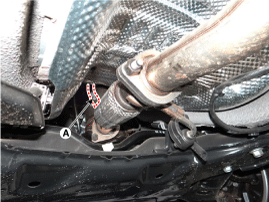
Turn the ignition switch OFF and disconnect the battery negative (-) terminal.
Disconnect the lambda sensor connector (A).
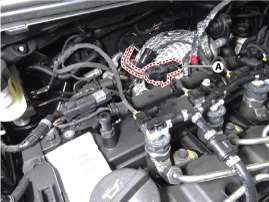
Lift the vehicle.
Remove the lambda sensor (A).
Install the sensor to the specified torque.
If the sensor is dropped by mistake, check if there is no problem.
Do not use a cleaner, spray or grease on the sensing element and connector because they could cause a malfunction of sensor.
The sensor or the wiring can be damaged by being contacted to the exhaust system (Exhaust manifold, Catalytic converter etc.)
Install the sensor in the reverse order of removal.
Lambda sensor :
39.2 ~ 49.0 N.m (4.0 ~ 5.0 kgf.m, 28.9 ~ 36.1 lb-ft)
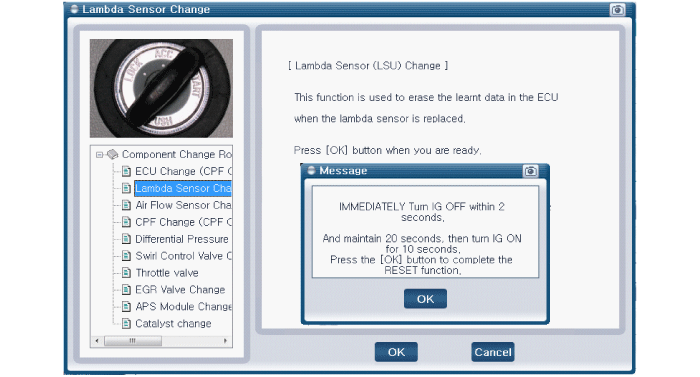
After replacing the lambda sensor, the "Component Change Routine" procedure should be performed. Otherwise trouble related with engine performance or emission control may occur until ECM learning about the component is completed.
Turn the ignition switch OFF.
Connect the GDS to Data Link Connector (DLC).
Turn the ignition switch ON.
Select "Vehicle, Model year, Engine, System".
Select "Vehicle S/W Management".
Select "Component Change Routine".
Select "Lambda Sensor Change".
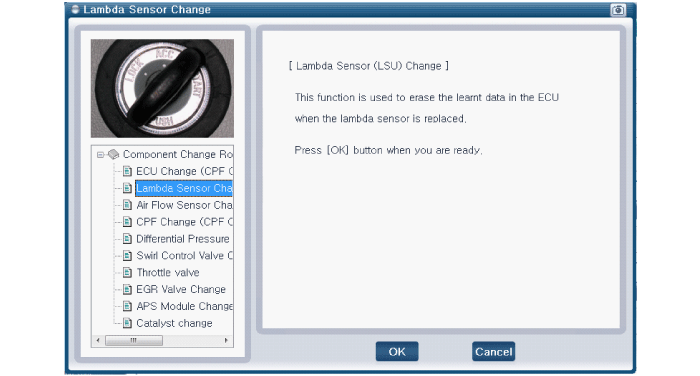
Turn the ignition switch OFF and Turn the ignition switch ON again in 20 seconds.