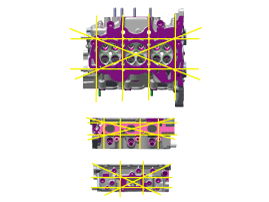
Inspect for flatness.
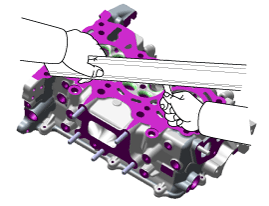
Using a precision straight edge and feeler gauge, measure the surface contacting cylinder block and inspect the manifolds for warpage.
Flatness of cylinder head gasket surface
Standard : Less than 0.05 mm (0.0020 in)
Less than 0.02 mm (0.0008 in) / 100x100
Flatness of manifold gasket surface
Standard : Less than 0.1 mm (0.0039 in)
Inspect for cracks.
Check the combustion chamber, intake ports, exhaust ports and cylinder block surface for cracks. If cracked, replace the cylinder head.
Inspect valve stems and valve guides.
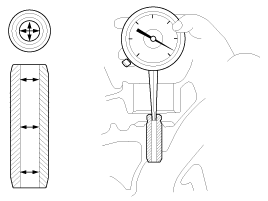
Using a caliper gauge, measure the inside diameter of the valve guide.
Valve guide I.D.
Intake / Exhaust :
5.500 ~ 5.512 mm (0.2165 ~0.2170 in)
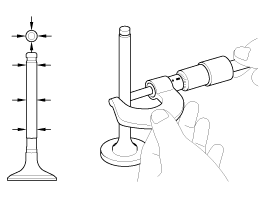
Using a micrometer, measure the diameter of the valve stem.
Valve stem O.D.
Intake : 5.465 ~ 5.480 mm ( 0.2151 ~ 0.2157 in)
Exhaust : 5.448 ~ 5.460 mm (0.2144 ~ 0.2149 in)
Subtract the valve stem diameter measurement from the valve guide inside diameter measurement.
Valve stem-to-guide clearance
Intake : 0.020 ~ 0.047 mm (0.00078 ~ 0.00185 in)
Exhaust :0.040 ~ 0.064 mm (0.00157 ~ 0.00251 in)
Inspect valves.
Check that the valve is ground to the correct valve face angle.
Valve face angle :
Intake/Exhaust : 45.25˚ ~ 45.75˚
Check the surface of the valve for wear. If the valve face is worn, replace the valve.
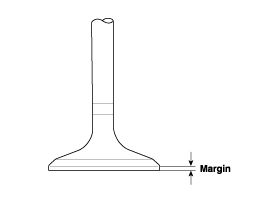
Check the valve head margin thickness. If the margin thickness is less than minimum, replace the valve.
Margin
Intake : 1.5 mm (0.0590 in)
Exhaust : 1.75 mm (0.0688 in)
Check the valve length.
Length
Intake : 92.85 mm (3.6555 in)
Exhaust : 93.37 mm (3.6759 in)
Check the surface of the valve stem tip for wear. If the valve stem tip is worn, replace the valve.
Inspect valve seats.
Check the valve seat for evidence of overheating and improper contact with the valve face.
If the valve seat is worn, replace cylinder head.
Before reconditioning the seat, check the valve guide for wear. If the valve guide is worn, replace cylinder head.
Recondition the valve seat with a valve seat grinder or cutter. The valve seat contact width should be within specifications and centered on the valve face.
Valve seat contact width :
Intake : 0.85 ~ 1.15 mm ( 0.0334 ~ 0.0452 in)
Exhaust : 1.35 ~ 1.65 mm (0.0531 ~ 0.0649 in)
Valve seat angle :
Intake / Exhaust : 44.75˚ ~ 45.10˚
Inspect valve springs.
Using a steel square, measure the out-of-square of the valve spring.
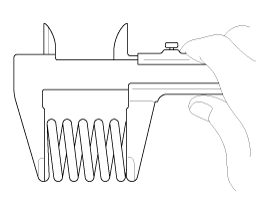
Using vernier calipers, measure the free length of the valve spring.
Valve spring
Free height : 47.9 mm (1.8858 in)
Out of square : 1.5˚ (MAX)
Inspect the MLA.
Using a micrometer, measure the MLA outside diameter.
MLA outer diameter
Intake/Exhaust :
27.964 ~ 27.980 mm (1.1010 ~ 1.1016 in)
Using a caliper gauge, measure MLA tappet bore inner diameter of cylinder head.
Tappet bore inner diameter
Intake/Exhaust :
28.000 ~ 28.025 mm (1.1024 ~ 1.1033 in)
Subtract MLA outside diameter measurement from tappet bore inside diameter measurement.
MLA to tappet bore clearance
[Limit]
Intake/Exhaust :
0.020 ~ 0.061 mm (0.0008 ~ 0.0024 in)