2.
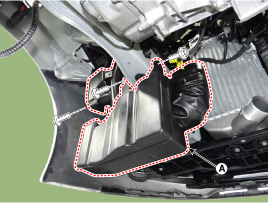
Remove the air duct (A).
Remove the engine cover.
(Refer to Engine and Transaxle Assembly - "Engine Cover")
Remove the air duct (A).
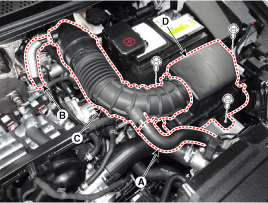
Remove the air cleaner assembly.
Disconnect the RCV hose (A).
Disconnect the breather hose (B).
Disconnect the air intake hose (C).
Remove the air cleaner assembly (D).
Tightening torque
Hose clamp bolt :
2.9 ~ 4.9 N.m (0.3 ~ 0.5 kgf.m, 2.2 ~ 3.6 lb-ft)
Air cleaner assembly bolts :
3.9 ~ 5.9 N.m (0.4 ~ 0.6 kgf.m, 2.9 ~ 4.3 lb-ft)
Install in the reverse order of removal.
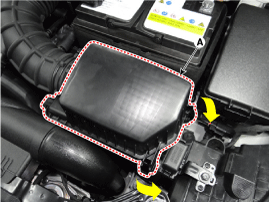
Open the air cleaner element cover (A) by unlocking the clamp.
Replace the air cleaner element (A) with a new one.
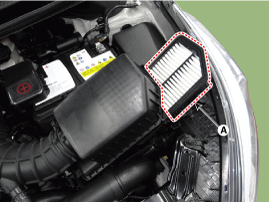
If there are foreign substances inside the air cleaner assembly, wipe the inside of the air cleaner assembly and then replace the air cleaner element.
Close the air cleaner cover by hooking the clamps.
Remove the air cleaner assembly.
Remove the engine room front under cover and LH side cover.
(Refer to Engine And Transaxle Assembly - "Engine Room Under Cover")
Remove the LH front wheel guard.
(Refer to Body - "Front Wheel Guard")
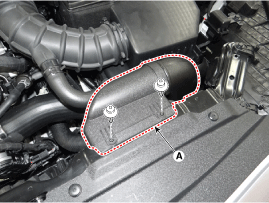
Remove the resonator (A).
Tightening torque :
3.9 ~ 5.9 N.m (0.4 ~ 0.6 kgf.m, 2.9 ~ 4.3 lb-ft)
Install in the reverse order of removal.
Remove the air duct.
Remover the front bumper.
(Refer to Body - "Front Bumper Cover")
Remove the air intake shield (A).
Tightening torque :
3.9 ~ 5.9 N.m (0.4 ~ 0.6 kgf.m, 2.9 ~ 4.3 lb-ft)

Install in the reverse order of removal.
