3.
Perform "Actuation Test" for Injector #1.
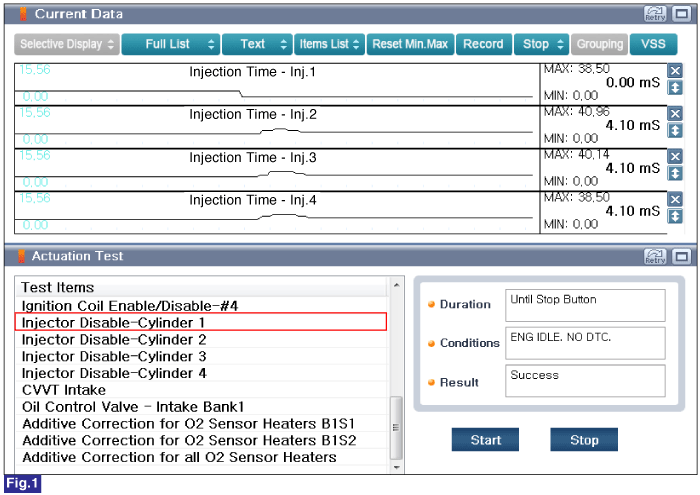
Fig.1) Injector Disable - Cylinder 1 Actuation Test
Connect GDS to Data Link Connector(DLC).
IG KEY "ON" & ENG "OFF"
Perform "Actuation Test" for Injector #1.
Fig.1) Injector Disable - Cylinder 1 Actuation Test
Check its RPM decrease when doing the injector's actuation test.
Is there any cylinder with no change in RPM or only a small change in RPM?
 | ▶ Replace injector, and go to "Verification of Vehicle Repair" procedure. |
 | ▶ Go to "Check Injector performance" procedure. |
IG KEY "OFF"
Connect VMI to GDS and select "Oscilloscope".
Connect Channel A positive probe to Pin No.2 (control) terminal of Injector harness connector and chassis ground.
Connect Channel AUX probe to Pin No.2 (control) terminal of Injector harness connector.
Warm up the engine to normal operating temperature.
Specification : Refer to Signal Waveform & Data
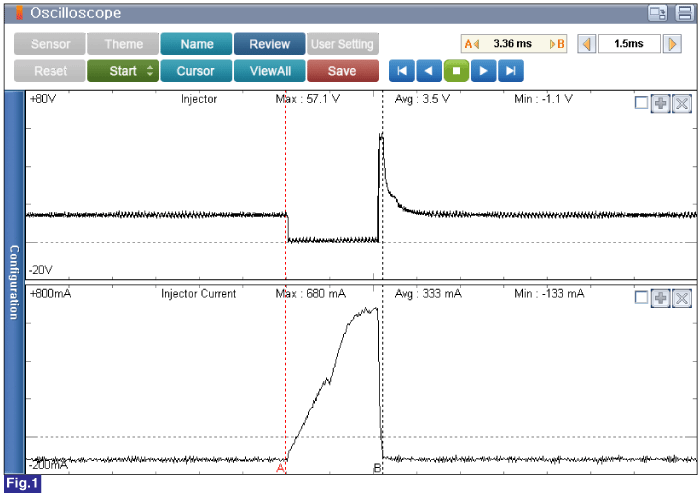
Fig.1) Engine Idle after Warm Up(Injection time - Approx. 3ms)
CH. A - Injector Max 57.1V
CH. AUX - Injector Current Max 680mA
IG Key "OFF"
Disconnect Injector #1 connector.
Measure resistance between Pin No.2 (control) terminal and Pin No.1 (power) terminal of the Injector #1. (component side)
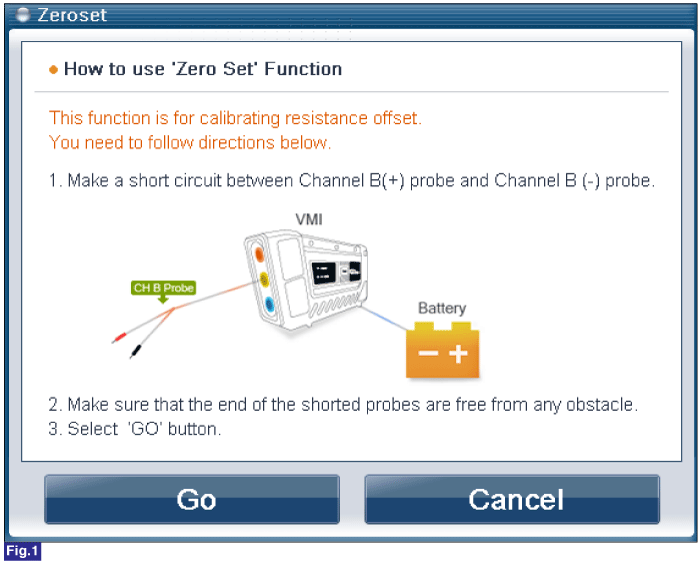
Fig.1) 'Zero Set' Function
Specification : 13.8 ~ 15.2Ω [20°C(68°F)]

Does the Injector operate properly? (check variation)
| ▶ Go to "Verification of Vehicle Repair" procedure. |
| ▶ If no problems were found with the circuits or connectors, Replace the Injector #1. |
