1.
Turn the steering wheel to the right.
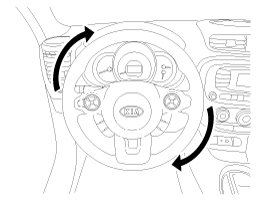
Turn the steering wheel to the right.
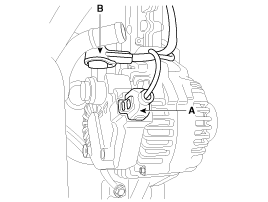
Turn ignition switch OFF and disconnect the negative (-) battery terminal.
Disconnect the alternator connector (A), and remove the cable (B) from alternator "B" terminal.
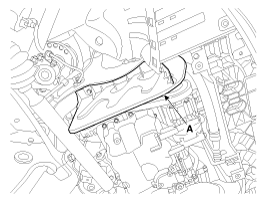
Remove the engine room RH under cover (A).
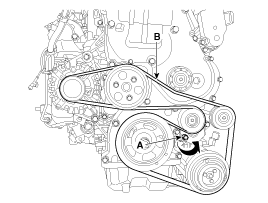
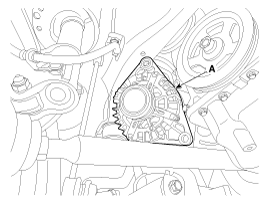
Using the hexagon wrench, turn the tensioner (A) counterclockwise and loosen. Then remove the drive belt (B).
Remove the alternator mounting bolts (A).
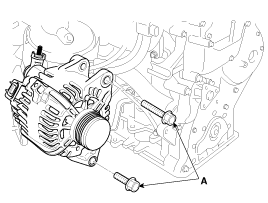
Remove the alternator (A).
Install in the reverse order of removal.
Adjust the alternator belt tension after installation.
(Refer to Engine Mechanical System - "Drive Belt")
Alternator mounting bolt:
49.0 ~ 63.7 N.m (5.0 ~ 6.5 kgf.m, 36.2 ~ 47.0 lb-ft)
Alternator B-terminal cable mounting nut:
9.8 ~ 14.7 N.m (1.0 ~ 1.5 kgf.m, 7.2 ~ 10.8 Ib-ft)
Remove the alternator.
(Refer to Charging System - "Alternator")
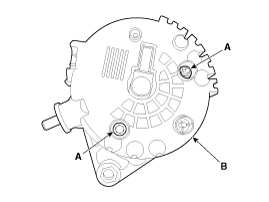
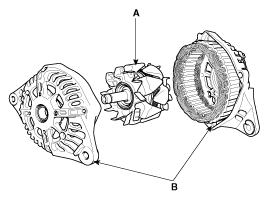
Remove the rear cover (B) after loosening the mounting nuts (A).
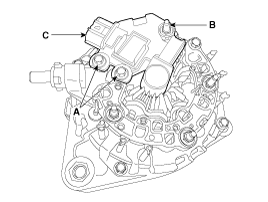
Remove the regulator assembly (C) after loosening the mounting bolts (A) and nut (B).
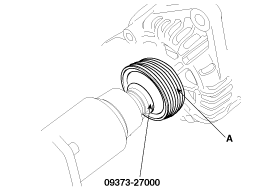
Remove the pulley (A) using the special tool.
Unsolder the 3 stator leads (A).
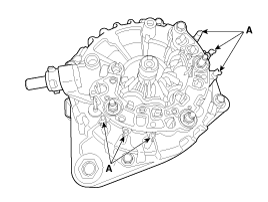
Loosen the 4 through bolts (A).

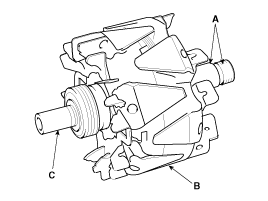
Disconnect the rotor (A) and bracket (B).
Reassembly is the reverse order of disassembly.
Check that there is continuity between the slip rings (A).
Check that there is no continuity between the slip rings and the rotor (B) or rotor shaft (C).
If the rotor fails either continuity check, replace the alternator.
Check that there is continuity between each pair of leads (A).
Check that there is no continuity between each lead and the coil core.
If the coil fails either continuity check, replace the alternator.
