2.
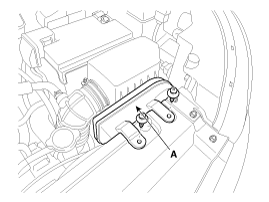
Remove the air duct (A).
Disconnect the battery negative terminal.
Remove the air duct (A).
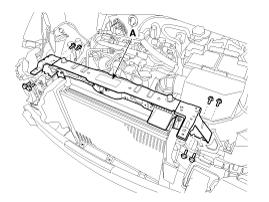
Separate the filler neck (A) from the radiator upper member assembly.
Tightening torque :
7.8 ~ 11.8 N.m (0.8 ~ 1.2 kgf.m, 5.8 ~ 8.7 lb-ft)
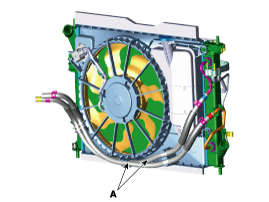
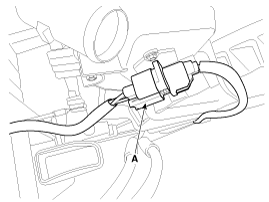
Disconnect the radiator reservoir hose (A).
Remove the hood lower latch.
(Refer to Body - "Hood Latch")
Remove the engine room under cover.
(Refer to Engine And Transaxle Assembly - “Engine Room Under Cover”)
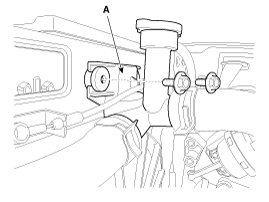
Separate the ATF cooler hoses (A) from the holders on the cooling fan assembly. (A/T only)
Remove the front bumper cover.
(Refer to Body - "Front Bumper Cover")
Remove the headlamps.
(Refer to Body Electrical System - "Head Lamps")
Remove the radiator upper member assembly (A).
Tightening torque :
6.9 ~ 10.8 N.m (0.7 ~ 1.1 kgf.m, 5.1 ~ 8.0 lb-ft)
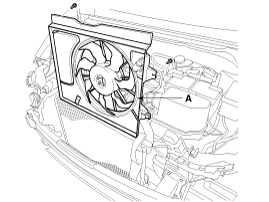
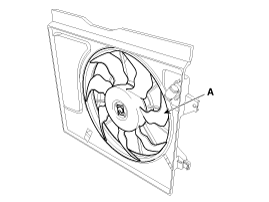
Disconnect the cooling fan connector (A).
Remove the cooling fan (A) from the vehicle.
Tightening torque :
4.9 ~ 7.9 N.m (0.5 ~ 0.8 kgf.m, 3.6 ~ 5.8 lb-ft)
Install in the reverse order of removal.
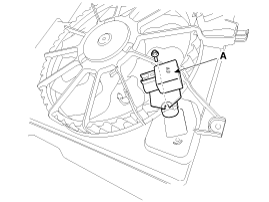
Disconnect the wire harness connector (A) and the fan motor connector (B).
Remove the resistor (A) from the cooling fan shroud.
Tightening torque :
1.8 ~ 2.4 N.m (0.18 ~ 0.25 kgf.m, 1.3 ~ 1.8 lb-ft)
Install in the reverse order of removal.
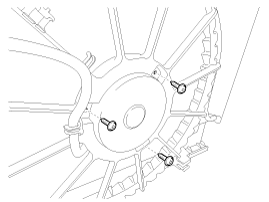
Remove the cooling fan (A) from the cooling fan assembly.
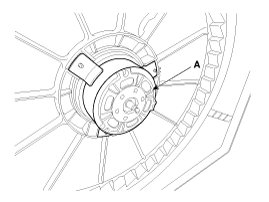
Disconnect the fan motor connector (A) from the resistor.

Remove the fan motor (A) from the cooling fan shroud.
Tightening torque :
3.9 ~ 5.9 N.m (0.4 ~ 0.6 kgf.m, 2.9 ~ 4.3 lb-ft)
Assemble in the reverse order of disassembly.
Disconnect the fan motor connector from the resistor.
Connect the battery voltage to the "+" terminal and ground to "-" terminal.
Check the cooling fan motor operates well.
