Remove the control cable (B).
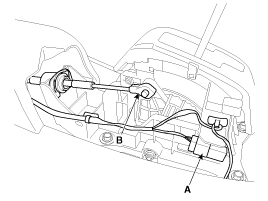
Remove the center console.
(Refer to "interior (console)" in BD group)
Disconnect the connector (A)
Remove the control cable (B).

Remove the shift lock cable (A).
Tightening torque:
8.8 ~ 13.7 N.m (0.9 ~ 1.4 kgf.m, 6.5 ~ 10.1 lb-ft)
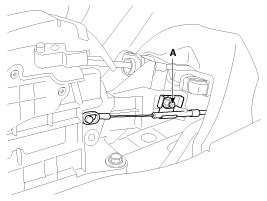
Remove the wiring clip (A).
Remove the AT lever(shift lever) assembly (B) by removing the bolts(4ea)
Tightening torque:
8.8 ~ 13.7 N.m (0.9 ~ 1.4 kgf.m, 6.5 ~ 10.1 lb-ft)
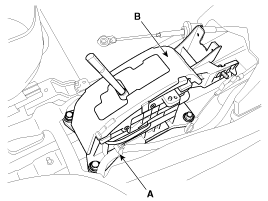
Installation is the reverse of removal.
Adjust the shift lock cable.
(Refer to "adjustment shift lock cable" in this group)
Remove the center console.
(Refer to "interior (console)" in BD group
Remove the control cable (A).
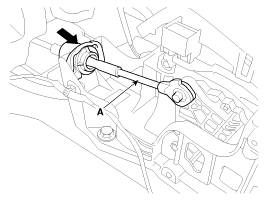
Remove the retainer (A) and nuts (B).
Tightening torque:
8.8 ~ 13.7 N.m (0.9 ~ 1.4 kgf.m, 6.5 ~ 10.1 lb-ft)
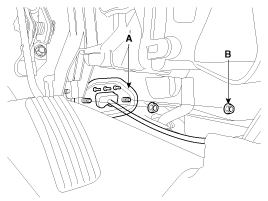
Remove the nut (A) from the manual control lever.
Remove the control cable (B) from the bracket (C) at transaxle assembly side.
(Refer to "Automatic Transaxle" in this group)
Tightening torque:
8.8 ~ 13.7 N.m (0.9 ~ 1.4 kgf.m, 6.5 ~ 10.1 lb-ft)
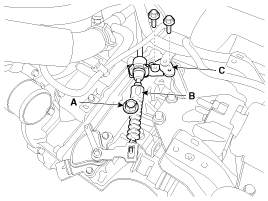
Remove the control cable at cabin room.
Installation is the reverse of removal.
Set room side AT lever(shift lever) and automatic transaxle side manual control lever to "N" position.
Control cable must be free unreasonable bending.
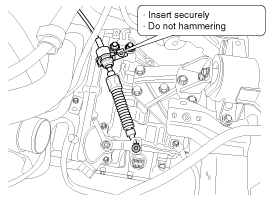
Remove the center console.
(Refer to "interior(console)"in BD group)
Remove the shift lock cable (A).
Tightening torque:
8.8 ~ 13.7 N.m (0.9 ~ 1.4 kgf.m, 6.5 ~ 10.1 lb-ft)
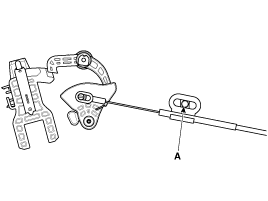
Remove the shift lock cable (B) from the brake pedal (A).
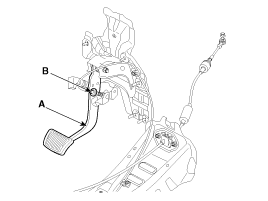
Installation is the reverse of removal.
Shift lock cable must be free unreasonable bending.