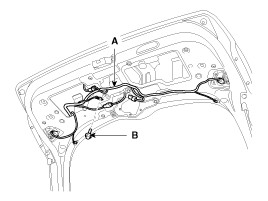
Disconnect the connectors and tail gate wiring harness (A).
When removing and installing the tail gate, an assistant is necessary.
Take care not to damaged the tail gate and body.
Remove the tail gate trim.
Loosen the mounting ground bolt (B).
Disconnect the connectors and tail gate wiring harness (A).

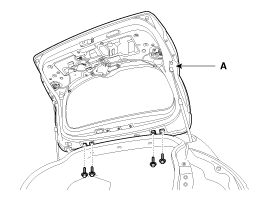
After loosening the mounting bolts, then remove the tail gate assembly (A).
Tightening torque :
6.9 ~ 10.8 N.m (0.7 ~ 1.1 kgf.m, 5.1 ~ 8.0 lb-ft)
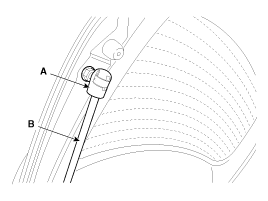
Using a screwdriver, lift the socket clips (A) up slightly on both ends of the tail gate lifter (B).
Installation is the reverse of removal.
Make sure the tail gate opens properly and locks securely.
Adjust the tail gate alignment.
Make sure the connectors are connected in properly.
Replace any damage clips.
When prying with a flat-tip screwdriver, wrap it with protective tape, and apply protective tape around the related parts, to prevent damage.
Put on gloves to protect your hands.
Take care not to scratch the body surface.
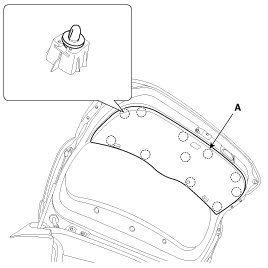
Using a screwdriver or remover, remove the tail gate trim (A).
Installation is the reverse of removal.
Replace any damage clips.
When prying with a flat-tip screwdriver, wrap it with protective tape, and apply protective tape around the related parts, to prevent damage.
Put on gloves to protect your hands.
Take care not to scratch the body surface.
Remove the tail gate trim.
Disconnect the tail gate latch connector (A).
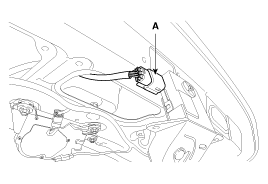
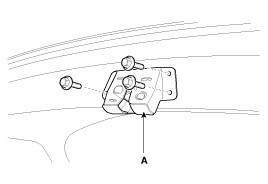
After loosening the mounting bolts, then remove the tail gate latch assembly (A).
Tightening torque :
6.9 ~ 10.8 N.m (0.7 ~ 1.1 kgf.m, 5.1 ~ 8.0 lb-ft)
Installation is the reverse of removal.
Make sure the tail gate opens properly and locks securely.
Make sure the connector is connected properly and the connecting rod is connected properly.
Replace any damage clips.
When prying with a flat-tip screwdriver, wrap it with protective tape, and apply protective tape around the related parts, to prevent damage.
Put on gloves to protect your hands.
Take care not to scratch the body surface.
Remove the tail gate trim.
Disconnect the tail gate outside handle connector (A).
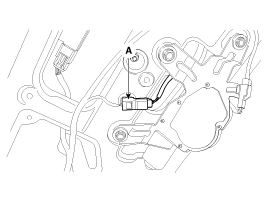
After loosening the mounting nuts, then remove the tail gate outside handle (A).
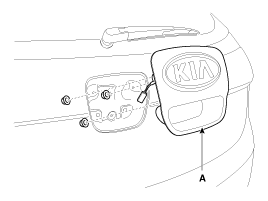
Installation is the reverse of removal.
Make sure the tail gate opens properly and locks securely.
Make sure the connector is connected properly and the connecting rod is connected properly.
Replace any damage clips.
Take care not to be closed the tail gate, when removing the lift.
Using a screwdriver (A), lift up slightly the socket clips (B) of both ends on the lifer (D), and then remove the lifter from the bracket (C).
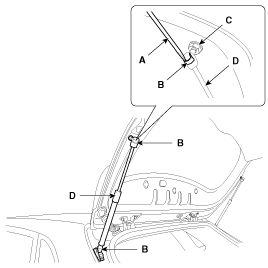
Push the socket of the lifter into the bracket for installation.
Make sure the tail gate lock and opens properly and locks securely.
Do not apply sealant to the body.
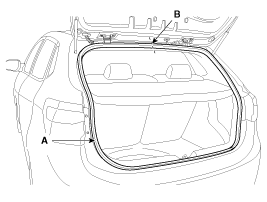
Remove the tail gate weatherstrip (A).
Installation is the reverse of removal.
Install the weatherstrip aligned with center line (B).