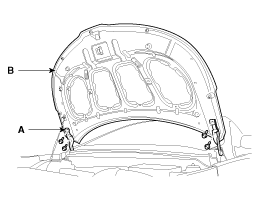
1.
After loosening the hood hinge (A) mounting bolts, remove the hood panel (B).
Tightening torque :
21.6~26.5 N.m (2.2~2.7 kgf.m, 15.9~19.5 lb-ft)
When removing and installing the hood, an assistant is necessary.
Be careful not to damage the hood and body.
When removing the clips, use a clip remover.
After loosening the hood hinge (A) mounting bolts, remove the hood panel (B).
Tightening torque :
21.6~26.5 N.m (2.2~2.7 kgf.m, 15.9~19.5 lb-ft)
Installation is the reverse of removal.
Make sure the hood locks/unlocks and opens/closes properly.
Adjust the hood alignment.
Remove the hood weatherstrip (A).
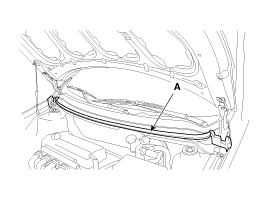
Installation is the reverse of removal.
Disconnect the hood release handle cable (A).
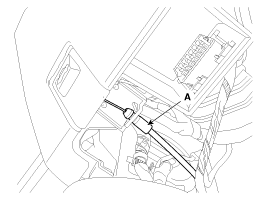
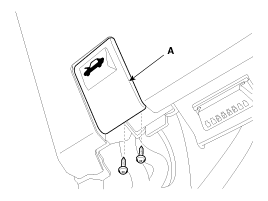
After loosening the mounting screws, then remove the hood release handle (A).
Installation is the reverse of removal.
Make sure the hood latch cable is connected properly.
Make sure the hood locks/unlocks and opens/closes properly.
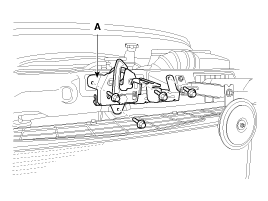
Remove the front bumper.
(Refer to the BD group - "Front Bumper")
Remove the hood latch (A) mounting bolts.
Tightening torque :
6.9 ~ 10.8 N.m (0.7 ~ 1.1 kgf.m, 5.1 ~ 8.0 lb-ft)
Disconnect the hood latch cable (A) and remove the hood latch (B).
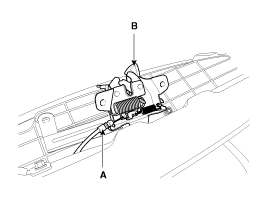
Installation is the reverse of removal.
Make sure the hood latch release cable is connected properly.
Make sure the hood locks/unlocks and opens/closes properly.
Adjust the latch alignment.
