4.
Remove the control cable.
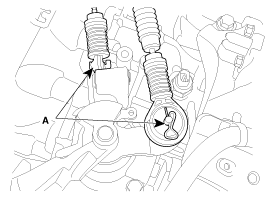
(1)
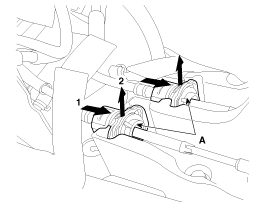
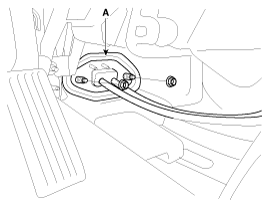
Remove the control cable from the control shaft after removing the snap pins (A).
(2)
Remove the control cable (B) from the bracket (C).
Move the shift lever to 4th gear.
Remove the air duct and the air cleaner assembly.
(Refer to "Intake and Exhaust system" in EM group.)
Remove the battery and battery tray.
(Refer to "Charging system" in EE group.)
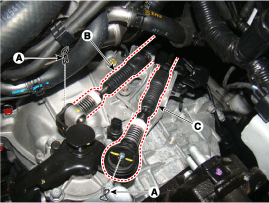
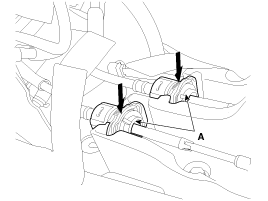
Remove the control cable.
Remove the control cable from the control shaft after removing the snap pins (A).
Remove the control cable (B) from the bracket (C).
Remove the floor console assembly.
(Refer to "Interior (Console)" in BD group)
Remove the select cable (A) from the shift lever after removing the snap pin.
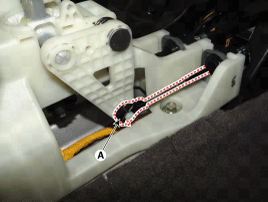
Remove the shift cable (A) from the shift lever after removing the clip.
Remove the cable socket (A) from the shift lever.
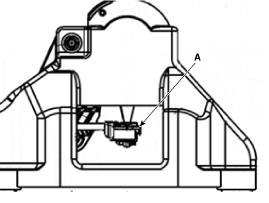
Remove the cable retainer (A) by loosening the nuts.
Remove the shift cable into the cabin room side.
Install the cable retainer (A).
Tightening torque :
8.8 ~ 13.7 N.m (0.9 ~ 1.4 kgf.m, 6.5 ~ 10.1 lb-ft)
Install the control cable soket (A).
Install the shift cable from the shift lever after intalling the snap pin (A).
Insert the snap pin after installing the select cable (A) to the shift lever.
Install the floor console assembly.
(Refer to "Interior (Console)" in BD group)
Install the control cable.
Check that the shift lever and control shaft are placed in the "4th" position.
Install the control cable to the cable bracket.
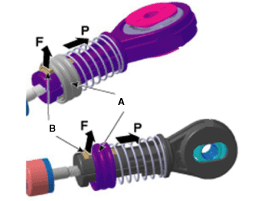
After pulling the holder (A) in the direction of the "P", pull the lock (B) in the direction of the "F".
Push the lock (C) after installing the control cable to the control shaft.
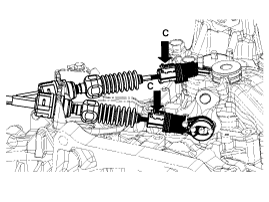
Insert the snap pin (A).
Install the battery and battery tray.
(Refer to "Charging system" in EE group.)
Install the air cleaner assembly.
(Refer to "Intake and Exhaust system" in EM group.)
