Disconnect the inhibitor switch connector (A).
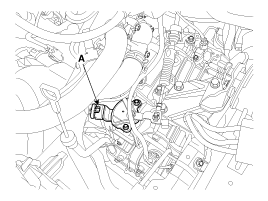
Remove the battery terminal.
Remove the battery and battery tray.
(Refer to "Charging System" in EE group)
Remove the air duct.
(Refer to "Intake and Exhaust system" in EE group)
Remove the air cleaner assembly.
(Refer to "Automatic transaxle" in this group)
Disconnect the inhibitor switch connector (A).

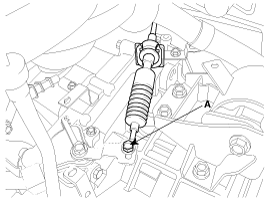
Remove the control cable(A) from the manual control lever.
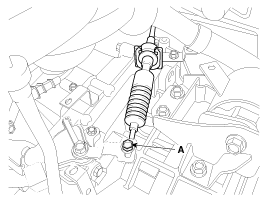
Remove the inhibitor switch and manual control lever.
Check that the shift lever is placed in the "N" position
Install the inhibitor switch (A).
Lightly tighten the inhibitor switch mounting bolts so that necessary adjustments can be made.
Install the manual control lever (B).
Lightly tighten the manual control lever nut so that necessary adjustments can be made.
Align the hole (C) in the manual control lever with the "N" position hole (D) of the inhibitor switch and then insert the SST inhibitor switch guide pin (09480-A3800).
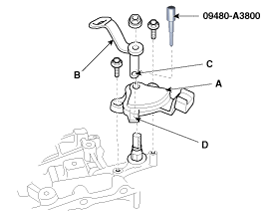
Tighten the nut and bolts with the specified torque.
Tightening torque
Manual control lever nut : 16.7 ~ 20.6 N.m (1.7 ~ 2.1 kgf.m, 12.3 ~ 15.2 lb-ft)
Inhibitor switch bolts : 9.8 ~ 11.8 N.m (1.0 ~ 1.2 kgf.m, 7.2 ~ 8.7 lb-ft)
Remove the SST (09480-A3800) from the hole.
Connect the inhibitor switch connector (A).
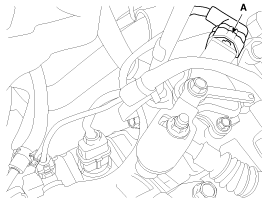
Install the shift cable by tightening nut (A).
Lightly tighten the shift cable mounting nut (A) so that necessary adjustments can be made.
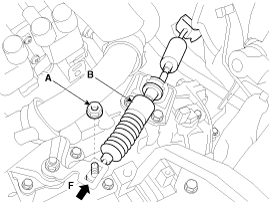
Push the shift cable (B) to the arrow "F" to eliminate free play and then tighten the nut (A) with the specified torque.
Tightening torque :
9.8 ~ 14.7 N.m (1.0 ~ 1.4 kgf.m, 7.2 ~ 10.8 lb-ft)
Connect the inhibitor switch connector (A).

Install the air cleaner assembly and air duct.
(Refer to "Automatic transaxle" in this group)
Install the battery and battery tray.
(Refer to "Charging System" in EE group)