2.
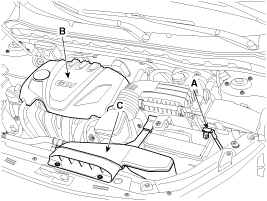
Remove the engine cover (B) and the air duct (C).
Use fender covers to avoid damaging painted surfaces.
To avoid damaging the cylinder head, wait until the engine coolant temperature drops below normal temperature before removing it.
When handling a metal gasket, take care not to fold the gasket or damage the contact surface of the gasket.
To avoid damage, unplug the wiring connectors carefully while holding the connector portion.
Mark all wiring and hoses to avoid misconnection.
In case of removing the high pressure fuel pump, high pressure fuel pipe, delivery pipe, and injector, there may be injury caused by leakage of the high pressure fuel. So don’t do any repair work right after engine stops.
Disconnect the battery negative terminal (A).
Remove the engine cover (B) and the air duct (C).
Remove the air cleaner assembly.
Disconnect the breather hose (A), the brake booster vacuum hose (B) and the intensifier hose (C).
Disconnect the air intake hose (D) and then remove the air cleaner assembly (E).
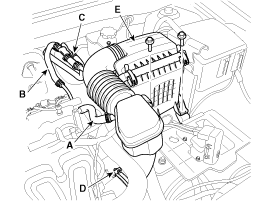
• Install the air intake hose while the plate of the hose clamp must be in line with the stopper of the hose.
• Install the air intake hose match groove to throttle body groove.
Remove the RH front wheel.
Remove the under covers (A,B).
Tightening torque:
7.8 ~ 11.8N.m (0.8 ~ 1.2kgf.m, 5.8 ~ 8.7lb-ft)
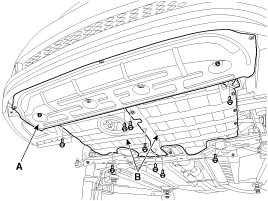
When removing the under cover (B), unfasten the mounting bracket bolts and then remove the under cover and mounting bracket assembly.
Loosen the drain plug, and drain the engine coolant. Remove the radiator cap to help drain the coolant faster. (Refer to Cooling system in this group)
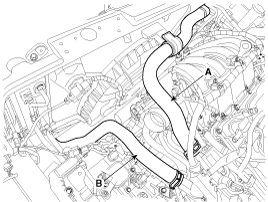
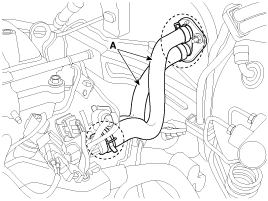
Disconnect the radiator upper hose (A) and lower hose (B).
Disconnect the wiring connectors and harness clamps, and remove the wiring protectors from the cylinder head, intake manifold and exhaust manifold.
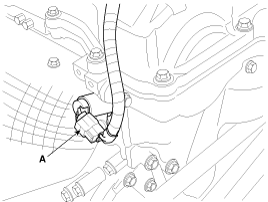
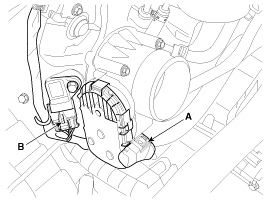
Disconnect the exhaust OCV (Oil control valve) connector (A).
Disconnect the VIS (Variable intake system) connector (A), the OPS (Oil pressure switch) connector (B), the injector extension connector (C), the knock sensor connector (D), the alternator connector (E) and the A/C compressor switch connector (F).

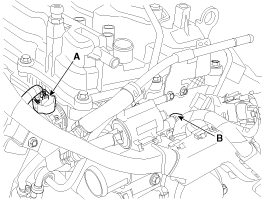
Disconnect the ignition coil connectors (A), the fuel pump connector (B) and the intake OCV (Oil control valve) connector (C).
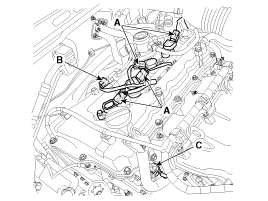
Disconnect the ETC (Electronic throttle control) connector (A) and MAPS (Manifold absolute pressure sensor) & IATS (Intake air temperature sensor) connector (B).
Disconnect the ECTS (Engine coolant temperature sensor) connector (A) the exhaust CMPS (Camshaft position sensor) connector (B), the condenser connector (C), the CKPS (Crankshaft position sensor) connector (D) and the oxygen sensor connector (E).

Disconnect the intake CMPS (Camshaft position sensor) connector (A) and the PCSV (Purge control solenoid valve) connector (B).
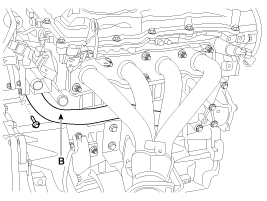
Disconnect the fuel hose (A) and PCSV (Purge control solenoid valve) hose (B).
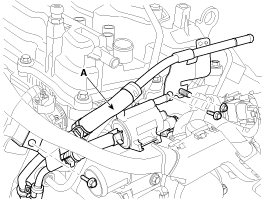
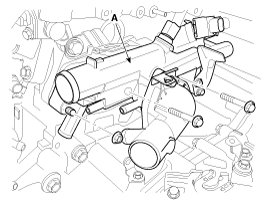
Remove the vacuum & PCSV (Purge control solenoid valve) pipe assembly (A).
Remove the high pressure pipe (A). (Refer to FL group)

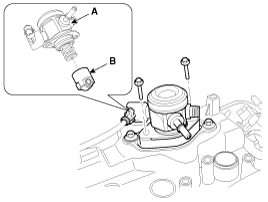
Remove the high pressure fuel pump (A) and the roller tappet (B). (Refer to FL group)
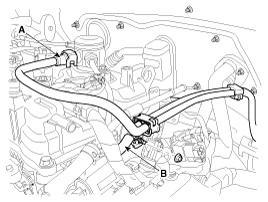
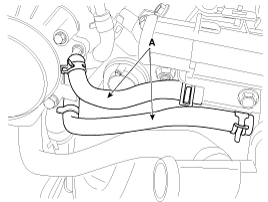
Disconnect the heater hoses (A).
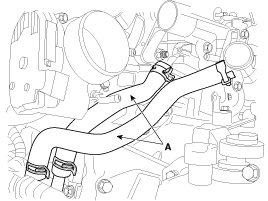
Disconnect the throttle body coolant hoses (A).
Disconnect the oil cooler coolant hoses (A).
Remove the water temperature control assembly (A) with the water inlet pipe (B).
Remove the timing chain. (Refer to Timing system in this group)
Remove the intake and exhaust manifold. (Refer to Intake and exhaust system in this group)
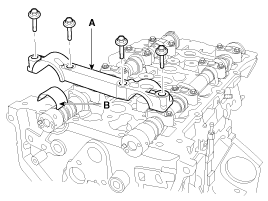
Remove the high pressure fuel pump bracket (A).
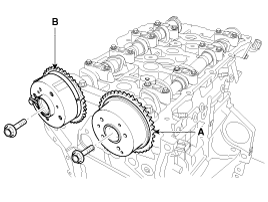
Remove the intake CVVT assembly (A) and exhaust CVVT assembly (B).
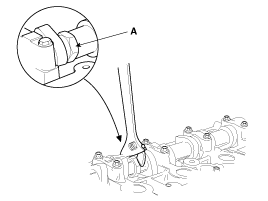
When removing the CVVT assembly bolt, prevent the camshaft from rotating by using a wrench at position A.
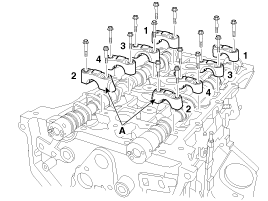
Remove the camshaft.
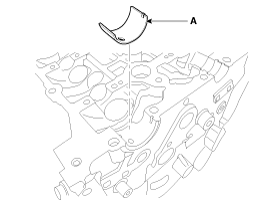
Remove the front camshaft bearing cap (A) with the upper bearing (B).
Remove the camshaft bearing cap (A) in the sequence shown.
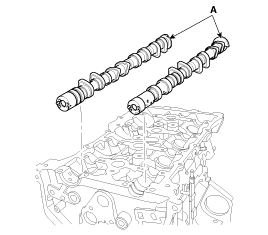
Remove the camshafts (A).
Remove the exhaust camshaft lower bearing (A).
Remove the intake OCV (Oil control valve) (A) using a torx wrench.
Remove the exhaust OCV (Oil control valve) (A) using a torx wrench.
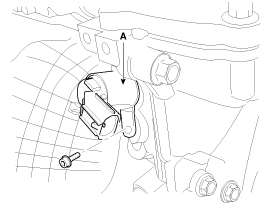
Remove the intake CMPS (Camshaft position sensor) (A).
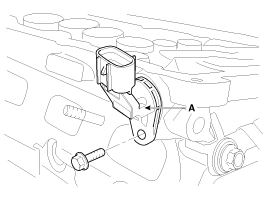
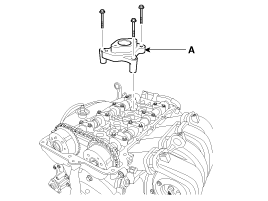
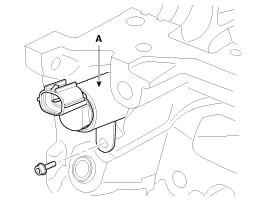
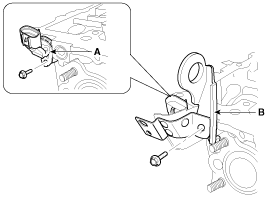
Remove the exhaust CMPS (Camshaft position sensor) (A) after removing the engine hanger (B).
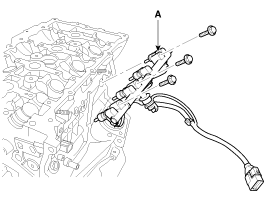
Remove the injector & rail module (A). (Refer to FL group)
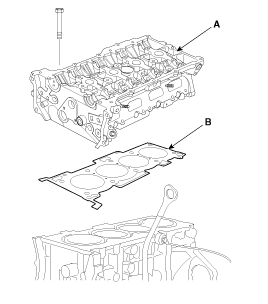
Remove the cylinder head.
Using triple square wrench, uniformly loosen and remove the 10 cylinder head bolts, in several passes, in the sequence shown. Remove the 10 cylinder head bolts and plate washers.
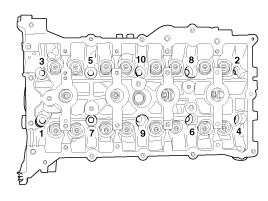
Head warpage or cracking could result from removing bolts in an incorrect order.
Lift the cylinder head (A) from the dowels on the cylinder block and place the cylinder head on wooden blocks on a bench.
Be careful not to damage the contact surfaces of the cylinder head and cylinder block.
Remove the cylinder head gasket (B).