1.
Self-diagnosis process
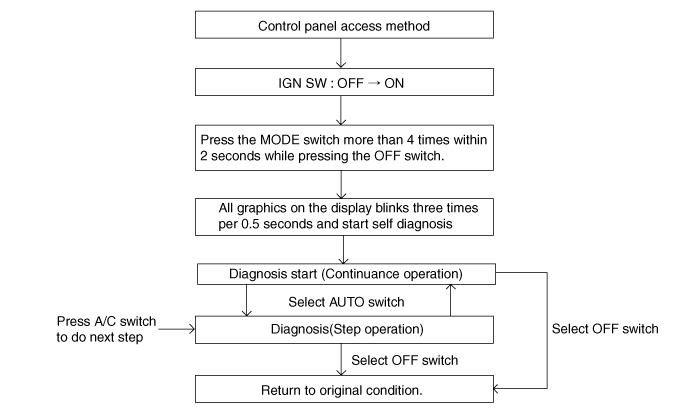
Self-diagnosis process
How to read self-diagnostic code
After the display panel flickers three times every 0.5 second, the corresponding fault code flickers on the setup temperature display panel every 0.5 second and will show two figures. Codes are displayed in numerical format
Display | Fail description |
00 | Normal |
11 | In-car sensor open |
12 | In-car sensor short |
13 | Ambient sensor open |
14 | Ambient sensor short |
17 | Evaporator sensor open |
18 | Evaporator sensor short |
19 | Temp door potentiometer open/short- Drive |
20 | Temp door potentiometer fault- Drive |
21 | Mode door potentiometer open/short |
22 | Mode door potentiometer fault |
25 | Intake door potentiometer open |
26 | Intake door potentiometer short |
32 | Temp door potentiometer open/short - Passenger |
33 | Temp door potentiometer fault - Passenger |
45 | APT CAN signal fault |
46 | - |
47 | RPM CAN signal fault |
48 | Vehicle speed CAN signal fault |
49 | Engine coolant temp CAN signal fault |
50 | Cluster ion generator fault |
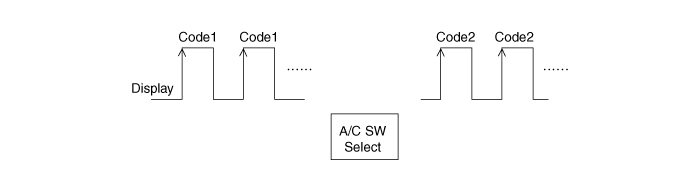
Fault code display
Continuance operation : DTC code is one.

Continuance operation : DTC code is more two.

STEP operation
Normal or one fault code is same as a continuance operation.
DTC code as more two.
If fault codes are displayed during the check, Inspect malfunction causes by referring to fault codes.
Fail safe
In-car temperature sensor: Control with the value of 23°C(73.4°F)
Ambient temperature sensor: Control with the value of 20°C(67°F)
Evaporator temperature sensor: Control with the value of -2°C(28.4°F)
Water temperature sensor: Control with the value of 85°C(185°F)
Temperature control actuator (Air mix potentiometer):
If temperature setting 17°C-24.5°C, fix at maximum cooling position.
If temperature setting 25°C-32°C, fix at maximum heating position.
Mode control actuator (Direction potentiometer):
Fix vent position, while selecting vent mode.
Fix defrost position, while selecting all except vent mode.
Intake control actuator :
Fix fresh position, while selecting fresh mode.
Fix recirculation position, while selecting recirculation mode.
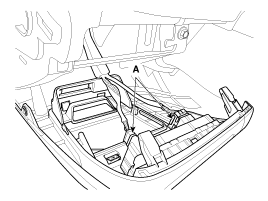
Disconnect the negative (-) battery terminal.
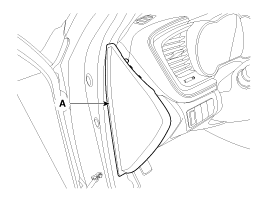
Using the screwdriver, remove the side cover (A).
Loosen the mounting screw and then remove the crash pad lower cover (A).
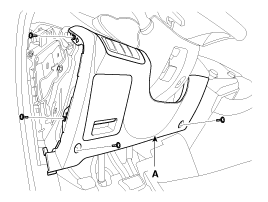
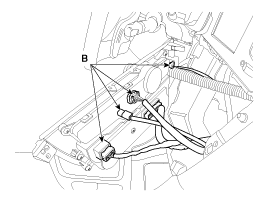
Disconnect the connector (A), and then remove the crash pad lower cover.
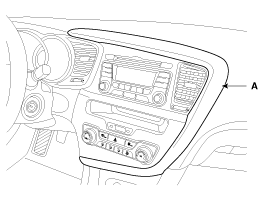
Using the screwdriver, remove the center garnish (A).
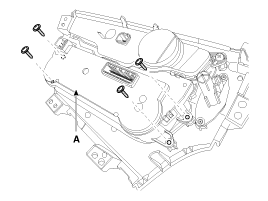
Disconnect the connector and then remove the blower & A/C controller (A).
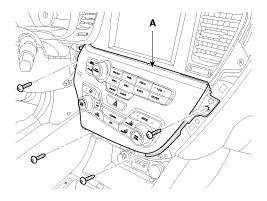
Loosen the control panel mounting screws and then remove the control panel (A).
Installation is the reverse order of removal.
